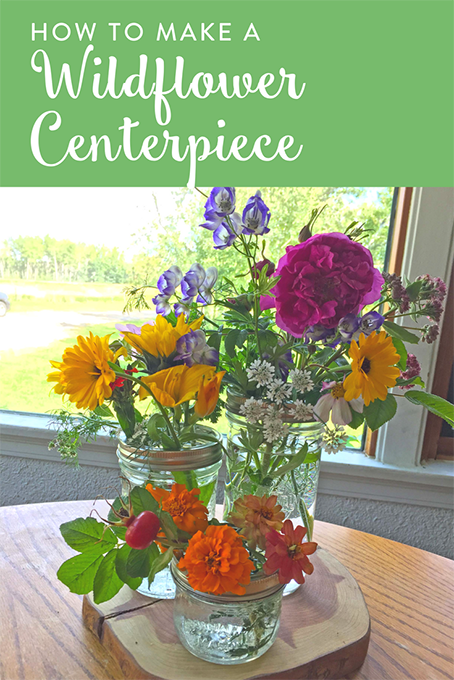
How to Make a Wildflower Centerpiece
It’s that time of year where our property just blooms in wildflowers. Both flowers we’ve planted as well as plants the birds have brought for our enjoyment. Although I typically enjoy all of these outside, I also like to bring a little bit of pretty indoors to enjoy too. Unlike my sister, who is THE flower arranger (indeed, she even owns her own flower shop), I need a little remedial help.
I’m also sort of anti-vase. Vases need a lot of flowers to make them look truly stunning, and in my garden, I may only have a few stems of this and that. I needed a smaller solution. Although I had been using mason jars, they didn’t really stand up the stems in a way that looked great.
Fast forward, I attended a blog conference where Bernardin gave me a Frog Lid. This has rocked my world – these lids fit on wide mouth jars, and help you easily arrange flowers. Since I may be obsessed with canning (understatement), there are a few different kinds of jars hanging out around my house. You can put them together to create a 3 level arrangement. Or if you only have 1 or 2, put together what you have.
This couldn’t be easier. Here’s how you do it:
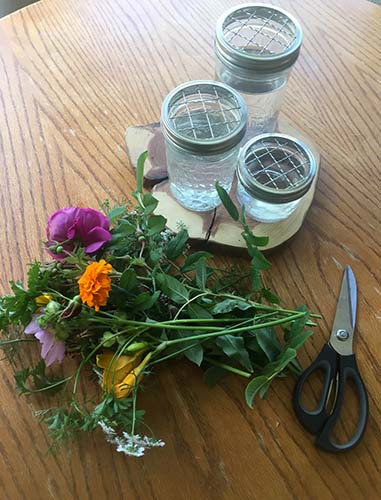
- Pick some stems from your garden or wild field that draw your attention.
- Grab Bernardin mason jars. I used one that’s 750ml, 500ml and 250ml with wide mouths.
- Pick up a package of Frog Lids.
- Insert the Frog Lids in the rings of the jars.
- Fill with water.
- Trim your stems to your jar’s height.
That’s it! It’s super easy to let kids help with too – my 4 year old designed this whole arrangement.
Looking for more uses for your Bernardin Mason Jars? We’ve got you covered.
]]>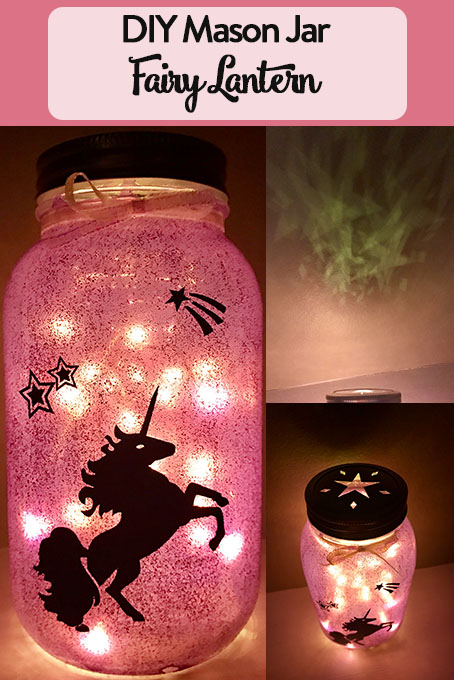
Mason Jar Fairy Lantern
Bring a little bit of magic and whimsy into your home with a beautiful lantern. My daughter is definitely a girly girl. She loves unicorns and rainbows and glitter and the colour pink. Fairy jars are typically just that: a jar featuring a fairy. For my five year old daughter, I decided to alter it exactly to her liking. So technically, this is a unicorn lantern but I think it still contains the same magic as a mason jar fairy lantern.
What You’ll Need
- Bernardin 1L Mason Jar
- Transform Mason™ Metal Star Lid
- White glue
- Extra fine glitter (either silver or a matching colour)
- Food colouring
- Foam paintbrush
- Permanent adhesive vinyl in black (aka Oracal 651 or similar)
- Transfer tape
- Cricut or similar device
- If you do not have a Cricut, arm yourself with a template, small scissors and some patience!
- Twine or ribbon
- Battery-powered light strand
Invite Magic In
This isn’t a project you can complete in one sitting as it requires several layers of “paint” in the form of white glue. Get a small bowl and pour in some glue. Add a few drops of food colouring (I used about 6 drops of the purple colour from the neon pack). Blend it all together and paint a thin layer onto your jar with the foam brush. Allow it to dry at least 1 hour. Apply a second coat and allow to dry. For the third coat, stir in a healthy dose of your glitter and add another layer to the jar. After letting dry once again, apply your fourth coat of the glue, colouring and glitter mixture. Let dry overnight.
Customization

While you’re waiting for those many layers of glue to dry, start preparing your design. I simply used files available to me in the Cricut Access software: the unicorn and a variety of stars. This is where you can have some fun. You may want a fairy and some flower shapes. Maybe your little one prefers rainbows. Let your imagination run wild. Your focal point (in my case, the unicorn) is about half the height of the jar. I used black permanent adhesive vinyl (aka Oracal 651). The designs were cut and weeded, ready to be applied to the outside of the mason jar once dried.
Be sure to press your decals down very well. I used my scraper to burnish them on. Once I removed the transfer tape, I used my thumb to really press the vinyl onto the surface. Due to the glitter, you will have many lumps & bumps but these will not be seen once the jar is light.
Starlight, Star Bright
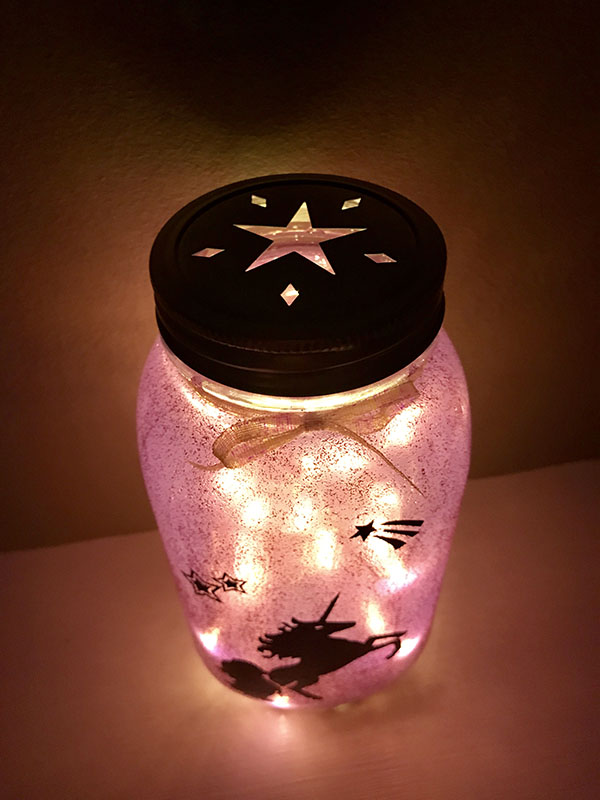
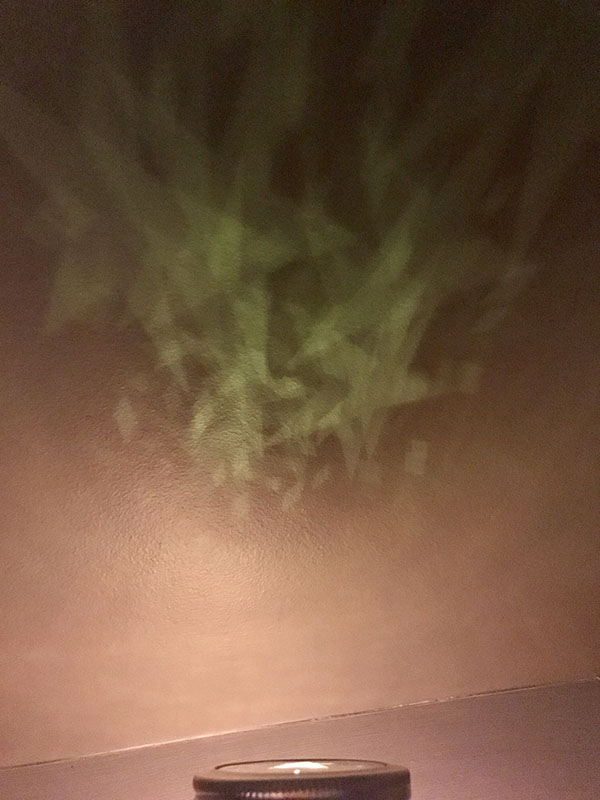
Remove the lid of the jar, discard the snap lid and place your metal star lid inside the ring. Drop your battery-powered light strand into the jar and place the lid on. Tie some pretty ribbon or twine around the next of the jar. Another nice touch would be to add a Metal Wire Handle to hang it. The star lid will shine a smattering of stars all along the ceiling which your little one is sure to love.

Check out more of our DIY Crafts for Kids.
Looking for more Bernardin Mason Jar crafts? We’ve got you covered.
]]>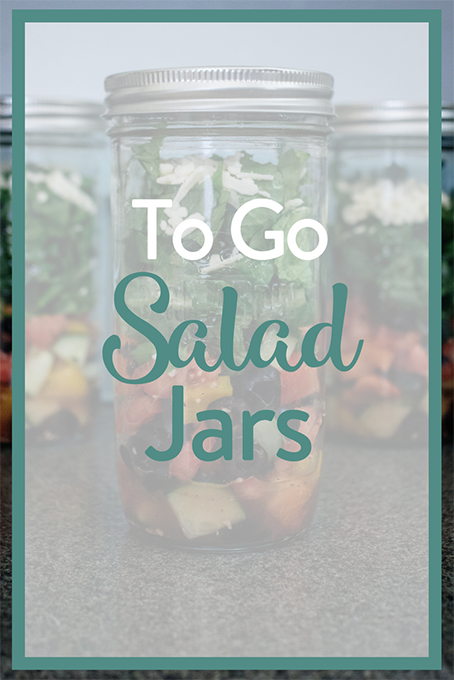
To Go Salad Jars
Summer is a busy time for everyone. Meal times tend to sneak up out of nowhere. I find myself looking at the clock wondering where the last few hours just went. And then wondering what in the world we are going to eat. By this point the kids are hungry (read: whiny) and I quickly scan the fridge looking for the answer.
Since our house does not have A/C, when it is hot, we try to avoid turning on the oven and stove. We BBQ a lot since it’s quick and easy. Plus the kids can play outside while we cook – win win! Hot dogs, hamburgers, and sausages are our go-to foods on the grill, and then we need a side to go with them. The answer: salad jars!
Making salad jars is so simple, and it’s the perfect way to portion out a salad. Perfect for dishing up with dinner, packing in your lunch for work, or as a healthy late night snack. Using glass jars is not only environmentally friendly, it is a little more “grown up” than plastic containers. Being able to grab a jar of salad and head out the door to work, baseball practice, or to watch your kid’s soccer game is great.
We like to use the Bernardin 750 mL Wide Mouth jars – it’s the right size for us. You may prefer to use smaller or larger jars depending on your family and/or how much salad you want to eat at a given time. The two recipes below make a enough salad for 4 of the 750 mL jars. You can easily adapt these recipes to make more or less depending on your needs.
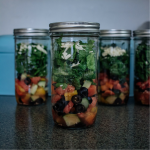
Greek Salad
Ingredients
Dressing
- 1/4 cup olive oil
- 1/4 cup red wine vinegar
- 1 tbsp lemon juice
- 2 cloves garlic minced
- 1/2 tbsp dried oregano leaves
- 1/2 tsp salt
- 1/4 tsp black pepper
Salad
- 2 tomatoes chopped
- 1/2 english cucumber chopped
- 1 bell pepper chopped
- 1/2 cup feta cheese crumbled
- 3/4 cup black olives
- romaine lettuce
Instructions
- Make the dressing. Let stand for a half hour.
- Chop up tomatoes, cucumber, peppers in large pieces
- Pour dressing over chopped vegetables & olives, mix together.
- Divide mixture evenly between 4 750mL wide mouth mason jars
- Fill remainder of jar with chopped romaine lettuce, and sprinkle feta cheese on top
- When ready to eat, simple shake up jar to mix, then enjoy!
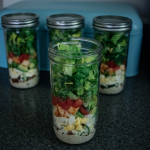
Cobb Salad with Bacon Ranch Dressing
Ingredients
Bacon Ranch Dressing
- 1/2 cup sour cream
- 3 tbsp buttermilk
- 2 tbsp lemon juice
- 2 tbsp dijon mustard
- 1/2 tsp onion powder
- 1/4 tsp black pepper
- 1/4 tsp garlic powder
- 1/2 tsp chilli powder
- 1-2 green onions finely chopped
- 1 tbsp parsley finely chopped
- 3 slices bacon cooked & finely chopped
Salad
- 4 slices bacon cooked & chopped
- 1/2 cup cheese crumbled or cubed
- 1/2 cucumber diced
- 1 avocado diced
- 1/2 tomato diced
- romaine lettuce chopped
- 2 hard boiled eggs diced
- 1-2 chicken breast cooked & diced
Instructions
- Divide dressing evenly between 4 750mL mason jars
- Divide bacon, cucumber, cheese into the jars
- Add eggs and avocado, followed by chicken and tomatoes
- Fill remainder of jar with romaine lettuce
- When ready to eat, simple shake up jar to mix, then enjoy!
I think the classic Bernardin 500mL jars would work great for setting out already portioned salads on a buffet table. Just place a pile of forks next so them and everyone can enjoy right from the jars!

We absolutely love simple meal ideas here, so check out more of our great recipes.
Do you love Bernardin mason jars as much as we do? Be sure to have a look at more of our mason jar crafts & recipes.
]]>
How To Organize Craft Supplies
In our house, my almost-4-year-old Allie has a wildly creative imagination. It leads to all sorts of wonderful crafts, games, songs, and more. I love that I never know what to expect from her, or what turns she will take us on as we head through an activity. I find the best way to let her express her creativity is to let her see what’s available to her. That is why I just reworked how to store all our craft supplies.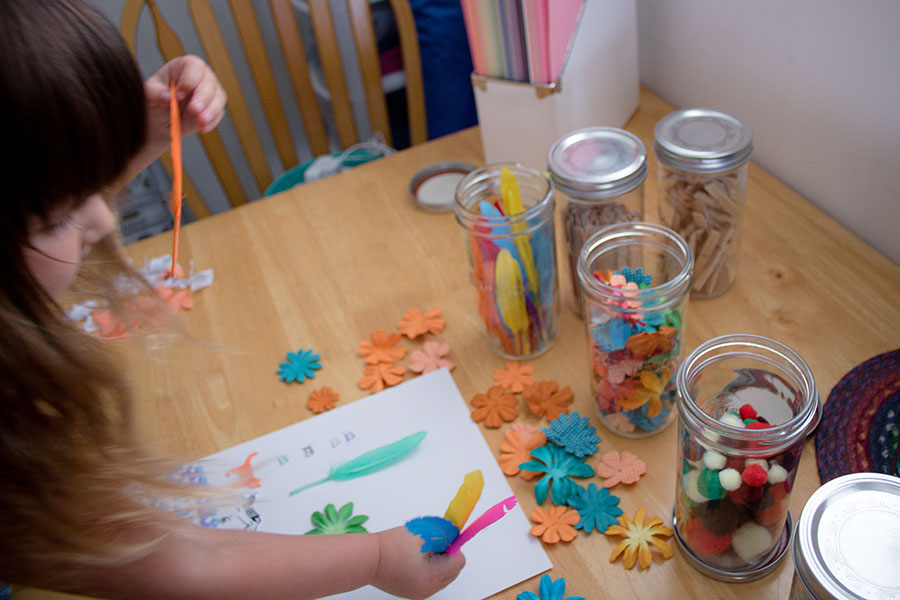
Make It Visible
Our craft supplies were stored in all sorts of bins, bags, and boxes. There was no rhyme or reason to where they were kept. This is so not like me at all. I knew I wanted to organize it better so I gave it a fair bit of thought before tackling the project. Allie is the type of child who needs to see her options. Whether she is deciding on what to eat, what colour cup to have, or what movie to watch – Allie needs to see the choices in front of her. This is why I chose to put the majority of our craft supplies into Bernardin Mason Jars. The clear glass jars allow Allie (and me) to see what is inside easily. We can open the jars she wants to use, and leave the others aside or up on the shelf. I love these wide mouth jars since Allie can reach right in and grab what she’s got her eye on. The 750mL size is tall enough for pipe-cleaners (cut or bent in half) as well as pencil crayons once they have been sharpened a couple times. 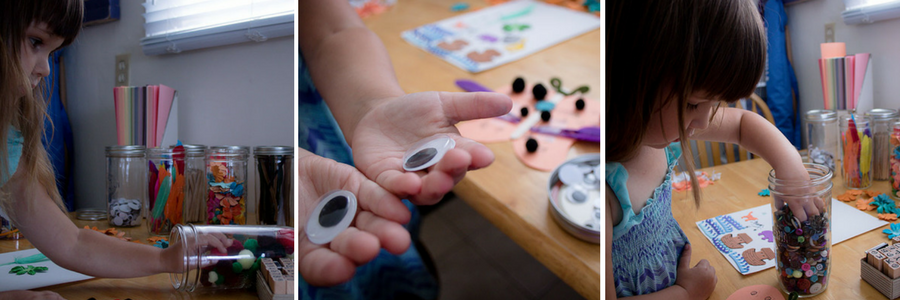 Having everything in the jars has made things much better. We can easily see the supplies, and Allie is always dreaming up the next craft we will make. I can also see when things are getting low, and take note so I can restock.
Keep It Together
We do still use some plastic containers for things that don’t easily fit into glass jars, or that the kids can use without me around. For us this includes crayons & markers, scissors & stamps. For construction paper, colouring books, and sticker sheets, I love using magazine holders. They keep everything upright and together in one place. It easy to find what you are looking for, and for a cleaner look you can turn them around so the exposed side faces into the shelf or against the wall. I try to keep all our craft supplies in one spot. This is easier said than done of course. My own personal craft supplies are all in the basement. While the kids stuff is upstairs on the shelf between the kitchen & living room. Typically the kids do crafts at the kitchen table. So my goal is gradually move any of my supplies that they may use upstairs with theirs. (Just add that to the never ending to do list, right?)
Be Ready To Change It Up
One thing that having kids has taught me, is that any form of organization works until it doesn’t. As my kids grow & learn & develop & change, so must the way I organize. As the kids are able, I want to include them in the organization maybe this will work process. To let them help decide how things will be done, so that it makes sense for them & to them. That will be a fun challenge for me, since I always like to have the final say when it comes to organization in our house. Take a moment to check out more of our Organization ideas. Do you love Bernardin mason jars as much as we do? Be sure to have a look at more of our mason jar crafts & recipes.
]]>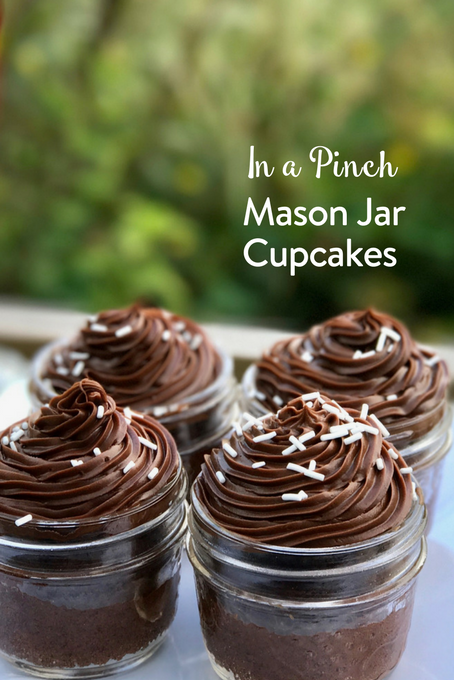
It’s been busy, busy around here. Between health stuff, kids stuff, work stuff and volunteer stuff, my husband’s birthday party planning kind of took a back seat. I needed to make some kind of cake, it needed to be chocolate. The kids wanted cupcakes and I wanted fancy and easy. Those two things are hard to achieve at the same time. Then it hit me. Mason Jar Cupcakes. Cake mix upgrade is my go-to in a pinch. And this was definitely pinch time.
I love baking with Bernardin mason jars. Everything just looks extra fancy (and extra homemade) in mason jars – even if you had a little help.
These mason jar cupcakes were very easy. Like super cheater easy. As someone who used to make multi-tier wedding cakes, it actually pains me to say this. These are Devil’s Food Cake boxed cake mix cupcakes, with store-bought whipped chocolate icing.
There are three things that make them look fancy. The adorable jars. The piped frosting. And sprinkles.
Baking Mason Jar Cupcakes
Step 1. Prepare your favourite cupcake recipe. Preheat the oven to the desired temperature. Mine cooked at 350 degrees.
In this case, I used Dunkin Hines Devils Food Cake Mix. It’s dairy-free, very moist and it tastes rich in your mouth.
When you can, use fresh eggs. They make a better cake.
I tend to mix it a little longer than than the instructions say.
Step 2:

Prepare the jars.
Make sure they are clean and dry.
Spray them lightly with PAM or grease them with oil so the tasty cakes will pop out.
Add cake batter to each one until they’re 2/3 full. Don’t overfill and wipe away any drips or spills.

Place them into the oven on a baking sheet. Be sure they don’t touch.
Bake as directed until an inserted toothpick comes out clean.

Step 3:
Frost and add sprinkles.

As I said in my confession earlier, I used store-bought frosting. If you decide to go that route, try choosing a whipped variety. In my experience, they just seem to pipe more easily.
You can achieve this look with a star tip and a piping bag. Or you can choose to use a flat knife or palate knife to create a flat or swirled top.
Lastly, add sprinkles. If the icing looks perfect, use a few. If it doesn’t quite turn our the way you planned? Add a lot of sprinkles. Everything looks fancy with sprinkles.

We love quick & simple desserts around here so be sure to check out a few more.
Do you love Bernardin mason jars as much as we do? Be sure to have a look at more of our mason jar crafts & recipes.
]]>
My Little Pony Birthday Party
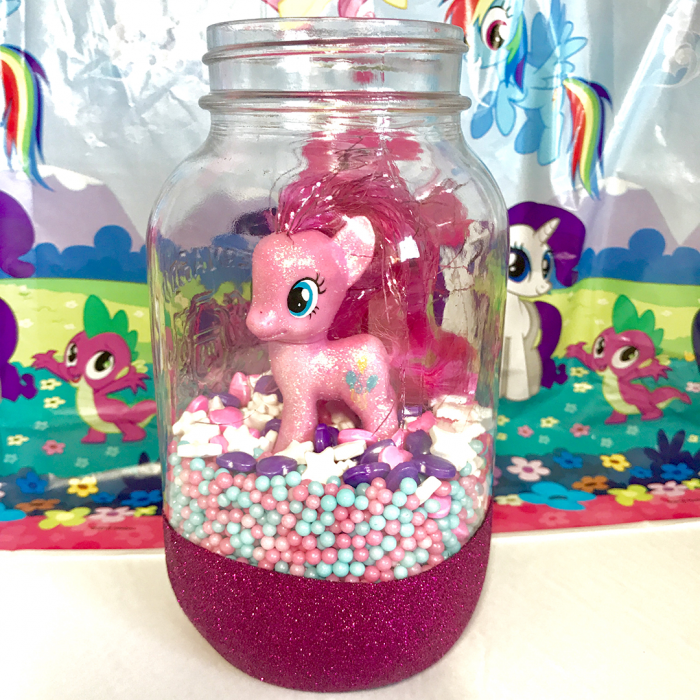
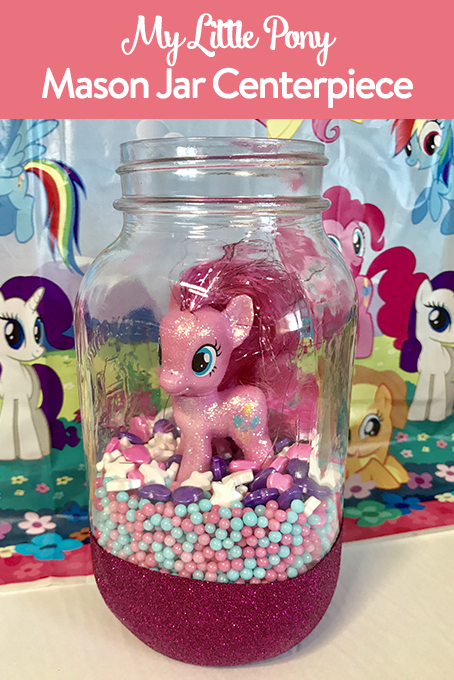
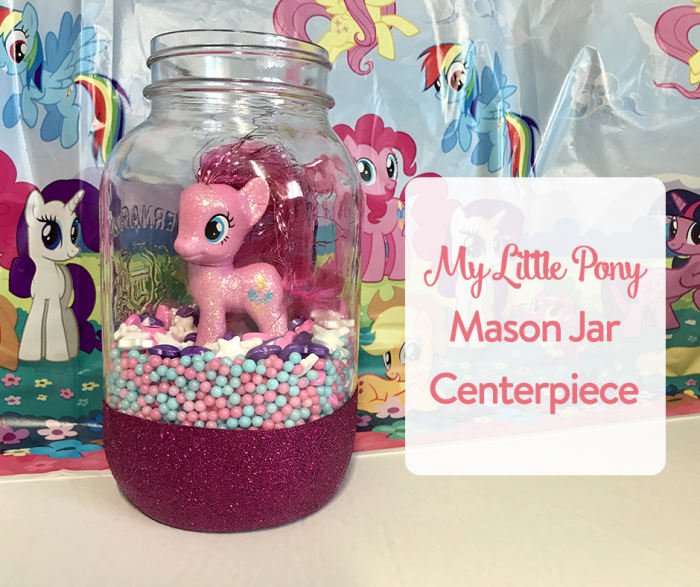
If you are a regular visitor here at The Inspired Home then it doesn’t come as a surprise to you that I love to throw fun, themed birthday parties for my kids. Miss O has had a pink party, a Princess Peach party and a Hello Kitty party over the years. This year’s theme of choice was My Little Pony. I decided to whip up a simple mason jar centerpiece to adorn the food table. I pulled out one of my favourite Bernardin mason jars and went to work!
What You’ll Need
- 1L Mason Jar
- Lots of sprinkles!
- Pony figure
- Mod Podge (optional)
- Extra fine glitter (optional)
- Painter’s tape
- Foam brush
Note: You can get away with 500mL mason jars if that’s all you have on hand, you’ll just need to use a smaller pony.
Get Crafty
If you want to add a little sparkle to your mason jar centrepiece then you’ll need to pull out some Mod Podge (matte, glossy, glitter, it’s all up to you!) and some extra fine glitter in a colour to accent your pony. Lay out some paper on your work surface. First, you’ll need to put a line of painter’s tape around the jar to mark off a nice straight edge. I suggest stopping the glitter just under the logo of the mason jar.
Using your foam brush, paint a coat of Mod Podge from the bottom edge of the jar right up to the edge of the tape. Once you’ve done that, it’s time to pour on the glitter! It’s helpful to do this over a container that will make it easier to pour the excess glitter back into its container. Use a heavy hand with the glitter to cover it fully.
Allow the jar to dry for at least 30 minutes but one hour is best. Once that is done, paint on another coat of Mod Podge and dump even more glitter all around. Let dry once again. Now it’s time for one final coat of Mod Podge to seal the glitter. Once you have finished with that layer, peel off the painter’s tape while the glue is still wet – this will ensure a nice, crisp line around the jar. Let dry overnight.
Now comes the easy part (especially if you decided to skip the glitter!): pour in the sprinkles, pop in your pony and you have assembled a beautiful mason jar centrepiece that any My Little Pony lover is sure to adore.
Happy Canada Day!
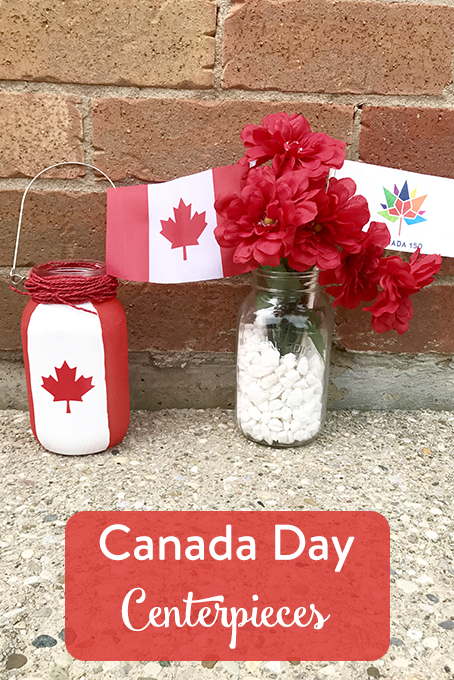
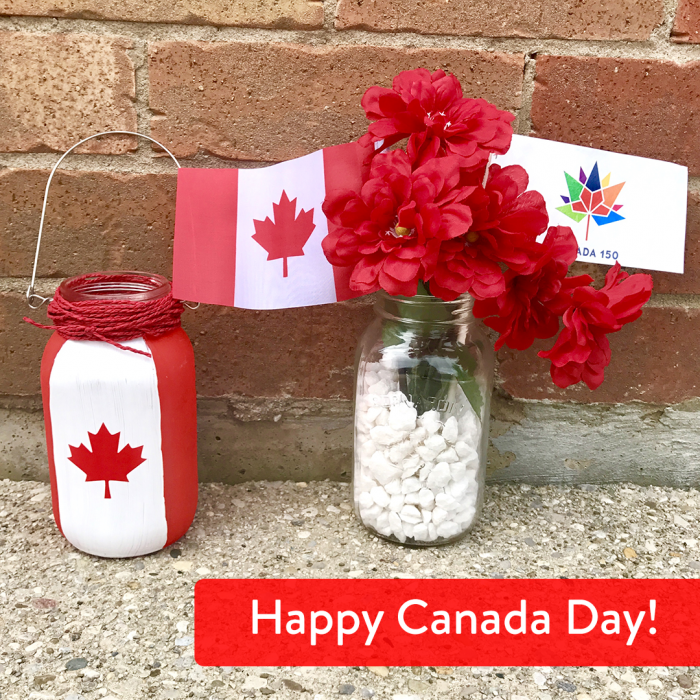
It’s time to celebrate Canada’s 150th Birthday and I thought I’d spruce up our tables with two different styles of a Canada Day centerpiece. Both of these were fun and simple to make using some Bernardin mason jars and a variety of dollar store items on all payday loans direct lenders.
What You’ll Need
- Bernardin 1L mason jars (1 for every centerpiece)
- Transform Mason Metal Wire Handle
- Acrylic paint in red & white
- Sponge brushes
- Red twine
- Maple leaf stickers (or cut out two from vinyl with your Cricut)
- LED tea lights
- White rocks
- Red fake flowers
- Mini Canada flag
Canada Day Lantern
![]()
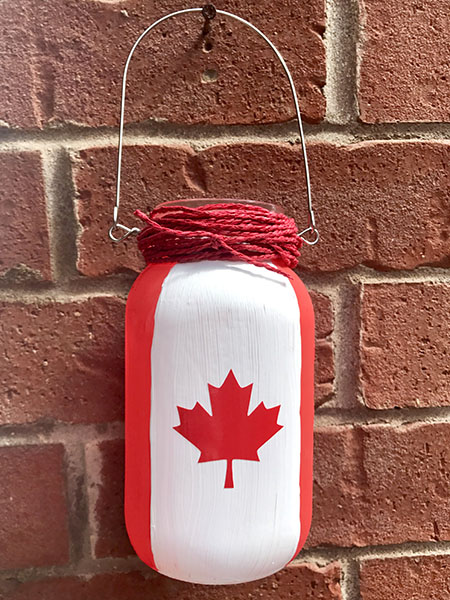 The most time-consuming part of these Canada Day lanterns is waiting for the paint to dry. Aside from that, they’re quick and simple to complete. I suggest putting your wire handle onto the jar before painting. I didn’t and it scratched up my paint. Since you will be covering the wire with twine or ribbon, it won’t matter if you get paint on it! Using a Bernardin 1L mason jar, I took my sponge brush and painted red down two of the sides. If your jar only has one decorative side as these do, make sure you paint the sides with the decoration in red. I didn’t use any tape to ensure straight edges as I have a pretty stead hand. Once your red paint dries, do a second coat. It will take a little while for it to dry – I left mine for about an hour. Once your second coat of red paint has dried, use your white paint to cover the other two sides, leaving time in between coats. Once the paint is dry, add your maple leaf stickers or vinyl decals to the middle of the white sides. Wrap the top of the jar with red twine. Drop an LED tea light or two inside and you have a lovely festive lantern.
Canada Day Centerpiece
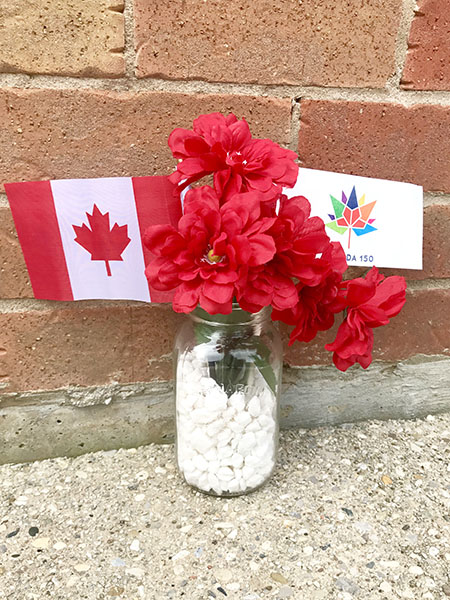 This centrepiece couldn’t have been any easier to make. Grab your 1L mason jar and dump in some decorative white rocks. Next, insert your red flowers and your Canada Flags. Voila! A gorgeous centerpiece that took mere minutes to assemble. Everything in this jar is from the dollar store. The mason jar itself is courtesy of Bernardin. You could also add some decorative ribbon around the neck of the jar for even more punch.
Sensory Bottles
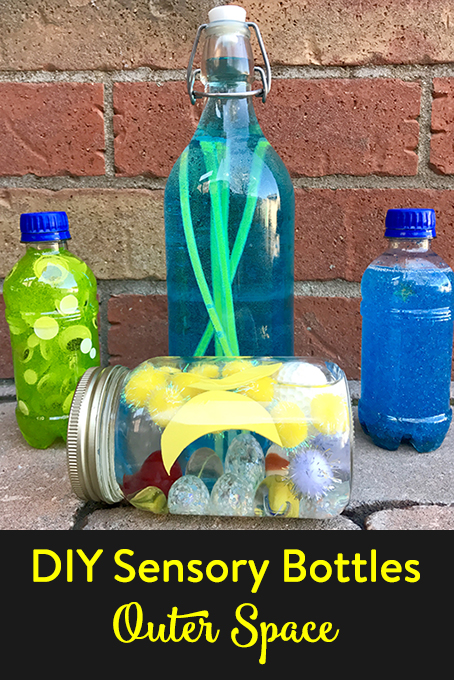
I love love love sensory bottles. They are so simple to make and offer a blank canvas for any and all subjects. With Little J being obsessed with space lately, it only made sense to whip up a few DIY sensory bottles with an outer space theme. While the moon is his favourite part of outer space right now, I wanted to cover a few bases with the bottles. From an alien bottle to one filled with planets and stars, I made four in total.
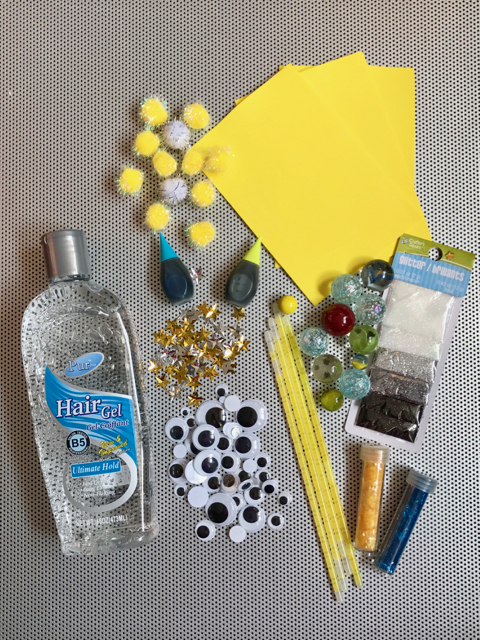
To create any of the sensory bottles, you will need to start with a bottle! Many people use Voss glass water bottles but I didn’t have any on hand. I find the Hawaiian Punch plastic bottles to be the perfect size! You can also use mason jars and other glass bottles. I prefer plastic so I don’t fret about it getting broken. No matter what style you choose, be sure to secure the lid with some sort of glue to keep curious hands from opening it!
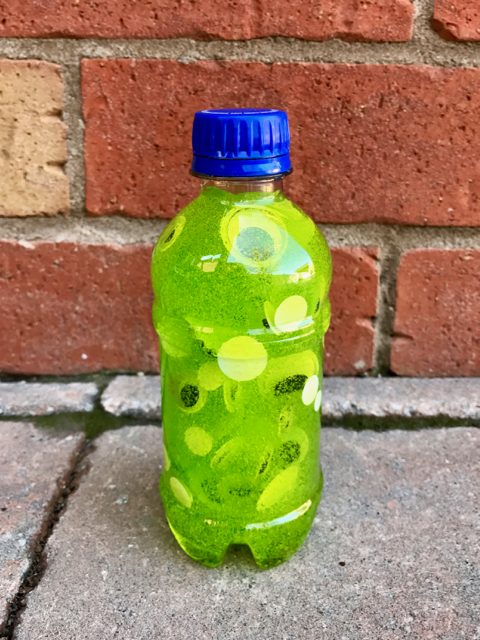
Alien Sensory Bottle
For this bottle all you need is some clear hair gel, green food colouring, googly eyes and water.
Fill the bottle half-full with hair gel. Add some water to make it about 3/4 full. Add one drop of liquid food colouring – I used the green from a neon pack I picked up at Walmart. Shake it up to mix it all together. Next up, toss in your googly eyes and shake it all up. Voila! You have made a fun green alien sensory bottle.

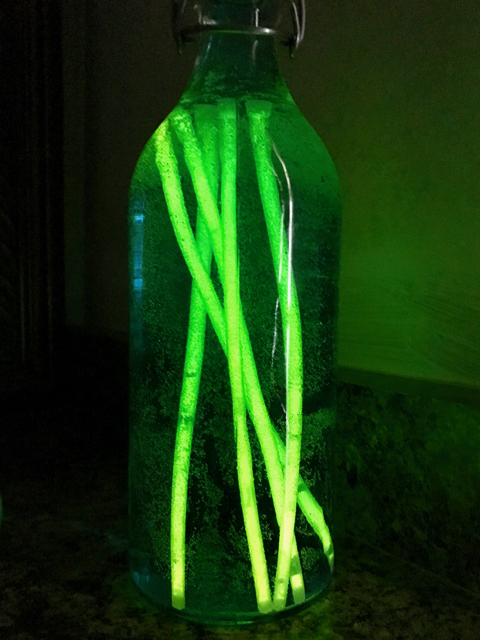
Glow in the Dark Sensory Bottle
This bottle is ridiculously simple to make. Pick up a pack of glow in the dark bracelets at your local dollar store. I found them quite long so I had to find a taller bottle in my collection. If you can find glow sticks which are shorter, you can use a smaller bottle. Toss the glow sticks into the bottle, fill it up with tap water and add a drop of blue food colouring. Instant nightlight!
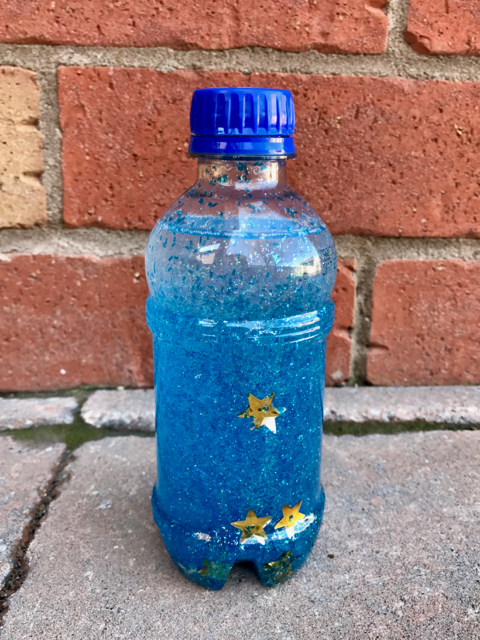
Glitter Sensory Bottles
Glitter sensory bottles are some of my faves. For this sensory bottle, you will need baby oil, star sequins and blue glitter. I used a combination of fine light blue glitter and a chunkier, darker blue glitter. Toss everything in the bottle, give it a shake and watch the glitter and stars slowly descend. This is a great device to help calm down your kids as well.
Stars & Planets Sensory Bottle
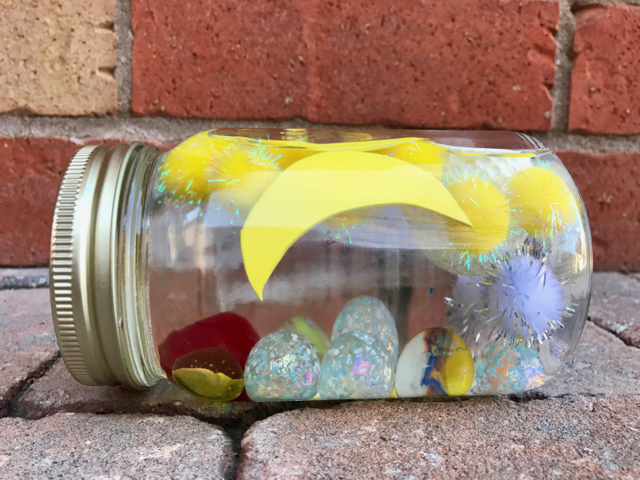
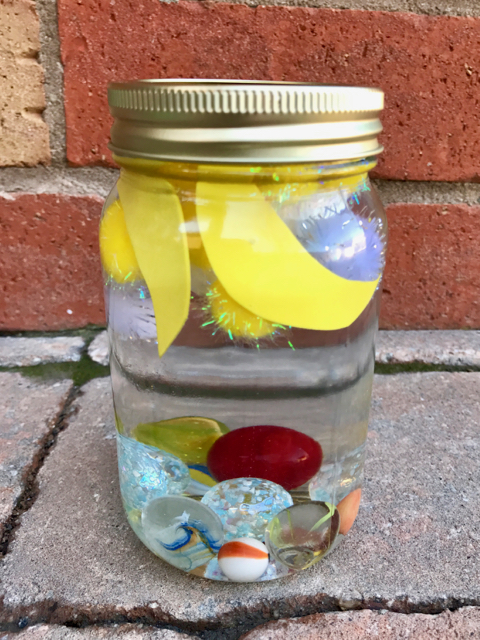
For this bottle, I used water as my base and added glitter pom poms in yellow & white, moon shapes cut from sheets of yellow foam and some marbles. My original intent was to use rubber balls but alas, I couldn’t find any with swirls resembling planets at my local dollar store. The bag of marbles I picked up instead were absolutely perfect with their glitter and swirls. Try as I might, I could not get those marbles to fit into my plastic bottles. When using marbles, it is definitely a good idea to use a plastic bottle – a Gatorade bottle with a screw-top lid would probably work very well. The only container I had in my house with a wide enough opening was a mason jar. If you opt for marbles in glass, it will be heavy so it’s definitely a jar to monitor your children with.
The different weights in this jar are a great lesson in physics. When talking about space, you can’t avoid science! The foam moons and pom poms floated and glided around the jar beautifully. It was also interesting to turn the jar on its side and slowly move the marbles around.
More great crafts for kids – this way!
If you’re obsessed with space like we are, how about Tin Foil Moon Craft, Alphabet Space Ship Craft, or more Space Crafts for Kids?
]]>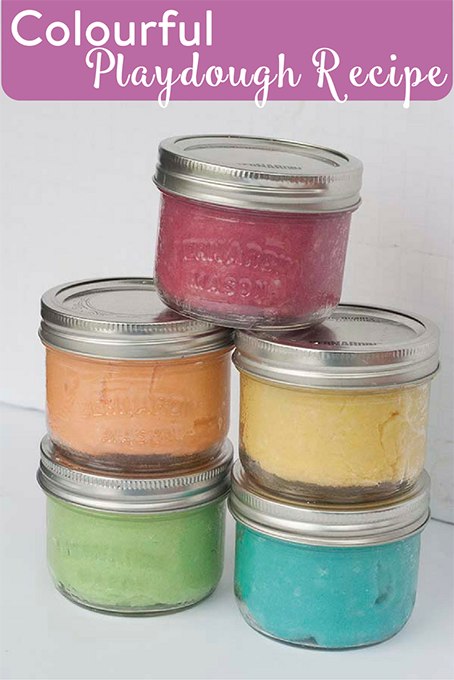
Colourful Playdough Recipe
Recently, the kids were invited to a friend’s birthday party. I struggled with what to give as a present.
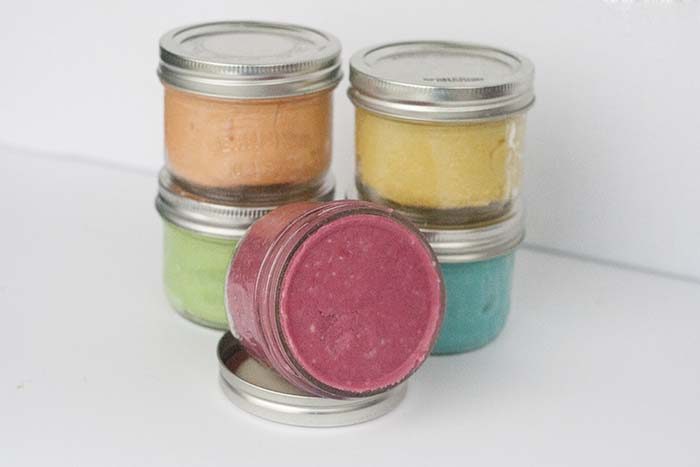
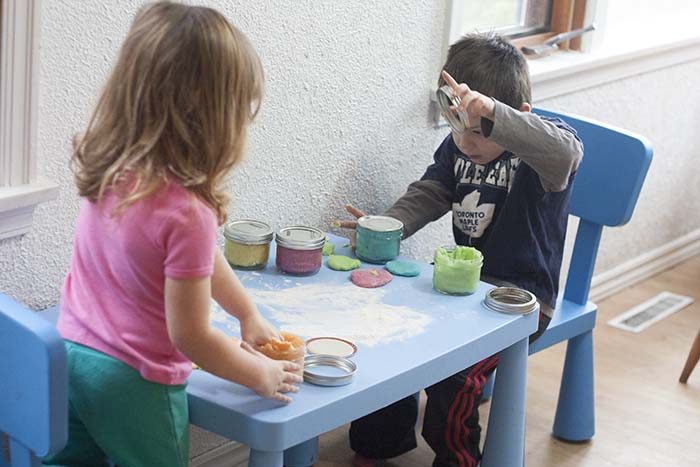
Instead of rushing out to the mall, we decided to make her some homemade playdough in the birthday girl’s favourite colours. Mr J, Ms P and I whipped up a batch of no-cook playdough in our kitchen. The kids were pleased with their colours & creations. We piled them into a jars and wrapped them up in a homemade painting for wrapping.
Of course, we had to make a second batch the next day for my kids to play with too! This recipe makes it a breeze to whip up no-cook playdough in just a few minutes. As a mom, I love it because it only uses one bowl and I don’t have to cook it either. Most of the ingredients are ones that we typically have in our house, so no need to run out and buy anything. No pesky cream of tartar like some recipes either.
No Cook Playdough Recipe
-1 cup flour
-1/2 cup salt
-1/2 cup water
-1 tbsp vegetable oil
Yields about 3 cups of playdough.
How To Colour Playdough
There are many different ways to do this: food colouring, gel food colouring or even powered gelatin mix.
In my kitchen, it comes down to what’s in the cupboard.
If you want a vivid, rich colour – gel food colouring is the way to go.
If you like a scent along with your playdough, powered gelatin mix in all the different flavours will work.
For a pastel coloured playdough, 5-8 drops of food colouring will work.
Packaging for a Gift or for Much Use
To package, use 250ml Wide Mouth Canning Jars. We love these containers because they hold 1 cup of playdough which is usually more than enough and the lids can be popped on and off for playtime.
Enjoy your new dough!
]]>
DIY your own decor to bring Halloween – scary or sweet – into your house. We’ve found 15 amazing projects to make your house BOO-tiful just in time for that spooky season.
Got clothespins? This Easy Clothes Pin Halloween Wreath will be a cinch to make.
Want to zazz up that hall table? Deco Mesh Halloween Topiary is just the thing!
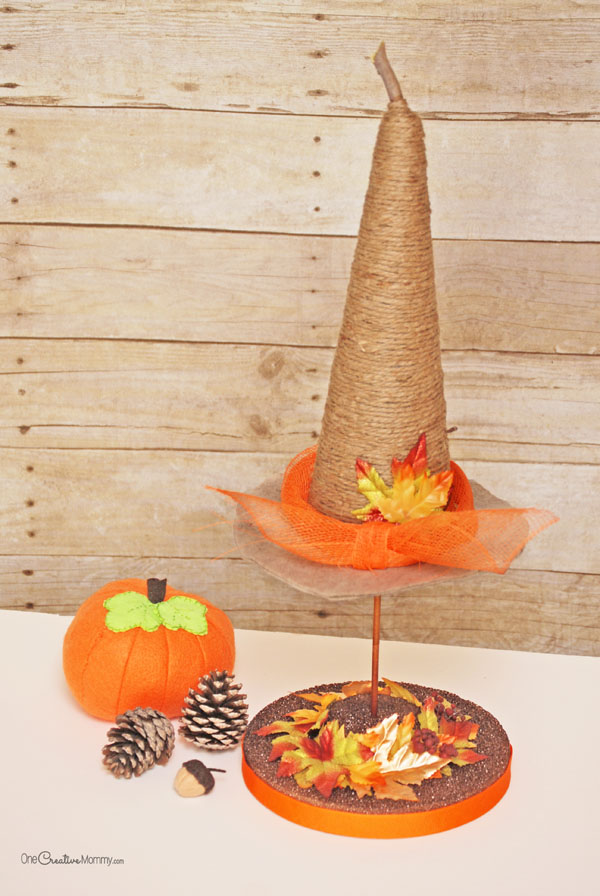
Want a decoration that will work in fall & Halloween? This Rustic Witch Hat Tutorial will have you cackling with joy.
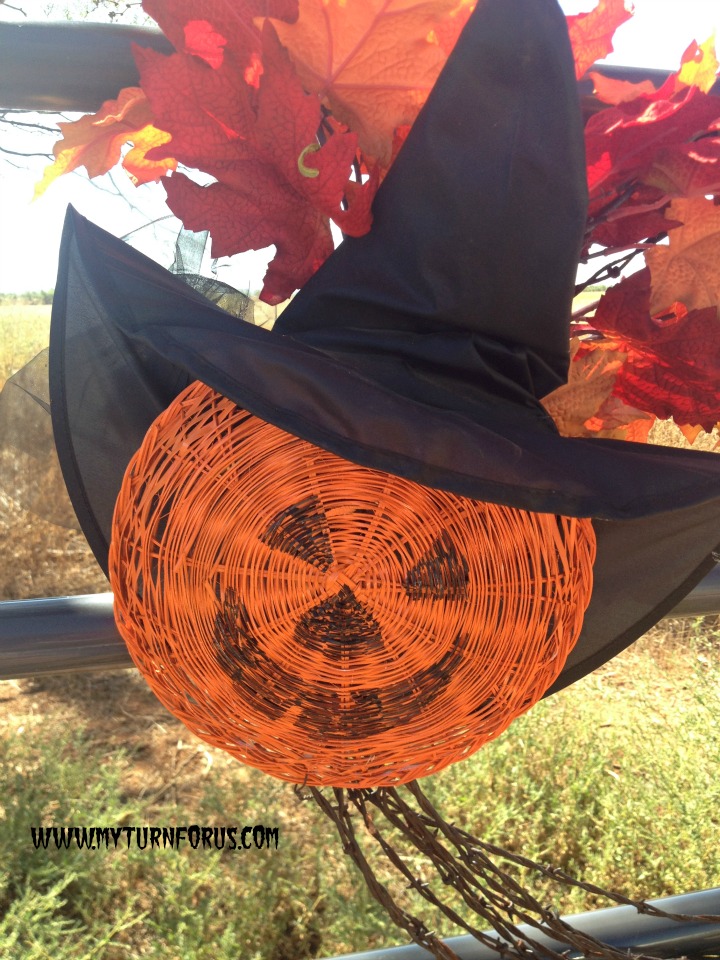
Got some barb wire lying around on your farm? Try out this Witch Barb Wire Wreath
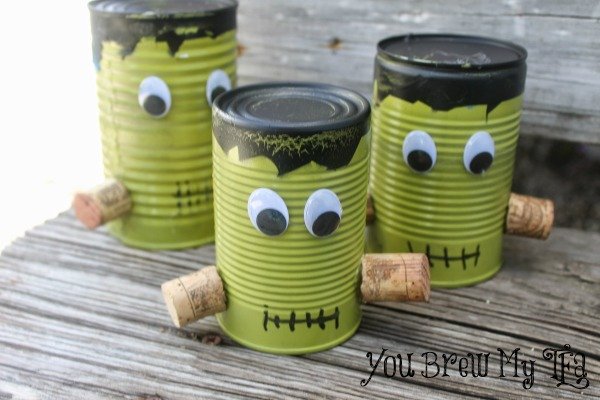
Dive into your recycling box for this one! Frankenstein Up-cycled Tin Cans are moaning for your attention.
A fan of felt like Andrea? This Reusable Halloween Banner will have satisfy the
Spell it with me now – B-O-O…… BOO Hanging Sign
Simple but sweet – a Spooky Ghost Garland
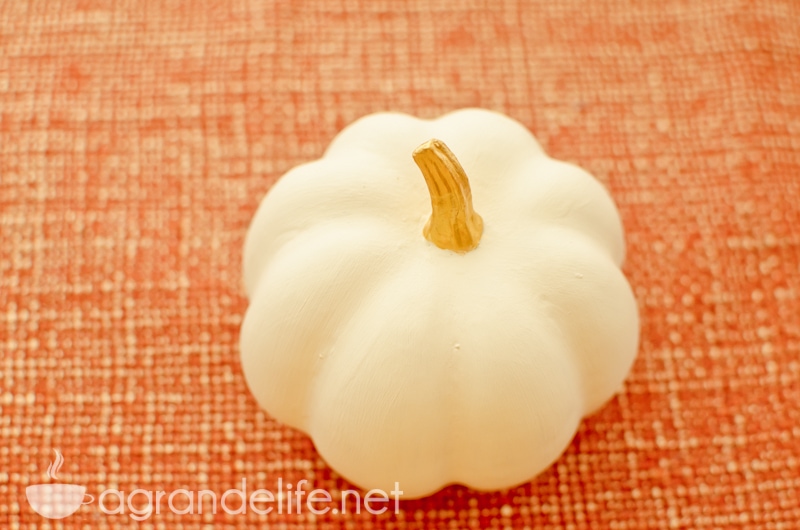
Grab your brush – these Faux Painted Pumpkins are a cinch to make.
A fan of the Modge Podge? Try your hand at the Decoupaged Halloween Letters
Grab your extra jars and try out these gorgeous Glittery Pumpkin Mason Jars
Like a little candy at your door waiting for trick or treats – Candy Corn Fall Decor are perfect!
These Purple Glitter Wood Pumpkins are adorable and a great way to use up scrap wood.
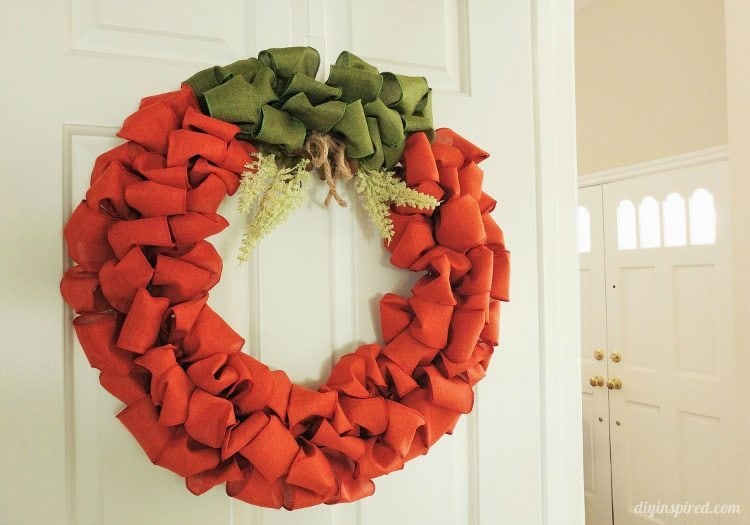
A little welcome (non-spooky) cheer on your door with this Pumpkin Ribbon Wreath
A simple classic – these Boo Blocks look terrific!
What decor do you most like to decorate with for Halloween?
]]>Time to Get Up.
6:30am seems to get earlier and earlier. Since the daylight savings spring forward, I am getting up before the sun again. This makes it harder to get out of bed. Today, I hit the snooze, but small footfalls tell me that my alarm didn’t go unnoticed. The covers are peeled back, my son snuggles in for a 10 minute snooze hug before we crank the morning routine in full gear. It’s a small period of time, however its one of my favourite parts of the day because it reminds me why I do need to get up and go to work – this kid likes to eat.
After we turn off the alarm off for the second time, our feet hit the ground, and we race to see who can get their clothes for the day on faster. A sleepy eyed girl in a night gown says “good morning mama” and races to join the clothing race. We let our border collie out for his morning sniff, and set the kettle on for oatmeal. I glance at the time and race to throw a smoothie together before I have to hit the driveway. After a flurry of kisses and hugs and a wave to a sleepy looking Dad, I’m off to hit my commute.
Watching the Sun Rise.
My commute never feels long. I hit the highway and then I call up my parents to see what they are up to. It’s a good time of day to catch up with them while they have their coffee and with the 30 minutes I have to talk, it’s just long enough. My mom fills me in on her recent trip to the naturopath and I fill her in on how I’m struggling to raise the temperature of my grow bench past 60F for my seedlings.
Hitting the Keyboard.
I’ve got a lot of tasks that I’m working on at work, so I hit the ground running with my to do list flying as I dive in. I remember my water bottle (for once) and guzzle H2O as I go through the list. I am a roll but I still remember coffee break where I take a break and chat with a co-worker about the microgreens and sprouts I’m growing, and thank another for the book he loaned me on mushroom identification.
Lunch.
Lunch is usually a massive power play while I can run errands in our largest closest town where I work. Today, the local thrift store is open (just one of the two days it is), and I head over to look for electric blankets, rubber boots for my whole family and the next size up clothes for Mr. J. I’m successful with everything except for the electric blankets, and I manage to even find 2 boxes full of multiple sized mason jars which is a total score at just 10 cents a piece. With no time remaining on the clock, I grab a fast food sandwich and head back to work while I talk to my husband on the phone about how he completed signing up Mr J for the next session of preschool. Way to go, super dad. However, the topsoil we hoped to spread on our garden this weekend isn’t available yet. I guess we’re really rushing farm season. So we talk briefly and rejig our weekend plans to a different task on our long list.
Time for a Drive.
I hit the road again for work to go and meet up with a local community group. It’s in one of our more northern hamlets, so I enjoy a drive through the countryside listening to the Homesteady podcast while I go. (Gotta get your homestead & farmer training in where you can!) The roads take me to some gorgeous views – a bridge over the Athabasca river, past kilometers of pine trees, farms of all sizes, and several of my favourite Alberta Parks. I’m alert at all times because it’s moose and deer aren’t uncommon crossing the road here.
Getting Home.
I roll into my driveway around 5pm. As I unload the boxes of thrifted goodness, the kids yell out their usual enthusiastic greetings and tear apart the boxes to see what are in them. Mr J goes through t-shirt by t-shirt and is pleased on what he finds. Ms P immediately puts on her rubber boots that are already muddy and stomps around the house. A little dirt never hurt, right? We roll through the regular routine of making dinner, Doug BBQs and I chop and throw together the veggies.
Bedtime, kinda.
After dinner, Mr J hits a wall. Without a nap today, he’s pretty much done in by 7:30pm, so we rush through the motions of pajamas. We get hung up on the laundry issue and to get rid of a load in their room so we can have the basket back while making his bed at the same time. Dad manages to get everyone to brush their teeth and I finish off the last of the laundry and calm Mr J down enough to lie down in bed. Many hugs and kisses, missed a story tonight, and we tip toe out of the room. We know they are both tired because there is no giggles or talking going on tonight.
My second shift.
I get back to the kitchen table with the intention of working on my computer, but it’s still full of the dinner dishes. The mason jars I loaded into the dishwasher from the thrift store earlier have disrupted our regular routine of putting the dishes right in. I carry the jars downstairs to the basement, and clear and clean the table. My MacBook hums to life, and the kitchen table turns into my office as CAO of Wild+Free Farm, The Inspired Home and Wild+Free Family. I answer a few pressing emails, answer some Facebook Messenger, and then turn on WordPress with the intention of flowing some words tonight. Some nights I type until 10pm, other nights I’m on a roll and I type until midnight before I close the lid. I write down the emails and inquires I need to send out on my break tomorrow, and what is next on my list for the week and then call it a night.
5 More A Day In The Life Of Posts for You
Now it’s time for some more Day in the Life Of posts from my Canadian blogging friends. Get ready for some wonderful inspiration on what these phenomenal women do every day:
Shawna: A Day in the Life of a Mom of Three
Karen: A Day in the Life of Spill It Mom
Codi Lyn: A Day in the Life of Creative Wife, Joyful Worker
Tamara: A Day in the Life of Discovering Parenthood
Michelle: A Day in the Life of a Stay at Home Mom

3 Easy Mason Jar Salads & 1 Soup
I think I’ve binge watched too much Jake and the Neverland Pirates on Netflix as of late. The song “Grab ‘Em & Go” got stuck in my head and seems to play on endless loop.
Grab ’em & go
Yo ho, yo ho
We found gold doubloons
Grab ’em & go
Yo ho, let’s go
We have so much more to do
I feel the same way about lunch. I’m always on the go, and I need to be able to grab a meal that’s quick and nutritious. Let’s grab ’em and go matey! I can prepare my meals in advance although I usually only have the weekend to do so, unless I’m grabbing leftovers.
I tried making lunch salads in advance in my regular stainless steel containers. The premixing of all the veggies seems to make them soggy and gross by the time you’re ready to eat them. There’s nothing worse than soggy salad, it’s like eating a mouthful of seaweed.
Are you still hungry?
My love of all things fresh for lunch, preparing in advance, and being a hoarder of mason jars all collided together into a wonderful rainbow of ideas. The trick lies in where how you layer your salad.
Easy Layering 101
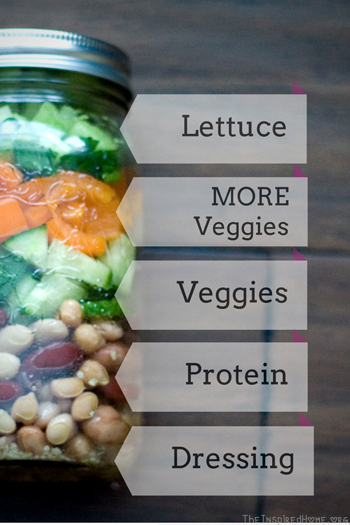
Liquids (dressings) go on the bottom, followed by your protein (nuts, beans or meat), followed by a rainbow of veggies, and then your lettuce on top. If you’re opting for parmesan, or croutons, I recommend putting them on the very top (or wrap them in a small reusable bag & place on top).
I made 3 salad recipes, and one soup with added broccoli goodness for lunches this week. Yes, I missed a working day – and that’s because I treat myself to sushi one day a week. It’s a little perk of taking my lunch and what I look forward to!
Easy Mason Jar Chicken Caesar Salad
One of the first things my husband ever made for me was a kick butt chicken caesar salad. He stills makes the best one hands down! His trick has always been to use a high-quality Caesar dressing (we like Renees) and add red onions to help the flavour. After Crockpot Chicken night, it’s often what’s for dinner. It makes a terrific mason jar lunch too, that helps clean up those pesky leftovers.
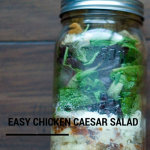
Chicken Caesar Salad
Ingredients
DRESSING
- 2-3 tbsp caesar dressing
SALAD
- 1/4 red onion
- 2-3 tbsp real bacon bits
- 2 tbsp parmesan cheese
- 3-4 cups romaine or 2 cups romaine & 1-2 cups of mixed baby romaine
- 2-3 tbsp croutons
Instructions
- Add dressing to bottom of the jar.
- Crop all lettuces and vegetables into bite sized pieces.
- Layer ingredients according to their order.
Notes
Simple Mason Jar Bean Salad
Beans are a great budget-saving protein source, and one that we keep in our cupboards all the time. This little salad is reminiscent of my one of my favourite summer salads with a bed of greens. The dressing is really what makes it good – feel free to use your own favourite oil based dressing. My combination of olive oil and garlic is really simple. I have also used other types of vinaigrette on it for more of a flavour punch.
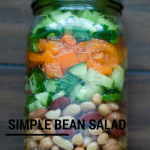
Simple Bean Salad
Ingredients
DRESSING
- 2 tbsp olive oil
- 1 tsp garlic I used preserved
SALAD
- 1/2 can of mixed beans
- 1 cup cucumber
- 1/2 orange bell pepper
- 2 cups romaine lettuce
Instructions
- Mix dressing together
- Chop all vegetables and lettuce in bite sized pieces.
- Add all items in order they appear above.
Notes
Easy Mason Jar Green Chicken Salad
This one is leftover friendly! Grab the leftover protein (I used chicken) from the night before and layer in your favourite fresh vegetables. At my house, it’s almost always a fight over the cucumber. The possibilities on this one are endless from grape tomatoes, cucumber, peppers, snow peas, radishes, berries…. I could go on and on!
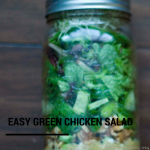
Easy Mason Jar Green Chicken Salad
Ingredients
- 2 tbsp of your choice of dressing I used Caesar vingarette
- 2 tbsp walnuts
- 1 leftover chicken breast
- 1 cup cucumbers
- 2 green onions scallions
- 3 cups mixed greens
- 1 cup sprouts
Instructions
- Chop vegetables.
- Layer all ingredients in the order they are listed.
Notes
Easy Soup
I’m a fan of soup. Especially with the bitterly cold days of winter, a bowl can represent a lot of comfort on one of those days. The kind recently I like the most is Happy Planet – in my Easy Soup, I took a bag of their fresh Chilliwack Broccoli, added a little (ok, a lot) of parmesan cheese and a little more fresh broccoli.
The only question left to answer is – which one will you try first?
For more great meal ideas, follow us on Pinterest:
Visit Pinterest’s profile on Pinterest.
Lessons Learned from a Jar of Beans
3 years old is a magic age. Mom and Dad are still really cool. Dragons and fairies exist. My favourite part by far is the imagination, and creativity. A 3 year old just jumps in and creates – draws wacky things, colours outside of the lines, and reminds us of the wonder in the world.
They’re also super stubborn.
They want to do everything THEIR way. They want stools so they can see what you’re doing. They DON’T want yogurt for breakfast, they want PBJ. If you don’t give them PBJ, well, it’s just say sometimes it isn’t pretty.
In the past two or maybe three weeks, getting out the door to go to daycare has been a battle royale. Trying to get Mr J to skate was tough. Every little thing we asked of him he would yell, “I need heeeelllppppp….!” I would explain calmly that no, I was helping his sister right now, and he would have to wait. Cue the hysterical sobbing, throwing himself on the floor.
(Also why are stores set-up so specifically to frustrate your small children at the checkout lines with the gum, candy, drinks, and wonderful little small objects? I spend most of my time in line putting things back, or trying to wheel my cart strategically so neither of my children can reach these objects. Mass chaos, more yelling, and those judge-y stares. Oh c’mon, like you haven’t been there. Don’t stare at me.)
Enter my friend Jennifer over at You Pinspire Me.
As a former Psychology students, she figured out:
I needed to stop focusing on the negative behaviour and start rewarding the positive behaviour… I needed something that he could focus on, something that grew in size as his behaviour started to improve. Something with a big reward at the end.
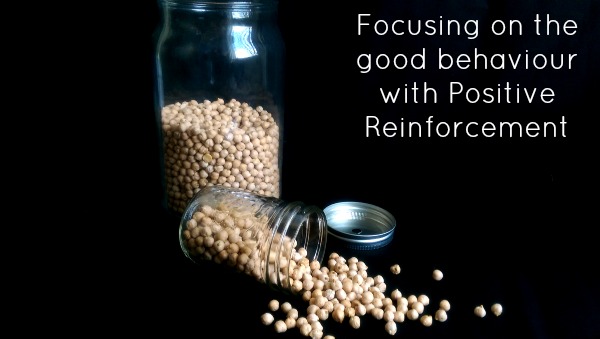
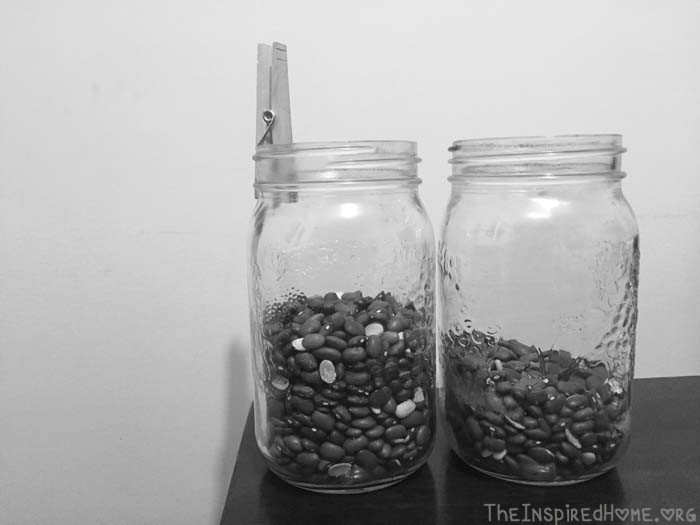
Simply put, she grabbed a large jar , and every time her son did something positive, she would add a chickpea to the jar. If it was something particularly great or arduous, she added a couple more. Jennifer let her son decide what the reward would be – he chose a Happy Meal at a McDonalds, and it had to have a Playplace.
Would it Work?
I was a little skeptical when I read about this magic jar of beans. I wasn’t sure if working at a larger goal was a concept that Mr J would understand. However, I already had jars and beans. There was no risk & no investment. If nothing else, DH and I would just be praising positive behaviour, which makes everyone feel great!
We started with basic things like sitting at the table until everyone is done, putting on your outdoor gear by yourself, brushing your teeth & hair, etc. Each positive behaviour that was exhibited when asked without fuss scored a bean. If it was a day-long task like getting to the bathroom on time, we were generous and gave 3-4.
When Mr J went to skating, had a great attitude and stayed on the ice the whole time, we POURED about 1.5 cup of beans into his jar. His eyes nearly popped out of his head!
Mr J is proud of his accomplishments, “I’m a big boy!” he says. He has even started getting things ready in advance before we go out the door and is incredibly helpful. He is working towards the goal of going swimming as a family at our local pool.
So can a cheap bag of beans (or whatever you have in your cupboard, really) help reinforce positive behaviours? With your consistent and constant praise, you bet it can.
]]>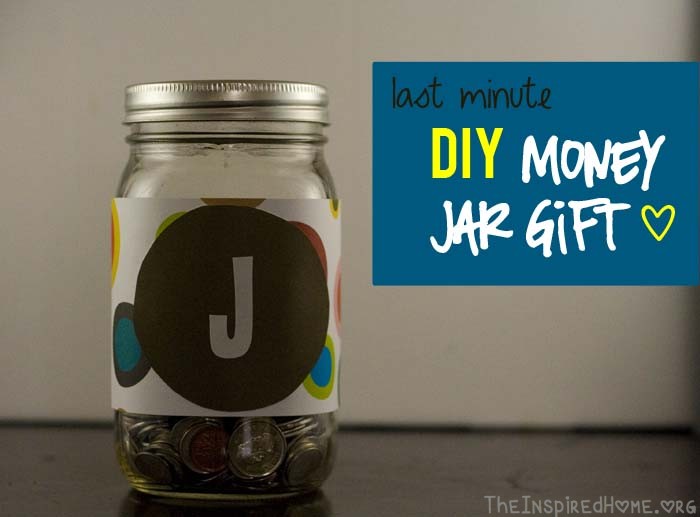
DIY Money Jar Gift
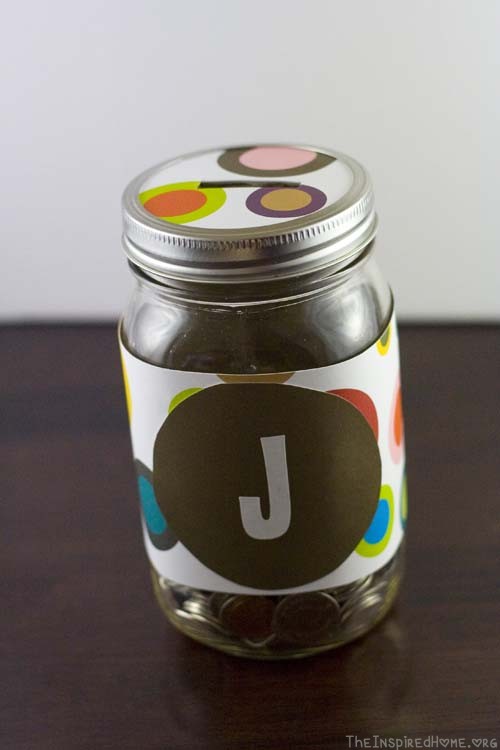
Mr J has been keeping all his “monies” in a little Altoid tin. Luck has been with him lately and he has found many coins while we were out shopping, in the couch and who knows where else? His little money collection has outgrown the tin. We’re not sure what he is saving his coins for. It’s great to see him taking an interest in money and we have begun to teach him what each of the coins are.
The little people in your life might not have a special jar to keep their money in yet. This easy DIY craft can also make a terrific last minute gift. For those who like to spend, save, and donate, consider using 3 smaller jars to create a collection.
Items Needed
1 – 1L mason jar, with lid
1 sheet of reversable scrapbooking paper
1 sheet of alphabet stickers
1 small piece of corrugated cardboard
Double sided tape or glue dots
Utility knife
Pencil
Paper cutter or scissors
How To
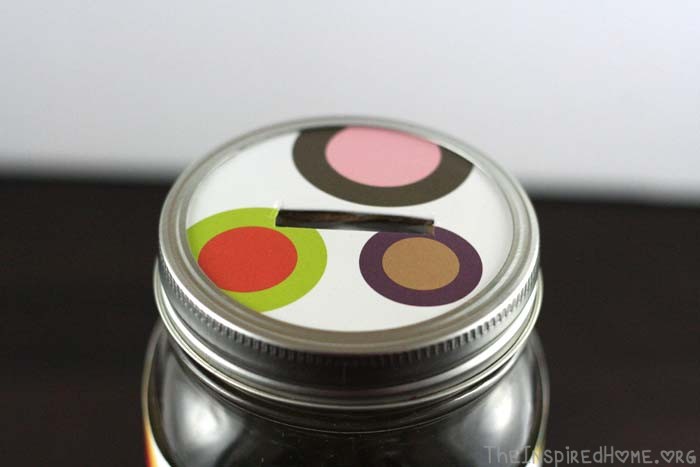
- Cut a 2.5″ strip of scrapbooking paper for the label
- Trace 2 circles on the opposite side of scrapbooking paper from the outside ring of the canning lid, and 1 circle of the corrugated cardboard
- Cut a money slot in the corrugated cardboard with the utility knife
- Tape a scrapbooking circle over the corrugated cardboard circle and use your knife to cut a similar slit
- Tape the other circle on the front of the label and add an alphabet stickers to personalize.
- Affix the long label to the jar.
- Put the cardboard circle on the top of the jar and screw canning lid around it.
Searching for other great gift ideas? Check out our Gift Board on Pinterest:
Follow The Inspired Home's board Gift Giving on Pinterest.

So long…
We’re breaking up. I’ve had enough. I’m tired of your unsightly shape every morning. I’m drained by the never ending piles of clutter. I’m weary of lugging you around, you weigh down my shopping cart. You block my access, and I’m over. It’s done.
Here’s my rant
Thank you to Milton the dog for making his cameo in my rant… bonus points to you if you spotted him.
Still need more reasons to break up with your bottles?
- Read more on Ban the Bottle on what you can do & how to get involved
- View this depressing video (Midway) about how plastic bottles are wrecking eco-systems
- What actually happens to plastic water bottles after you drink them
- Earth Day is coming – will this be your commitment to a better future for our children?
No Bottle Waste with Soda Stream
The Soda Stream system comes with reusable bottles, in a variety of shapes and materials. It’s easy to rinse them after use and fill with cold tap water for your next bubbly beverage. I have even enjoyed a few bubbles on the road taking my creations with me in mason jars & stainless steel travel mugs.
The Cage

SodaStream Cage in Tawain: 6,000+ bottles & cans
One of the things that totally blew my mind is the SodaStream cage I found in Pinterest. I’m a very visual person. I relate best when I can see it, look at it, and use it. So to me, these installations are actually brilliant, and a perfect way to raise awareness about the disposable nature of cans and bottles.
1 gas carbonator can actually replace over 2000 bottles. An average family goes through 6500+ bottles & cans a year. As my family seems to be “bottle a-holics” I’m guessing our stat on that one would be much higher. So 3 or 4 SodaStream gas cannisters would actually replace that exhibit! Best of all, they are recyclable. Even at my small town Walmart, I found you could exchange the carbonators at the Customer Service Desk.
SodaStream.ca Coupon
Use the coupon “PTPA” to receive a 15% discount off the purchase of your own SodaStream drink maker when you make the purchase online.
Enter to win 1 of 7 SodaStream Machines
Leave a comment below telling us what you do to make healthier, eco-friendly choices for your family.
Giveaway will run until April 30, 12 EST & is open to all Canadians. Colour of SodaStream prize will be chosen at random.
Disclosure: I am part of the PTPA Brand Ambassador Program with SodaStream Canada and I received compensation as part of my affiliation with this group. The opinions on this blog are my own.
]]>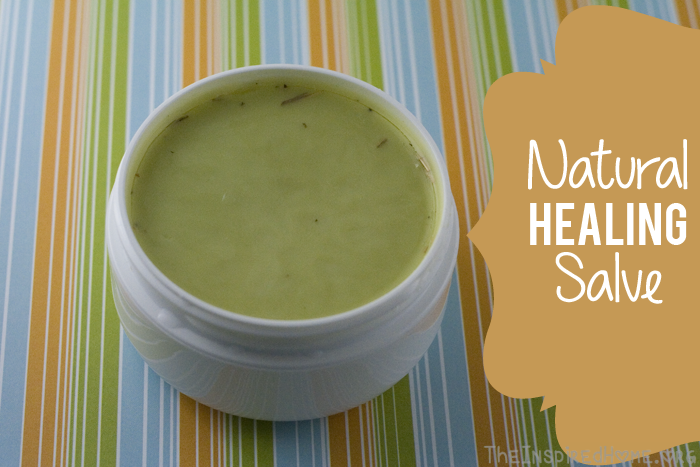
Natural Healing Salve
I’ve slowly been making my way through changing our personal care products to ones that are full of less toxins. In a perfect world, I’d be able to throw them all out and start with new products. That felt really wasteful and would wreak havoc on my budget. Instead, each time I run out of a product, I take the time to replace it with a better alternative.
The winter here this year has particularly been hard on my skin, my hands are dry and cracking. Since I have been doing the elimination diet, I have been breaking out with little skin rashes in the weirdest places. I made this recipe to be able to put a moisturizing salve on all of these little issues that would help them heal.
Here’s a little breakdown on all the ingredients and what each one does:
- Coconut Oil: Hydrates & softens skin, soothes itches, speeds healing
- Grapeseed Oil: moisturizes skin & improves skin elasticity
- Comfrey: speeds wound healing, anti-inflammatory
- Calendula: disinfect & treat minor skin infections
- Rosehips: high vitamin C content, helps with skin dryness
- Lavender Essential Oil: soothing scent for stress relief, antiseptic and anti-inflammatory
- Tea Tree Essential Oil: antibacteria, antifungal, disinfectant
It worked wonders on my poor hands and helped me random rashes heal up quickly. I’ve stowed one in each of our first aid kids. I’ve also used it on a few other minor abrasions with the kids. The beeswax in it helps lock in the moisture so even if they are out being active, the salve stays on and continues to do it’s great work.
Natural Healing Salve
Ingredients
- 1 cup coconut oil
- 1/2 cup grapeseed oil
- 1/2 cup dried comfrey
- 1/2 cup dried calendula
- 1/2 cup of dried rosehips
- 2 oz beeswax beads
- 10 drops of lavendar essential oil
- 10 drops of tea tree oil
Instructions
- In double boiler, mix in coconut oil, grapseed oil and herbs. Cook on rolling boil for about 30 minutes, stirring occasionally. Mixture should be melted in a liquid state. Strain herbs from oil using a coffee filter, discard.
- Using paper towel, wipe out the top of the double boiler and add liquid back in. Stir in beeswax beads and essential oils. Let melt and stir mixture frequently.
- Pour into mason jars, or heavy plastic jars and let set.
de>Follow The Inspired Home’s board DIY on Pinterest.
]]>
Shaving Cream Sensory Bin
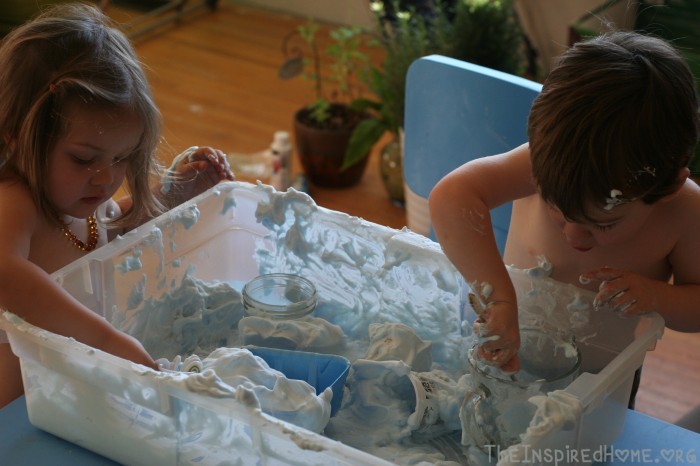
OK, so initially it took a little convincing and reassurance! I convinced him it was fun, a little messy and in no time, he was playing in the shaving cream. It was an activity where I needed to sit and start it with them, and play throughout the whole time. Mainly, because I didn’t want shaving cream all over my whole living room.
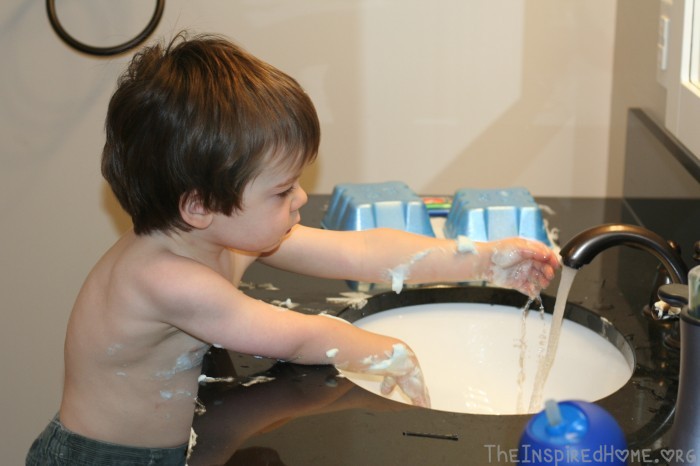
As a nod to tidying up, I stripped off their shirts to make wipe down & washing our hands a breeze. You can also use play aprons or just pop clothes into the washing machine when you’re done playing.
We used all of our regular sensory bin items (trays, yogurt cups, measuring cups, measuring spoons, small mason jars), and I hid some additional little plastic animals throughout.
There are lots of other materials you can mix shaving cream with to give it a more cloud or dough-like texture (snow, flour, to name two of my favourites), you can also add food colouring and get really creative. Shaving cream mixes well with others!
Clean-up with washing our hands and a quick wipe down with the washcloth.
Have you tried any great messy activities lately? What is in your sensory bin?
]]>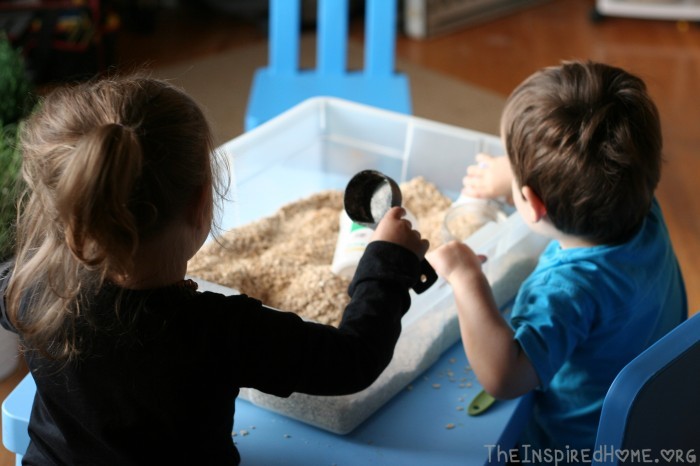
We’ve really been living it up with our sensory bins the last couple weeks. We play with one of our friends quite frequently, and some days when she comes in the door, she likes to go and take a peek at what’s in the bin today. I usually change it up weekly, so usually it’s a new material! I almost always get an “ooh” or “aah”. I try to use things we have in large quantity in our cupboard, or something that is cheap for ease of use.
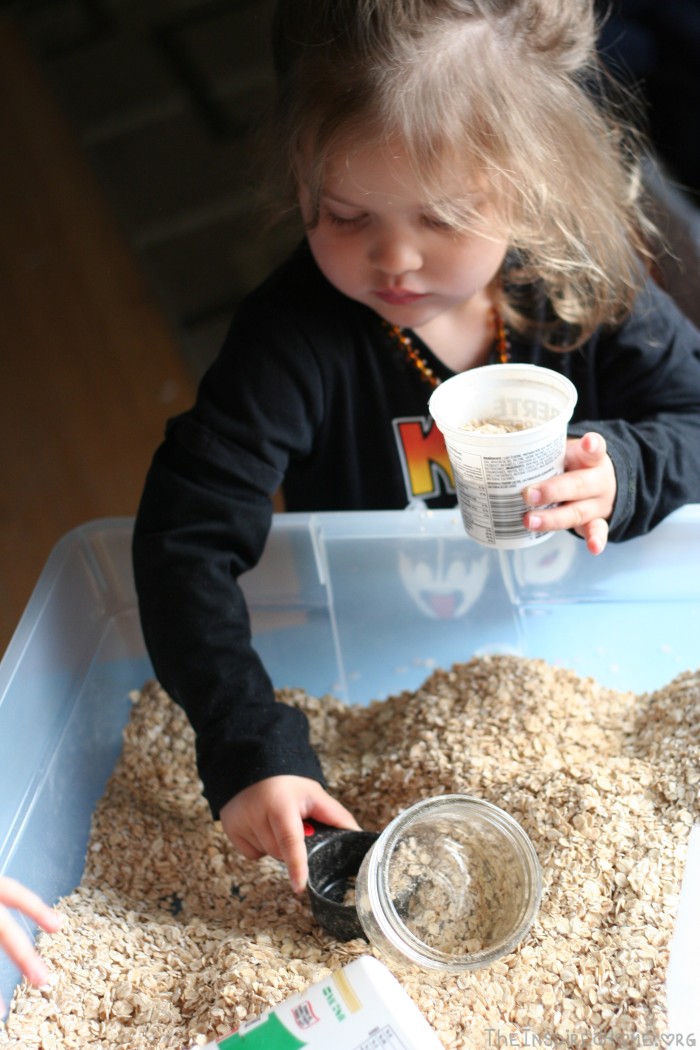
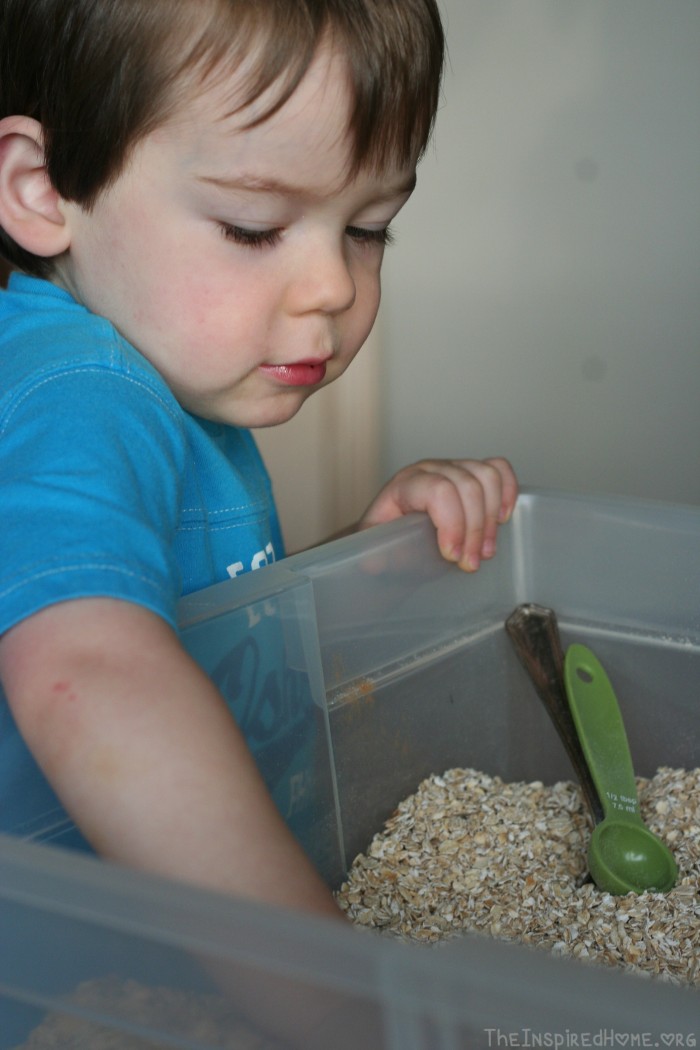
Oatmeal Sensory Bin
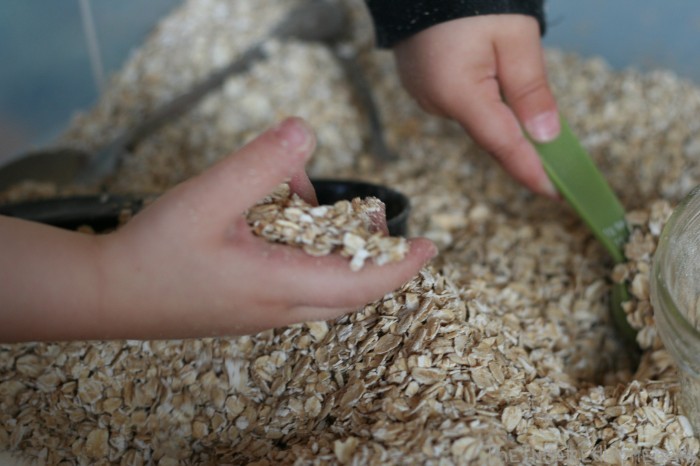
I used oatmeal for this one, and I added a little cinnamon just for a bit of smell.
We used our typical recycled materials like mason jars, measuring spoons, measuring cups, yogurt cups. Their favourite activity seemed to be to put the mason jar upside down then dump right on top of it until you couldn’t tell where in the bin it was anymore.
The texture of oatmeal is quite different, plus with the little sand that comes with it as well, makes for a nice item for the bin. I especially like that when it falls on the floor it doesn’t roll away, and it’s safe for the dog to eat without worrying too much about him. There’s a lot of filling/dumping, and pouring/dumping going on. Mr J’s pouring skills have gotten a real workout as of late.
My young friends had a terrific time with it for over 30 minutes which was a definite success.
What’s in your sensory bin this week?
]]>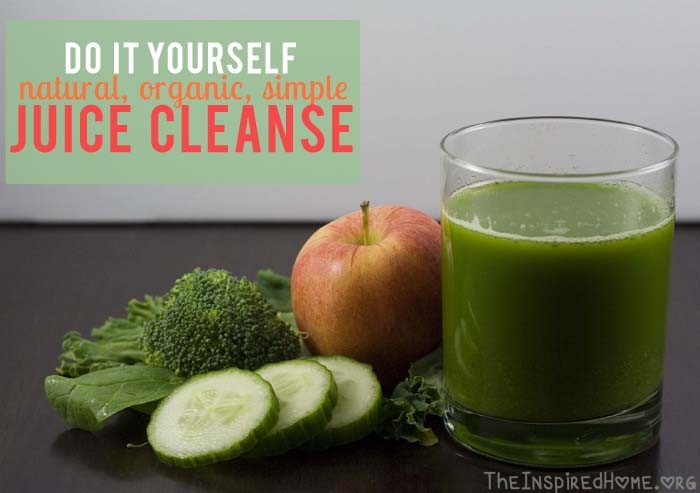
DIY Juice Cleanse
I’ve gotten really into juicing recently. I purchased a Hurom Slow Juicer as a way to get more vegetables into my diet. It has quickly become one of my favourite appliances and I may just move my toaster off the counter to make room for it. I took several books out of the library on juicing. After learning about the tastes and textures, I began to experiment with my favourite ingredients to develop a green juice recipe that didn’t taste like grass. I taste-tested many different batches on my visiting mother and she told me brutally which ones were grass-like and which were not. As she had never had juice like this before, it was a pretty unbiased opinion.
Over a few weeks, I consumed the fresh juice that I made myself. I found that my skin glowed, my mind was more sharp and I felt a lot more energetic. The best time of day to drink my green juice was in the morning, it just kick started my whole day! We had several sickness scares in our house too but with fresh orange juice with a dash of local honey and lemon, we seemed to kick the symptoms really quickly.
With my newfound love of juice, I researched doing a juice cleanse where they send you the bottles to drink over a 3 or 5 day period. I think this is a great thing to do for your health but the $180 price tag is simply out of my budget at the moment. Instead, I created my own DIY juice cleanse using simple, natural, organic ingredients that I found at my local grocery store.
How To: DIY Juice Cleanse
Before you start (2-4 days):
Ensure you’re hydrated (drink a lot of water, or coconut water, at least 2L/day), decrease your sugar intake (this will help you feel less nauseated when cleansing).
Get yourself a cool tumbler, and straw for being so brave.
Visit the grocery store to load up on healthy ingredients you need – buy organic if budget/supply allows (if you can’t, just make sure you peel).
Start soaking your almonds the night before.
Each Day:
You can consume as much water as you want, 5 – 16 oz glasses of green juice, and 2 – 8 oz glasses of Maple-Almond Protein+ Juice.
I recommend drinking green juice at every meal time, and Protein+ just prior to lunch & dinner time. Water whenever you’re not drinking something else.
For best results, drink only juice. If you’re about to eat your own arm, try a palm full of your favourite nut (naked, no salt) to take the edge off.
Raw juice is best when consumed right after juicing. If not possible, prep ingredients (chopping to fit juicer, peeling, etc) the night before, then juice in the morning into reusable glass containers (I used Mason Jars & upcycled glass bottles from one of my favourite beverages).
After Cleansing:
Ease back into your normal diet slowly. Eat healthy vegetables, fruits, gluten-free grains and lean meats.
I went vegetarian for a day just to help my body adjust back to normal, and ate frequent light meals and avoided dairy products.
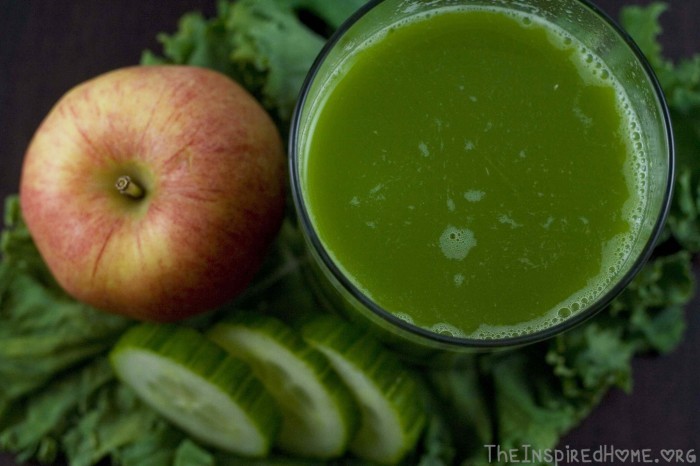
Holly's Green Juice
Ingredients
- 1 cucumber peeled
- 1 handful of baby kale or 1 kale stalk with stalk removed
- 1 handful of baby spinach
- 1 crown of broccoli
- 3 gala apples peeled
Instructions
- Peel vegetables and fruit as noted
- Feed into juicer in order listed
- Stir juice with fork
Notes
Best to consume immediately, but will keep in the fridge about 2 days in sealed glass container.
Ingredient Power
Cucumber – major hydration (they are 96% water), flushes toxins, vitamins A, B, C (immunity, energy, radiance), helps digestion, muscle pain and joint pain.
Kale – high in vitamins & minerals (strong bones, teeth, energy galore), increases testosterone, feeds healthy probiotic bacteria, healthy blood cells
Spinach – literally packed with vitamins that are good from head to toe, magnesium packed, great for your eyes & skin
Broccoli – helps damaged tissue, keeps digestive & immune system healthy, more calcium than milk, good for heart & eye health
Apples – antioxidant rich, slows aging and deters illness, natural sweetener, helps digestion (malic acid), slows bad fats (LDL)

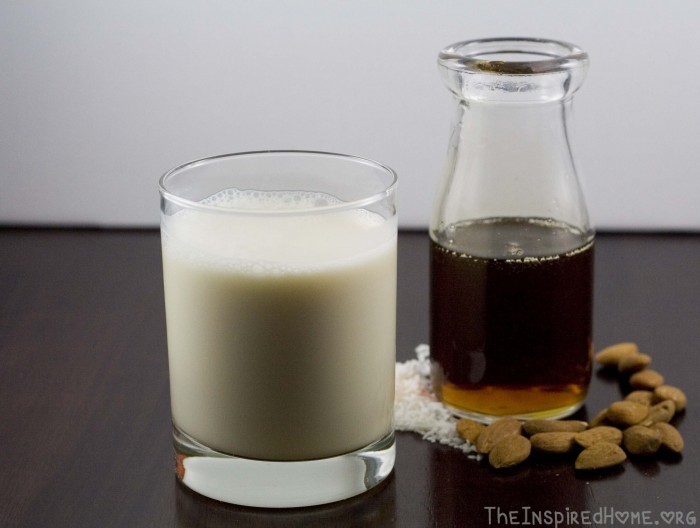
Maple-Almond Protein+ Juice
Ingredients
- 2 cups almonds
- 3.5 cups of water
- 0.5 coconut fresh, whole
- 1/3 - 2/3 cup maple syrup
Instructions
- Mix almonds & water together in a bowl.
- Using a 1/2 measuring cup, carefully pour nuts & water into juicer
- Set aside nut milk
- Make 3 nail holes in the bottom of coconut and drain water
- Crack coconut
- Scoop out all coconut meat, and chop into strips
- Feed coconut meat with nut milk through juicer once again
- Strain nut milk using a cheesecloth bag or produce bag
- Add maple syrup (to your taste) to the mixture and stir
Notes
Ingredient Power
Almonds-excellent source of protein, magnesium, vitamin E and fiber – a knock out punch to hunger & helps you flush out toxins.
Coconut-contains fatty acids, fiber – helps you flush out toxins.
Maple Syrup-freaking delicious – my favourite sugar replacement. Great source of zinc & manganese (energy & antioxidants)
Do you have any healthy eating goals for 2014? Are you into juicing?
This cleanse isn’t for everyone: if you have any medical conditions before, during, or after the cleanse please consult a doctor immediately. We are not nutritionists, nor do we claim to be. I’m just a chick who digs eating fresh & juicing.
]]>
A year ago, my husband and I were surfing the Internet when we came across date ideas & activities you could do for a non-traditional Valentines Day. It focused on what to do that was man-friendly instead of the holiday being woman-centric. Needless to say, my husband thought it was pretty rad. There were great outing suggestions such as take him to a shooting range, an action movie. One of the other suggestions was to make bacon roses and bacon jam. I was a little leery at the calorie content and also how much bacon it would take. We never really got around to trying it out!
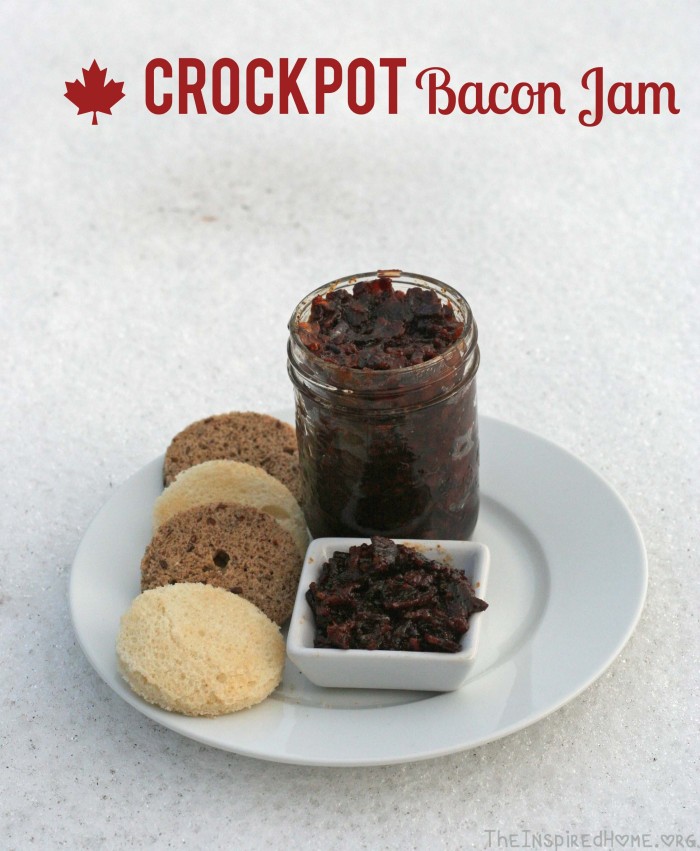
Through a hiking conversation that Jax and I had, I came to realize she had also read the same article. We were determined this year to put together a bacon jam that would be worthy of both of our hardworking spouses. Being that we are Canadian, we thought we’d give it a little Canadiana twist with maple syrup and a little touch of Ontario vino (a nod to both of our boys who are from there).
The results are delicious and make a terrific gift this holiday season.
Canadian Crock Pot Bacon Jam
Ingredients
- 1 large white sweet onion
- 2 lbs bacon
- 1 cup Malbec Wine
- 1 cup Maple Syrup
- 1/4 cup Balsamic Vinegar
Instructions
- Saute onions in frying pan, set aside.
- Cook bacon until crisp in frying pan.
- Combine all ingredients into crockpot.
- Cook on HIGH for 6-7 hours until bacon caramelizes.
- Put in 2 - 250ml mason jars, seal and refrigerate until eating.
Notes
Andrea
I have always enjoyed Halloween, especially the decorations. My mother was always passionate about decorating at Halloween. Now that I have a child I find myself getting really into decorating for all of the major holidays and even the minor ones too! As Miss O gets older I’m sure there will be more and more decorations. I’m a little bit sad that our new home doesn’t have a large covered porch. My mother’s main decoration every year was a fabulous spider she attached to the ceiling of the porch using balloons and streamers. She also wore her spider costume every year that she made herself when she was in her 20’s. It has held up well over the years!
This year we decided to give our house a face. I bought foam board from the dollar store and cut out teeth and eyes. I outlined the teeth with some black acrylic paint to make them stand out and painted the eyes with black & green acrylic paint. Both the teeth and eyes are attached to coat hangers. The teeth are hung into some siding under our awning. The eyes are attached with fish wire that is anchored in the window above.
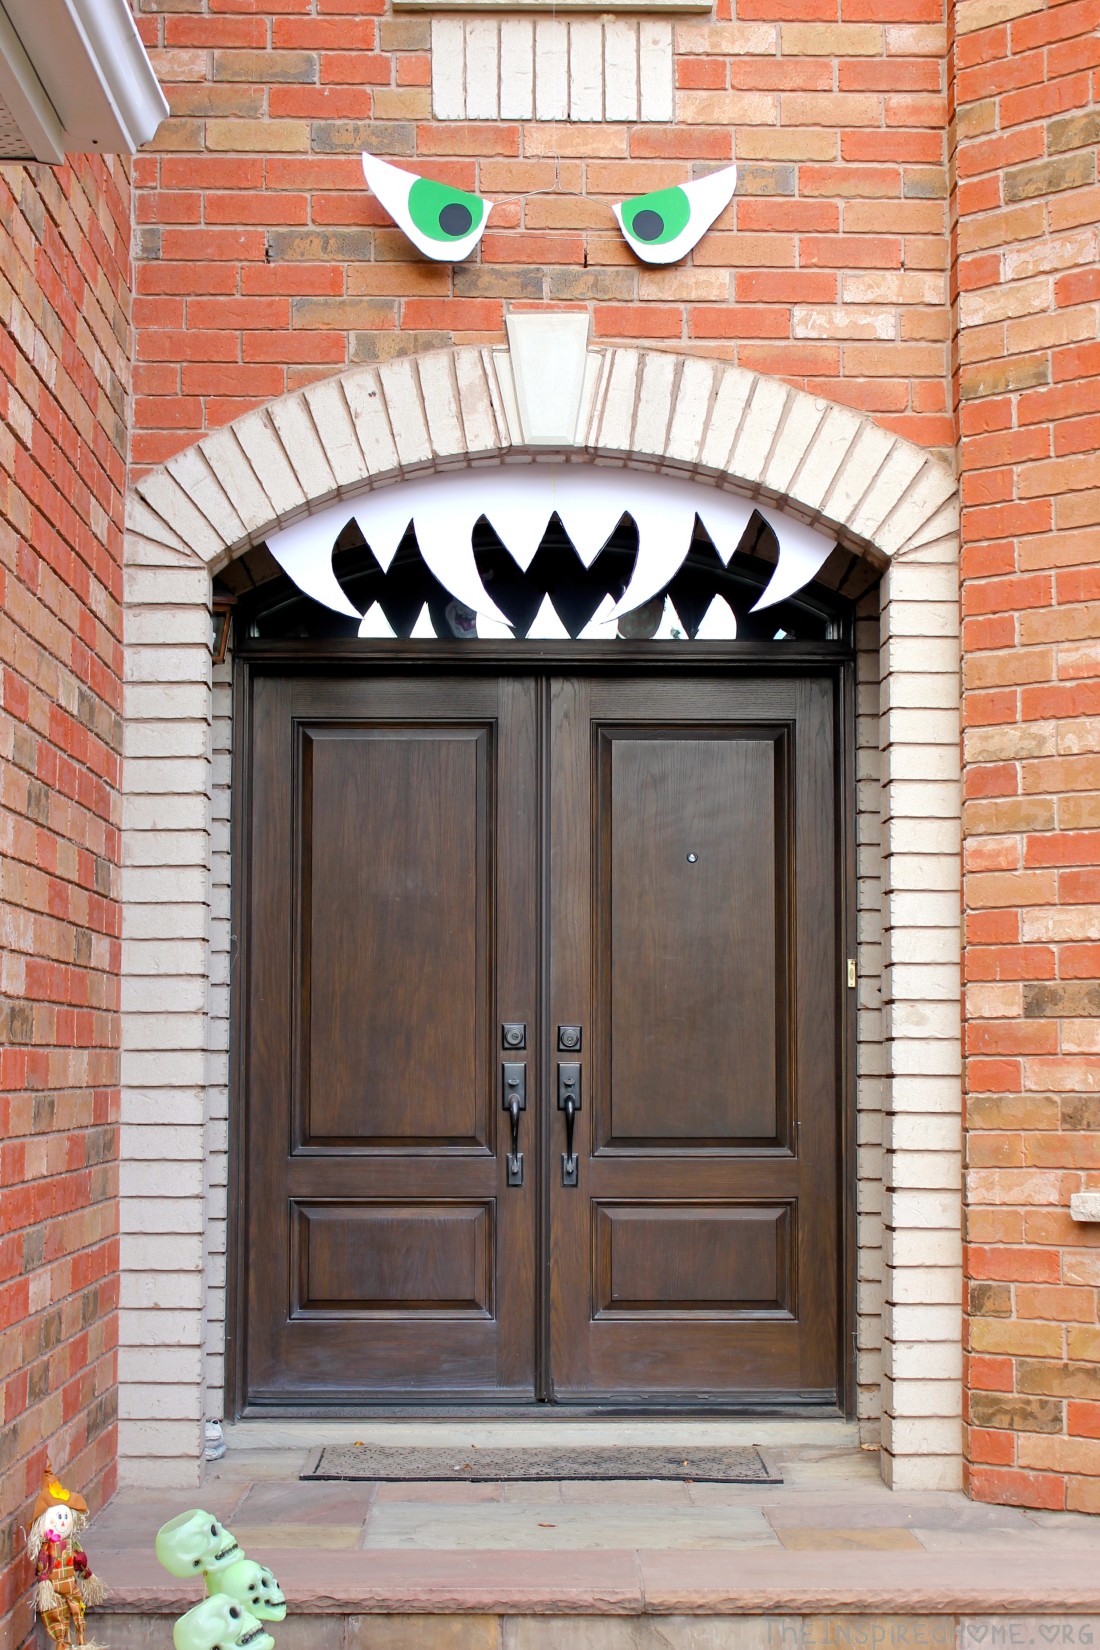
We also bought a fabulous posable skeleton from Costco whom we zip-tied to the chair & table to anchor him as well as prevent anyone from stealing him. There is also a corner by the front door designated as the witch zone complete with broom and floating witch hat! Majority of the decorations are from the dollar store with a few bigger ticket items like the tombstone being purchased from HomeSense.

Holly
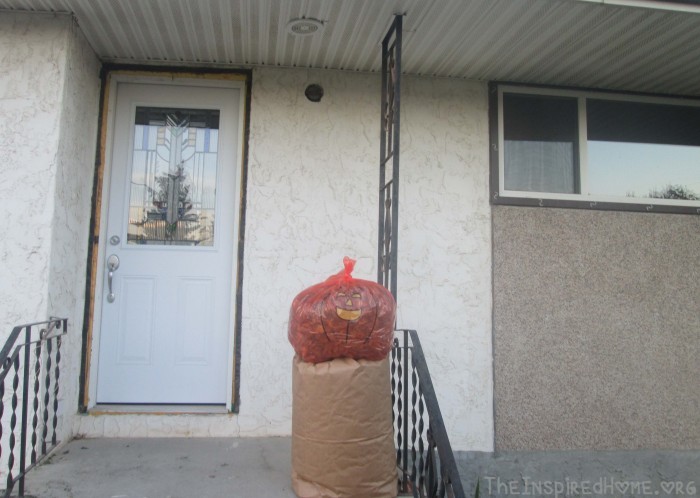
My family always enjoyed Halloween – but on a budget (as Christmas is coming you know!). So the decorations I am used to are largely homemade from things around the house. Our one splurge was usually very large leaf bags with pumpkin faces that we would stuff full of all the leaves from our large maple trees around our front & back yards. Raking them up and jumping in the leaves was half the fun! We would use dress-up clothes and make a figure for the porch too. I can remember a witch, a scarecrow, and a pumpkin head man. For extra kicks we would put our baby monitor in the pumpkin head and greet visitors by name to our door, and laugh uproariously when the visitor jumped ten feet!
Our Halloweens in Alberta tend to be snow-filled. Of the last four years, it has snowed 3 out of the 4, more than 20 cm. Snow-covered pumpkins just somehow seems odd to me but that’s the way of life here in the foothills of the mountains. Because we were fairly certain it was going to snow (and it did) – we didn’t get too fancy or attached to our decorations.
Out of Glad Kitchen Catcher bags, we made scary & happy ghosts to hang in our bush, along with creepy eyes.
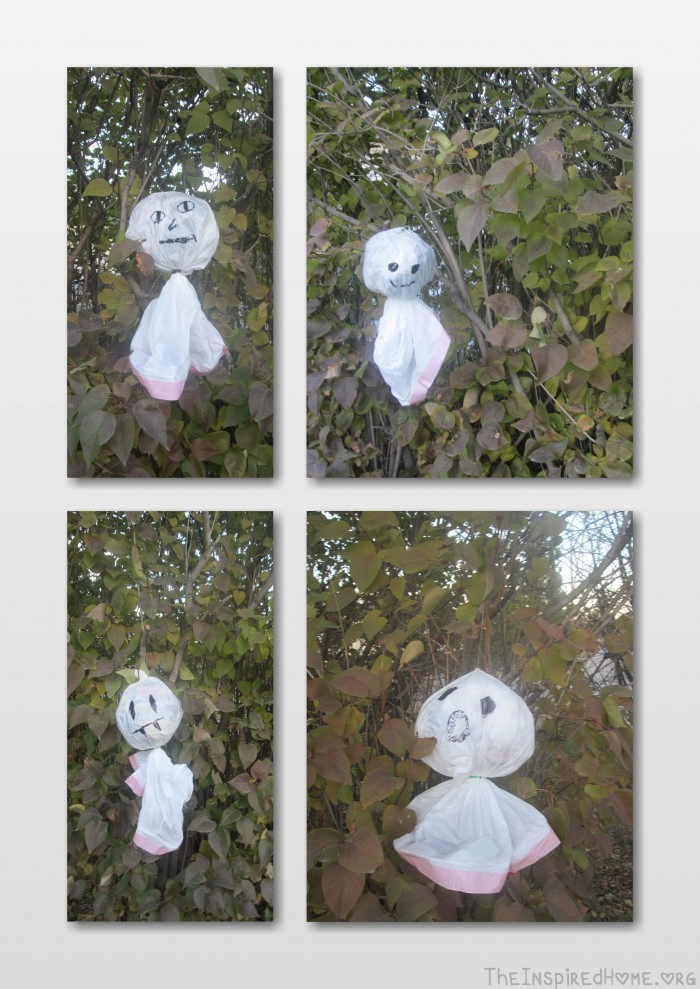
Out of inside-out compostable leaf bags, we had stands for our pumpkin leaf bags.
We added tombstones to our garden too.
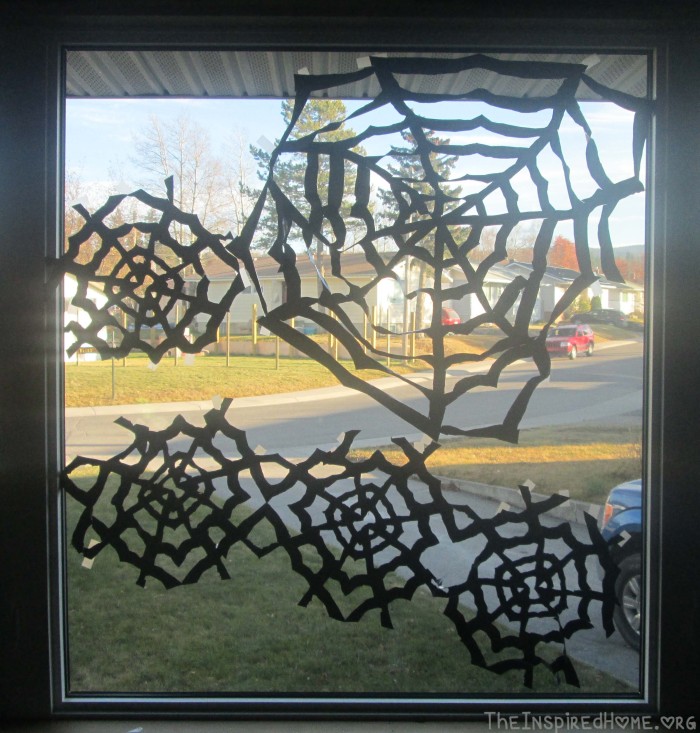
The piece de resistance was Garbage Bag Spiderwebs from How About Orange, which are brilliant in their simplicity and I added a spider we had from last Halloween.
Right before dinner, we’ll turn on our pumpkin stakes & throw the glowsticks in our pumpkins (even with our candles in mason jars, the wind always seems to get them!)
We hope you enjoyed seeing some of the ways we decorated our homes. How did you decorate your home for Halloween? Let us know in the comments below!
]]>
From my childhood, I can remember hot summer nights where my mom would throw a colander at me and send me outside to pick from our bountiful backyard garden. Little did I know, this would translate into a love of fresh food, which fed into a love of gardening.
Where I live now, in the foothills of Alberta, the growing climate is a little iffy, but since that time I have become an active member of the local community greenhouse, and I started preserving and canning wonderful BC fruits that I have picked up by the caseload from our farmer’s market.
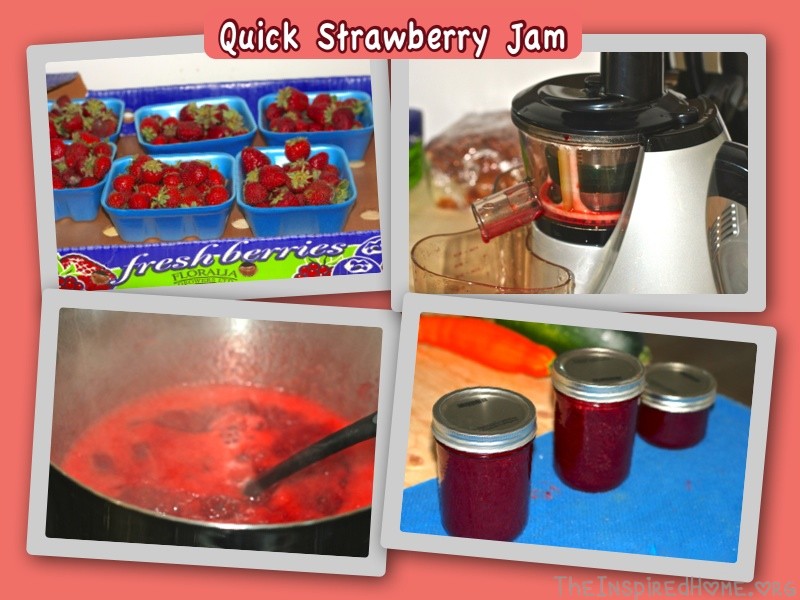
Canning to me always seemed like a long process with little reward, but in my quest for fresh, I have developed some recipes that are quick & simple. With two small children, my time is usually limited so I must be able to do it during a naptime (1-2 hrs) or be able to leave it itself with a kitchen timer. One of my favourites is quick strawberry jam (this can also be modified into whatever fruit you’d like to use).

Quick Strawberry Jam
Ingredients
6 cups of strawberries
4.5 cups of granulated sugar
1 tsp butter
1 pkg of Certo Light Pectin
6-250ml mason jars with lids
Directions
1. Put jars & lids in dishwasher. Use sanitize cycle (or a hot cycle) on your dishwasher. Leave jars in dishwasher to keep hot until ready to use.
2. Fill your canning pot with warm water & set on high on your stove.
3. Use juicer to extract strawberry juice from berries. If you like a chunkier jam, stir extracted seeds & skin also. (In lieu of a juicer, you can also use a blender).
4. Put strawberries, 1 tsp of butter and 1/2 cup of sugar into a large saucepan and turn on high heat.
5. Stir in the rest of the sugar.
6. Bring to a boil and let the mixture hard boil for 1 minute.

7. Remove from heat and skim off foam with a plastic spoon for 5 minutes.
8. Ladle hot liquid into jars leaving 1/4″ of headspace. Wipe any excess jam.
9. Add rings & seals until finger tight then add them into the canning pot to process. (How long you need to process depends on your altitude. See chart here.) Set your timer.

