

DIY Felt Weather Board
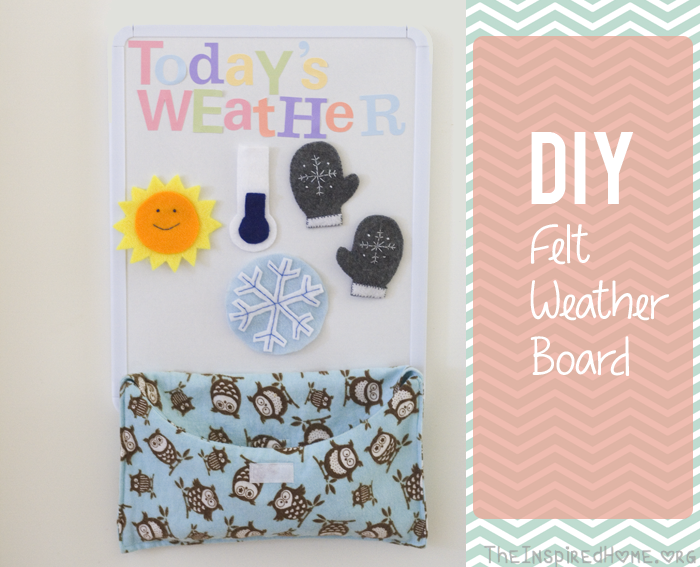
Andrea and I have a tradition of making homemade gifts for each other that spans back more than a decade. She is currently totally into felt (have you noticed?), and asked what felt thing she could make for my kids. After falling down the rabbit hole I like to call Pinterest, I gave her my idea that I wanted to build a weather board.
Things Needed:
- 8×10″ whiteboard
- Adhesive Velcro Pieces (scratchy side)
- Sheets/Scraps of felt: 1 sheet white; scraps can be used for all other colours
- Matching thread and/or hot glue
- Fabric
- Alphabet stickers
- Pouch or pencil case or bag to hold weather object choices
- Command Medium Picture Hanging Strips
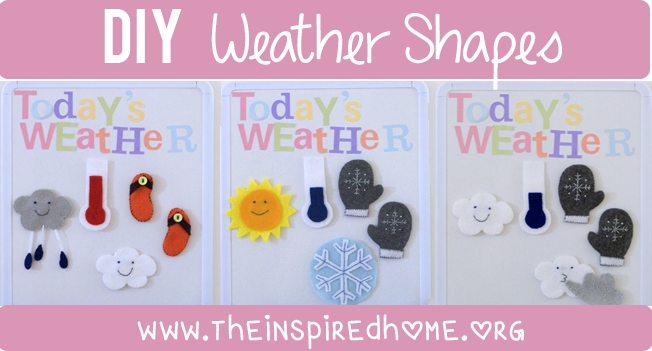
DIY: Felt Shapes
Create felt shapes to represent the types of weather you want to have as options. In Canada this time of year, it’s a lot of sunny/cold/mittens/snow!
We have:
- Cloudy
- Sunny
- Cold temperature
- Hot temperature
- Mittens
- Flip flops
- Windy
- Rainy
- Snowy
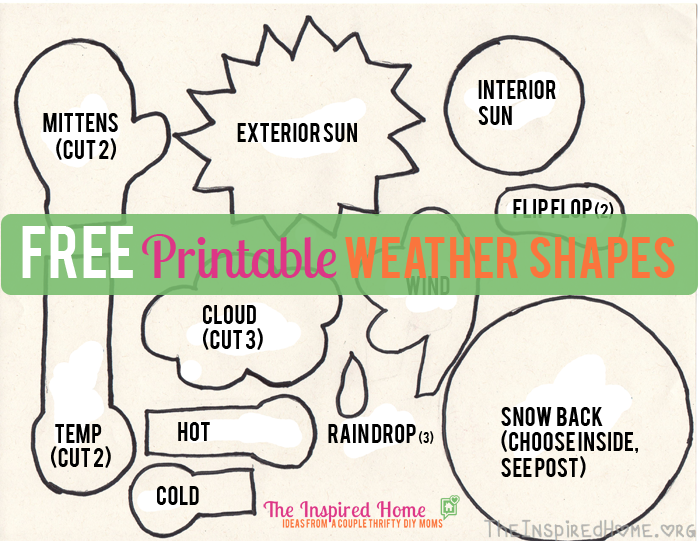
Click to download our free printable weather shapes
Andrea’s Felt Master tip: Google snowflake outline and print it out the size you want. Cut out template and staple to felt. Cut out shape and gently remove staples. Sew them or hot glue together depending on your skill level. Most shapes are double-layered. Faces are all embroidered; eyes are french knots which are much easier to do than they sound – look for a tutorial on YouTube. Raindrops are attached to white ribbon & sewn into cloud.
If you’re not crafty but think these are super cool, check out these collections on Etsy.
DIY: Display Board
Attach alphabet stickers to the white board – we used a set of scrapbooking stickers I had in my stash. When picking, make sure it has enough vowels!
Use felt shapes to gauge approximate distance needed/how many squares. Stick velcro pieces with scratchy side to board. (The felt will stick to this, but you can also add the smooth sides to your shapes if you want to!)
Use velcro to attach pouch or bag to board below to store shapes when not in use. (I upcycled a diaper/wipe pouch that a talented friend made me when Mr J was born to store them in. How cute are those owls?) My pouch had a sticky enclosure to it but it’s really not necessary!
Command Strip the board to the surface you wish to hang it on. My Command hint is that you need to pay attention to what side it says to “put to the wall” to ensure when you want to remove them that they come off cleanly.
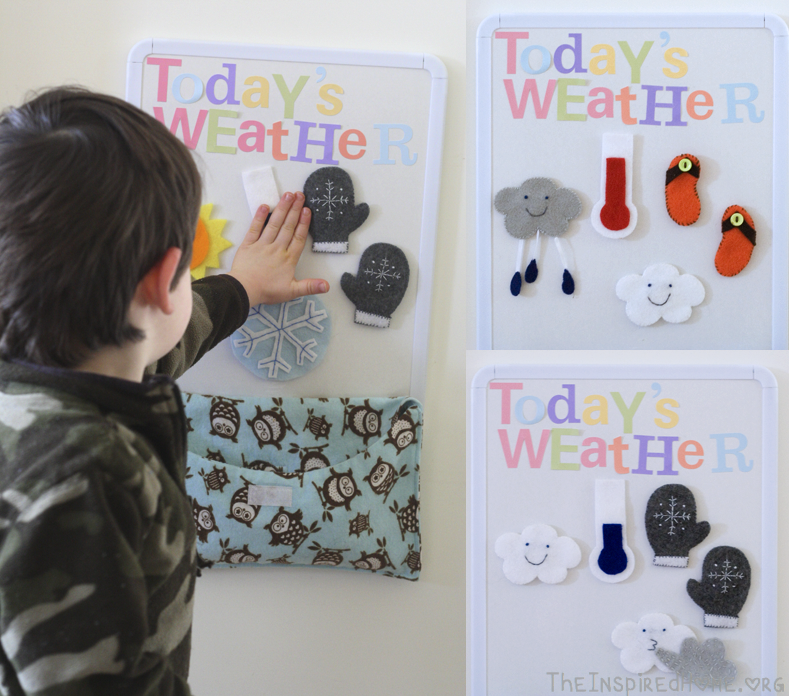
Weatherman Mr J
Mr J absolutely loves telling me the weather every day. The weather board is on the side of our large pantry. He rushes upstairs to the kitchen each morning to do it. Often I will help him look out the window or stick his head out the door to see what the weather is like. Daddy has taught him to watch the smoke from neighbour’s chimneys to see if it is windy out too. His favourite shape is “hot” (sun!), followed by “na na’s” (mittens).
Maybe a future at the Weather Network? Who knows!
Variations
- Consider adding a weather page into your quiet book.
- No room for a board? No problem – instead of velcro, use magnets and your fridge. Tape a piece of construction paper to the fridge and follow the same steps.
- Try a framed felt board or add a simple DIY felt board to your playroom where you can change the name of the day of the week & the weather.
What have you DIY’d lately that you’re proud of?
a passionate recreation coordinator by day, crazy farm mama of two by night. i live outdoors: growing my own food, camping and hiking with my border collie with two active kids in tow. when I’m not writing, I’m experimenting with recipes, and crafts – or anything else that might keep the monkeys entertained.
Leave a Reply