
Miss O has a short attention span. She wants to help in the kitchen but doesn’t want to wait around and has little patience. She wants to do it now, get it done and go play with her toys. So I try to find quick and easy recipes for her to help with. This ended up being quite successful; she was upset when we ran out of marshmallows to dip! To ease her frustration, I prepared everything while she ate her lunch. This way she wasn’t waiting on me to get things started. We did these dipped marshmallows while Little J took his afternoon nap – this is our window to do crafts uninterrupted by the little whirlwind.
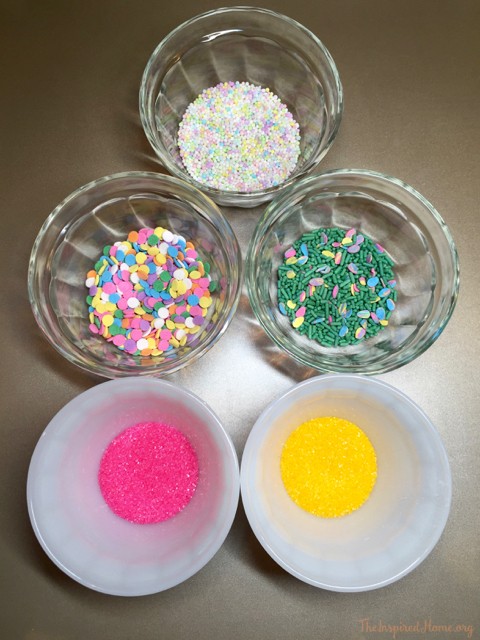
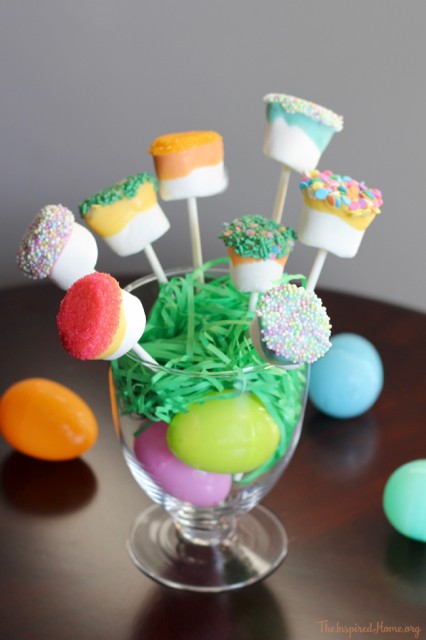
The first order of business was selecting the sprinkles. Miss O and I hit up Michaels to get some Easter sprinkles. We grabbed a container with a few different kinds such as rainbow dots, green sprinkles with little eggs, and some sanding sugar in bright colours. The pastel nonpareils were her favourite though – those were in a container on their own.
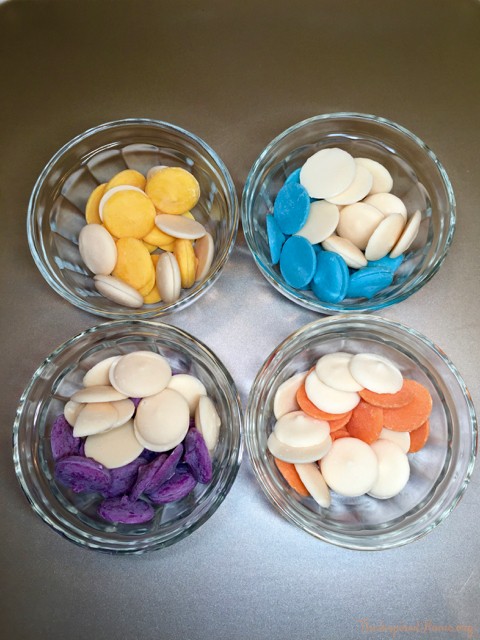
Next up was the candy melts. I think I have every colour of the rainbow in my cupboard as I love using candy melts for so many different fun recipes. You can quite easily use just one colour. You will need white as well to turn your colours a bit lighter into a lovely pastel shade. The more vibrant the colour, the more white you will need. I ended up adding more white to the purple and blue once melted as they were still quite bright.
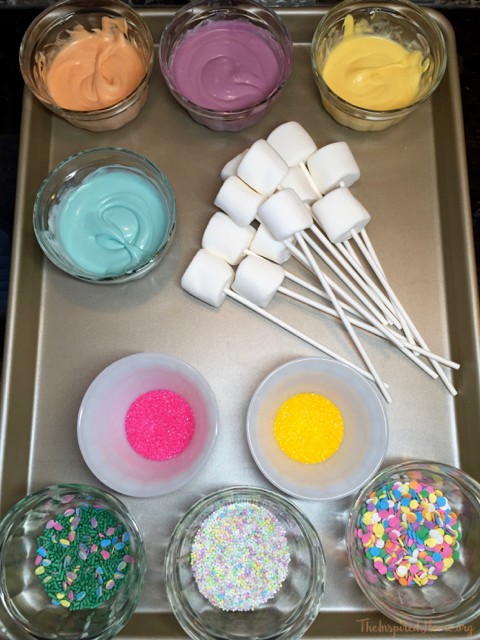
To prepare your candy melts, simply follow the instruction on the bag. Put some lollipop sticks into your jumbo marshmallows and get ready to dip! Containing everything on a cookie sheet helped to minimize the sprinkle mess, especially when Miss O started sampling…
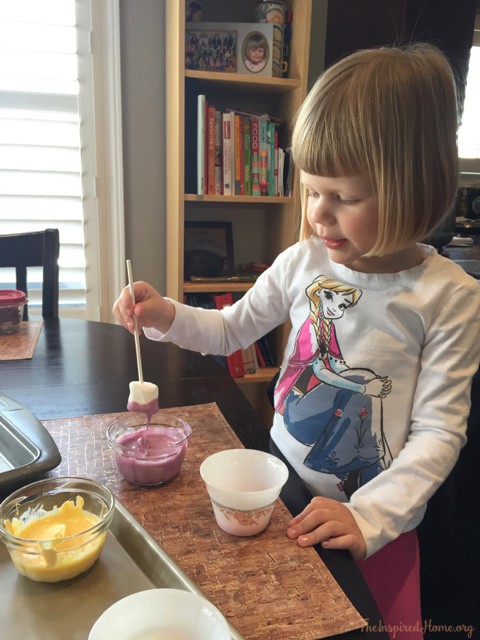
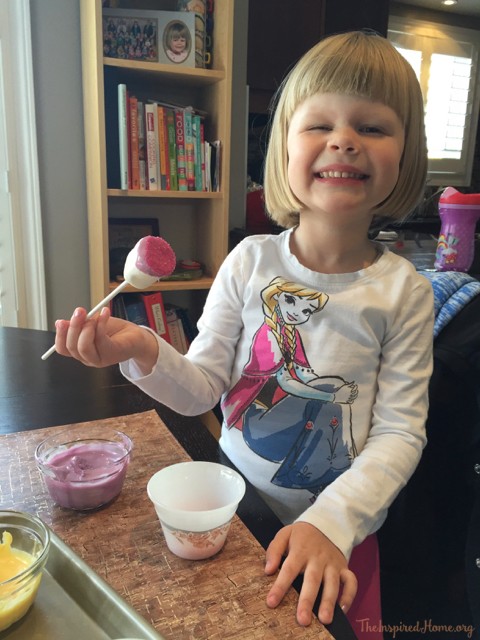
First up, select your marshmallow and dip into your candy melt colour of choice. It tends to be a bit goopy so you may need to help your little one wipe a bit of the excess off the marshmallow onto the side of the bowl. Miss O loved strategically choosing a different colour for each marshmallow.
The sanding sugar was her favourite because, well, it’s sugar! And bright pink – her fave! If you look really closely, you’ll see that her fingers are pink because she was sampling the sugar beforehand to make sure it was as delicious as it looked.
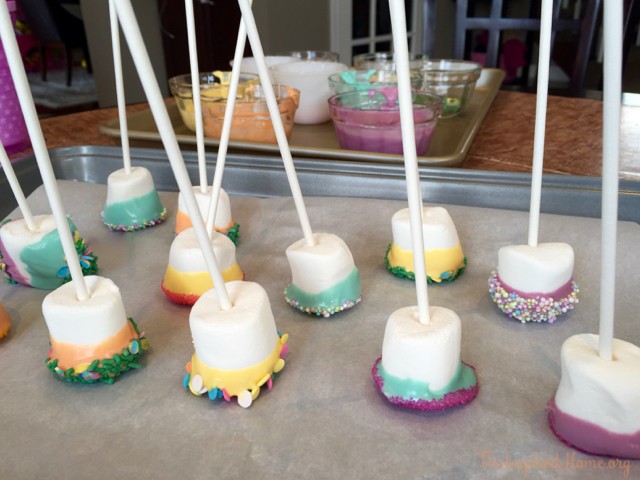
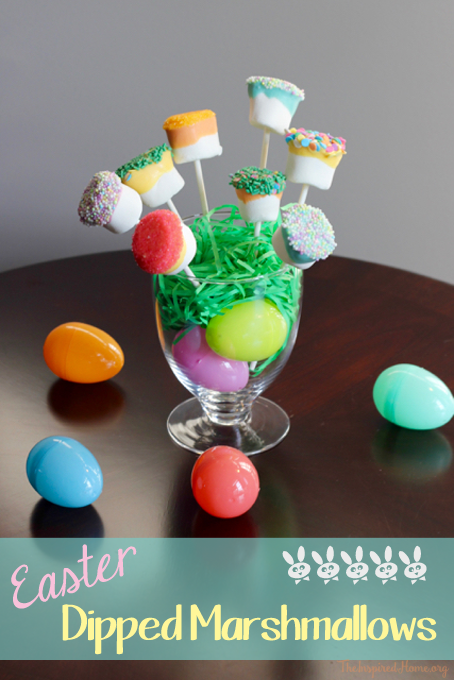
Place the marshmallows gently onto a piece of wax or parchment paper on a cookie sheet. They will harden in about 20-30 minutes just sitting out on the counter. The reason I prefer candy melts over chocolate is that once they harden, they typically stay hard, so you can store them in a container on the counter. They also don’t melt as much while eating them which means less messy fingers. Miss O prefers to just pull out the stick, eat the decorated end and toss the rest of the marshmallow. Typical kid!

Dipped Marshmallows
Ingredients
- Candy Melts in your choice of colour s
- White Candy Melts to make pastel colour s
- Lollipop sticks or paper straws
- Variety of sprinkles
- Cookie sheet with parchment or wax paper
Instructions
-
In small bowls, fill about 3/4 with candy melts - half colour, half white.
-
Melt according to package directions. Add more white as necessary to achieve desired colour.
-
Place your variety of sprinkles into small bowls.
-
Press lollipop sticks into ends of marshmallows - be sure not to pierce the opposite end.
-
Once everything is ready to go, start dipping your marshmallows into a candy melt colour - you can go as shallow or as deep as you like.
-
Wipe excess on edge of bowl.
-
Dip into your sprinkle selection.
-
Gently place marshmallow dipped-side down onto your paper-covered cookie sheet.
-
Once you have dipped all of your marshmallows, leave them to harden. This will take about 20 minutes.
-
These can be displayed or stored in a plastic container at room temperature.
Looking for more great crafts, activities, and foods to celebrate Easter? Check these out.
Looking for a simple Easter sewing project? Check out our Felt Carrot Goodie Bags.
Andrea can always be found with a new craft in front of her, a form of technology on her right and a coffee on her left. This is how she survives suburbia with her two crazy toddlers in tow.
Leave a Reply