senang303
sukses303
horus303
sboku99
spesial4d
amarta99
suryajp
monggojp
Gebuk Madrid 4-0 di Semifinal! PSG Melangkah Gagah ke Final Piala Dunia Antarklub FIFA 2025 Hari Ini
Pesta Gol PSG Hari Ini: Hantam Real Madrid 4-0, Amankan Tiket Final Piala Dunia Antarklub 2025!
Real Madrid Hancur Lebur! PSG Bantai 4-0 di Semifinal Piala Dunia Antarklub FIFA 2025, Kejutan Hari Ini
Breaking News! PSG Bikin Sejarah, Singkirkan Real Madrid 4-0 di Semifinal Piala Dunia Antarklub Hari Ini
Tak Terbendung! PSG Libas Madrid 4-0, Lolos Semifinal Piala Dunia Antarklub FIFA 2025: Sorotan Hari Ini
Cek Status BSU Lalu Berpetualang! Kejar Scatter Emas Paling Langka di Mahjong Ways 2
BSU Cair, Rezeki Melejit! Bongkar Rahasia Scatter Emas di Dunia Mahjong Ways 2
Jutaan Rupiah dari BSU? Lanjut Panen Emas di Mahjong Ways 2: Kisah Sukses Penerima!
Setelah Cek BSU kemnaker.go.id, Pecahkan Teka-teki Scatter Emas Mahjong Ways 2: Auto Untung!
BSU Datang, Sensasi Scatter Emas Mahjong Ways 2 Menanti: Siap-siap Kebanjiran Keuntungan!
Beyond The Ride: Menguak Daya Pikat Scatter Emas di Mahjong Ways 2 Bagi Penggemar Gamer Moge!
Petualangan Epik Gamer Moge: Menguak Misteri Scatter Emas di Mahjong Ways 2!
Di Balik Stang Moge: Strategi Jitu Para Gamer Meraih Kilauan Scatter Emas di Mahjong Ways 2!
Dua Dunia, Satu Tujuan: Bagaimana Gamer Moge Menaklukkan Tantangan Scatter Emas di Mahjong Ways 2!
Sensasi Koleksi: Mengapa Scatter Emas di Mahjong Ways 2 Begitu Menarik bagi Gamer Moge?
Jutawan Dadakan? Cairkan BSU di Pospay, Lalu Gas Mahjong Ways Cari Scatter Emas!
BSU Cair di Pospay? Jangan Lupa Mampir ke Mahjong Ways, Siapa Tahu Ada Scatter Emas Berlimpah!
Rahasia Saldo Meledak: Klaim BSU di Pospay, Lalu Intip Pola Mahjong Ways Berburu Scatter Emas!
Anti Boncos! Cairkan BSU Lewat Pospay, Main Mahjong Ways Pakai Trik Scatter Emas Ini!
Peluang Emas di Depan Mata! Setelah BSU Cair di Pospay, Langsung Coba Keberuntungan di Mahjong Ways & Scatter Emas!
terungkap 9 fakta mengejutkan di balik kematian misterius
rahasia jago biliar dalam 30 hari tips fundamental
chelsea vs psg bersiap hadapi dunia antarklub 2025
bsu tetap cair meski rekening bermasalah solusi mudah
samsung galaxy flip dan fold sudah bisa preorder
daftar hp android ram 16gb termurah 2025
motor matic terkece 2025 aplikasi mahjong ways
sepeda roadbike murah harga 2jutaan terbaik untuk pemula
rekomendasi smartwatch murah terbaik 2025 mahjong
mahjong ways 2 aplikasi ajaib menghasilkan 1 juta
all new honda beat ns125 rx spesifikasi lengkap
turun harga iphone12 pro juni 2025 plus
daftar 7 ipad terbaik untuk desain grafis 2025
daftar sepatu running brand lokal terbaik indonesia
daftar usaha modal kecil yang bikin cuan mahjong
yamaha aerox 155 motor impian anak muda 2025
harga iphone 13 anjlok juli 2025 tips cerdas mengumpulkan
sepatu lari asics terbaik 2025 panduan lengkap
sepeda roadbike terbaik dibawah 8juta untuk
tablet android murah harga 2 jutaan terbaik untuk anak
harga honda pcx 160 vs yamaha nmax turbo juli 2025
tampilan mirip yamaha xmax motor matic 22jutaan
laptop terbaru 2025 dengan spek ngebut dan harga dibawah 10juta
rekomendasi sepatu lari wanita untuk flat foot
psg vs real madrid pertarungan demi tiket final
honor x70 hp 2 jutaan dengan baterai besar super awet
daftar 5 mobil bekas harga 100 jutaan dengan cruise control
7 hp murah layar amoled terbaik 2025 bonus cara mahjong
7 ide usaha modal 10 jutaan yang bisa dijalankan dirumah
daftar mobil baru termurah juli 2025 spesifikasi lengkap
bsu juli 2025 telah cair segera cek apakah kamu
insiden pemukulan mas pelayaran ke driver shopeefood hebohkan
link nonton live streaming piala presiden malam ini 8 juli
honda scoopy jadi favorit gen z di jakarta fair kemayoran 2025
hp 4 jutaan kamera terbaik 2025 yang wajib kamu punya
rekomendasi 5 motor matic terkece juli 2025
rekomendasi 7 laptop gaming rtx 50 series terbaik 2025
7 hp murah ram besar baterai awet 2025
ide usaha kecil di kampung dengan modal 2 juta
cara cek bsu 2025 di pospay lewwat hp dengan modal nik
simulasi kredit motor aerox pcx dan nmax juli 2025
rekomendasi aplikasi penghasil saldo dana yang bikin kantong tebal
pilihan 10 hp gaming terbaik juli 2025 untuk bermain
laptop gaming rtx 50 series terbaik 2025 solusi sempurna
daftar stik carbon biliar premium investasi cerdas dari
5 smartwatch terbaik penghitung kalori yang bikin diet
berburu mobil bekas berkualitas dibawah 150juta
harga emas hari ini kompak turun di pegadaian
yamaha aerox turbo 2025 resmi meluncur dengan teknologi
ingin menambah modal usaha begini simulasi pinjaman
honda xr150l 2025 akhirnyta motor trail impian resmi dijual
rahasia tki tokyo tips mahjong ways 2 yang bikin kantong
tukang ojek terminal bojong gede raih 79 juta
petani sragen raih scatter hitam 2x beruntun di sukses303
penjual martabak di medan raih 85 juta dalam semalam berkat
Bandung Bergema: Rahasia Tersembunyi di Balik Performa Sempurna Persib
Gorontalo Hoki: Rahasia Saldo Dana Gratis via Misteri Scatter Hitam
Livesscore Terkini: Rahasia Scatter di Balik Skor Sepak Bola Mataram
Warga Bima Heboh: Jadwal Piala Presiden 2025 dan Rahasia Main Mahjong Ways 2
Tom Lembong Kunyah Gula Rafinasi: Viral Seperti Scatter di Sugar Rush!
Gempa 50 Kali di Jepang: Apakah Ini Mengganggu Fokus Anda pada Spin Joker Jewels?
Fakta Menarik: Mengapa Slot Gate of Olympus Trending Setelah Comeback BTS? Temukan Rahasianya!
Heboh! Telkom Luncurkan Kamera AI, Warganet Bandingkan dengan Fitur Bonus Sweet Bonanza!
Jackpot John Hunter Tak Bisa Obati Duka: Diogo Jota Tewas, Komunitas Hiburan Berduka
Lamine Yamal Jadi Inspirasi Pemain Mahjong Ways 2 di Pontianak, Ini Strategi Dapat Scatter Hitamnya
Buktikan Sendiri, Mahjong Ways 2 di MONGGOJP Banjir Scatter Hitam JP Hingga Ratusan Juta
Penjaga Pantai Bali Ungkap Rahasia Scatter Hitam di Mahjong Ways 2 di MONGGOJP
Peternak Lebah di Surabaya Ungkap Rahasia Produktivitas Scatter Hitam Mahjong Ways 2 Usai JP Ratusa Juta
Cristiano Ronaldo Resmi Perpanjang Kontrak, Sementara di Bandung Komunitas Game Ramai Jackpot Scatter Hitam Mahjong Ways 2 MONGGOJP
Satpam Hotel di Bali Jackpot Rp132.000.000 Langsung Bengong Setelah 3 Scatter Hitam Turun di Mahjong Ways 2
MONGGOJP Hadirkan Inovasi Terbaru untuk JP Scatter Hitam Mahjong Ways 2
Penjual Bakso Kini Jadi Bos Besar Usai Raup Rp142.000.000 dari Scatter Hitam Mahjong Ways Monggojp
Rahasia Sukses Peternak Bebek Scatter Hitam Mahjong Ways 2 PG Soft Sumber Penghasilan Tambahan
Turnamen Squid Game Edition Kejar Scatter Hitam di Mahjong Ways PG Soft MONGGOJP
Peternak Lele Ini Sukses Ganda Berkat Scatter Hitam & Mahjong Ways 2 PG Soft
Tukang Bubur Raup Rp121.000.000 Berkat Scatter Hitam Mahjong Ways 2 di MONGGOJP
Wayan Pria Asal Bali Jackpot 3 Scatter Hitam Mahjong Ways 2 Raup Rp120.000.000 Tanpa Pola-Pola
Gara-gara Scatter Hitam Mahjong Ways 2 MONGGOJP, Tukang Parkir Kute Bali Borong Vila
Jackpot Scatter Hitam Mahjong Ways 2 Rp83.000.000 Pak Komang Asal Bali Main Dengan Pola Sendiri
Warga Desa Solo Ramai-Ramai Gabung di MonggoJP Usai Ada yang Raup Rp145.000.000 dari 3 Scatter Hitam Mahjong Ways 2
Main Mahjong Ways 2 Coba-Coba Endin Nya Malah Jackpot Scatter Hitam Ratusan Juta
PG Soft Berkahi Seniman Bali Scatter Hitam Mahjong Ways 2 Ubah Nasib dalam Semalam
Keajaiban Kebun Sawit: Kuli Bangunan Temukan Emas Setelah Berani dengan Modal Scatter Hitam PG Soft
Kisah Tak Terduga: Tukang Parkir Dapatkan Motor Bekas Impian Setelah Main Scatter Hitam Mahjong Ways 2
Malam Spesial Ojek Online: Sorak Sorai Piala Presiden Diiringi Sensasi Mahjong Ways 2 PGSoft
Jejak Emas di Kebun Sawit: Kuli Bangunan Ungkap Kekayaan Terpendam Berkat Modal Scatter Hitam PG Soft
Bukan Sulap Bukan Sihir! Tukang Parkir Beli Motor Murah Berkat Kejutan Scatter Hitam Mahjong Ways 2
Cerita Unik Ojek Online: Saat Gol Indah Piala Presiden Bertemu Kombo Mahjong Ways 2 PGSoft
Tak Disangka! Kuli Bangunan Kebun Sawit Mendadak Kaya Raya Berkat Emas Modal Scatter Hitam PG Soft
Lebih dari Sekadar Kos Murah: Mahasiswa Temukan Peluang di Balik Scatter Hitam Mahjong Ways 2 PG SOFT
Bikin Rekan Ojol Terpukau: Cara Dapatkan Motor Bekas Murah Plus Nikmati Gates of Olympus Pragmatic Play
Solusi Gaming Hemat: Dapatkan HP Gaming Impian dengan Bantuan Sweet Bonanza Pragmatic Play
Performa Maksimal, Harga Minimal: Taklukkan Wild Bandito PGSOFT dengan Laptop Gaming Terjangkau!
Rezeki BSU BPJS Ketenagakerjaan Cair? Langsung Nobar Piala Dunia Antarklub bareng Kawan!
Mahasiswa Hemat Cuan: Rahasia Kos Terjangkau dan Sensasi Scatter Hitam Mahjong Ways 2 PG SOFT
Kunci Sukses Ojek Online: Dari Motor Bekas Ramah Kantong Hingga Kisah Gates of Olympus Pragmatic Play
Rahasia Gamer Cerdas: Beli HP Gaming Murah Berkat Sensasi Sweet Bonanza Pragmatic Play
Upgrade Pengalamanmu: Jelajahi Dunia Wild Bandito PGSOFT dan Game AAA dengan Laptop Gaming Murah
Kabar Gembira BSU BPJS Ketenagakerjaan & Keseruan Piala Dunia Antarklub: Temukan Tempat Nobar Terbaikmu!
Strategi Cerdas Mahasiswa: Kos Murah dan Keberuntungan Scatter Hitam Mahjong Ways 2 PG SOFT
Ojek Online Hemat Modal: Rahasia Beli Motor Bekas dan Sensasi Gates Olympus Pragmatic Play
Modal Minim, HP Gaming Mantap: Bagaimana Sweet Bonanza Pragmatic Play Bisa Wujudkan Itu?
Main Game AAA dan Wild Bandito PGSOFT Tanpa Kantong Bolong? Ini Dia Laptop Gaming Pilihan Terbaikmu!
Jangan Lewatkan! Info BSU BPJS Ketenagakerjaan Terbaru Sambil Rencanakan Nobar Piala Dunia Antarklub
slot gacor
slot gacor
slot gacor
slot gacor
slot gacor
slot gacor
slot gacor
slot gacor
slot gacor
slot gacor
slot gacor
slot gacor
slot gacor
slot gacor
Bukan Cuma Antar Penumpang Driver Ini Panen Maxwin Berkat Mahjong Ways 2 PG SOFT
Juragan Muda Makin Tajir Rahasia di Balik Scatter Hitam yang Bikin Usaha Melejit
Juragan Emas Dadakan Untung Wild Bandito PGSOFT dan Langsung Borong Emas Antam
Dari Cuan Gates of Olympus Pragmatic Play Lahir Rumah Makan Viral Omzet Jutaan
Modal Kecil Ojol Untung Mahjong Ways 2 PG SOFT Strategi Cerdas Driver Ini Raih Jutaan Rupiah
Dari Aspal Ojol ke Jackpot Mahjong Ways 2 PG SOFT Kisah Sukses Driver Ini Bikin Melongo
Dari Gamer Jadi Pebisnis Sukses Begini Cara Pengusaha Muda Manfaatkan Scatter Hitam
Anti Boncos Beli Emas ANTAM Cara Penggemar Wild Bandito PGSOFT Wujudkan Koleksi Emas
Zeus Resto Kisah Pengusaha Muda Buka Rumah Makan Viral Berkat Gates of Olympus Pragmatic Play
Modal Main Game Balik Modal Ratusan Juta Kisah Pengusaha Muda Berkat Scatter Hitam
Destinasi Bali Murah Jelajahi Surga Tersembunyi dengan Strategi Mahjong Ways 2 PGSOFT
Dari Antam Hingga Wild Bandito PG SOFT Kisah Pencarian Keberuntungan dalam Ekspedisi Harta Karun
Resep Sukses Warung Makan Racik Profit Sehebat Kombinasi Game Penghasil Uang Scatter Hitam
Jejak Petualang Hemat di Bali Temukan Keberuntungan di Setiap Sudut Terinspirasi Mahjong Ways 2 PGSOFT
Tambang Emas Antam Membongkar Potensi Kekayaan Mirip Kombinasi Unggulan Wild Bandito PG SOFT
Modal Kecil Cuan Maksimal Bangun Warung Makan ala Game Penghasil Uang Scatter Hitam
Panduan Wisata Bali Irit Dapatkan Pengalaman Terbaik Bak Bonus Mahjong Ways 2 PGSOFT
Dari Dapur Warung ke Saldo Rekening Kiat Jitu Mirip Game Penghasil Uang Scatter Hitam
Kisah Budi Tukang Parkir Handal Bagaimana Permainan Mahjong Ways 2 PG SOFT Menemani Rehat Sorenya
Kisah Anya Staf Shopee Produktivitas Kantor dan Rahasia Kemenangan di Permainan Wild Bandito PG SOFT
Pengalaman Bima Dari Mengantar Paket Hingga Kemenangan Sensasional di Mahjong Ways 2 PGSOFT
Rezeki Tak Terduga Pak Sugi Nasi Kuningnya Laris Manis Berkat Rahasia Scatter Hitam PGSOFT
Sukses Usaha Viral Rudi Bermula dari Hobi Game Penghasil Uang Scatter Hitam
Strategi Cerdas Rina Investasi Emas ANTAM Dimulai dari Kemenangan Gates of Olympus Pragmatic Play
Kisah Bu Ani Rezeki BSU BPJS Ketenagakerjaan Datang Disambut Petir Permainan Gates of Olympus
Kisah Sukses Pak Tino Sarang Walet Melesat Berkat Modal dari Sweet Bonanza Pragmatic Play
Rahasianya Makmur Punya Kebun Sawit Luas Berkat Game Penghasil Uang Sweet Bonanza
kujangbet 168
pacutoto 99 pacutoto 99 login pacutoto99 link alternatif pacutoto99 login sabung ayam pacutoto99 pacutoto99 slot pacutoto99 gacor pacutoto99 togel pacutoto99 slot anchorfly sportsepreneur visitomahafamilydental daladestroirecords africarenewableenergyawards sandsandpalms computerplanets njmetalroofing shanailmonick jun-deegan-mold-remediation superiorwastedisposal egyptotravel egyptotravel uthara serdiconi cliniquealbassar alfouzantransport kabatravel catoleemfoco uticafoods srisharadavedalayam sparelaxia feja feja shaheedeazamnews raus-global localenergyaudits unitedinstituteofbusiness maalichfarm keyviewadv sterlingfinancepartners raethgroup glhuntfoundationrepairofhondo dedicatedstaffingservices dedicatedstaffingservices skedaddlewildlife maeeempreendedora tamingautism esfamunifoundation risingabovethestorms dikomba rauthla denherdergroup abhilegal advankitsahu advocatepraveenmishradivorcelawyer akcentassociates radiantreve crazykidstudio psycora media-sellers sumanrai0 diftexcoco yovizag asiadigitallift cairodaytrip hawqaf nfcvault clubdecampobellavista coveprojects berlindomitrautama kopko lpm-support attorneysyonkers attorneysyonkers bemhospedado isabelacolucci shoisrestaurant maush alus milogloballogistics eticaretia
agidenim boitronthucpham keodannhanh mobochiunhiet raulanton mondebiscuit deafdw aaii adisankarafoundation adoremission airwingacademy amardeepeyecare amigotech aruvippurammadom asikerala bharatbhavankerala bluechipwll boffincontrol brookeportglobal carelinks chembaitrust divinesupermarket dmintllc dranupama drharishchandran drsunilmenon drvineethvascularsurgery flourishinternational genetika getsetgolearning gforgenius globalsofttvm hometech iase imapeps indianthozhilali intuckerala jabreen jandjassociate jointsolution kariyamkulathamma karunyaguidance kksudhakaran learningmask malankaraboyshome casaruralcazorla jaenrural agidenim diskubota <
praiseads olgaarce dynamicvishva compuretail maitreshygiene rumahspabali faevyt sada styledebates media polinizadores <
uve transcampos stefanruiz fortheloveofchickens dolawofattraction thecomfysofastudio relax n travel aismarine indonesia update amitabhshah papyrus travel caiotirapaniadvogados cartonwega cave chafarizdasquatroestacoes cirurgiadojoelhojuizdefora clidef clinicaramosjf confiancadedetizadora copfisioterapia pururucadetiradentes residencialvistaalegre rodrigueseseixas sagrescriativa suzanaazevedo tidimarhospitalar titaniumgoiabeiras trackaligner yuks gcdharamshala dimi group faro digital inspiro isos media group monggojp
sukses303 monggojp amarta99 sukses303 monggojp monggojp monggojp
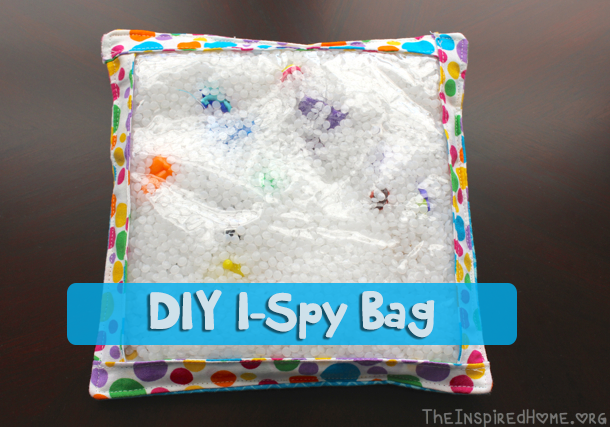
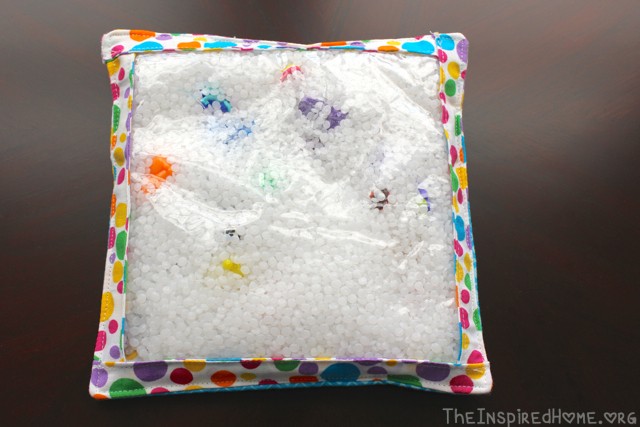
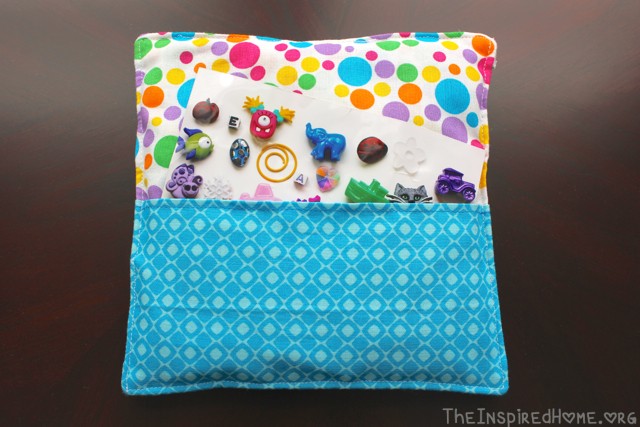
DIY I-Spy Bag
senang303
sukses303
horus303
sboku99
spesial4d
amarta99
suryajp
monggojp
Gebuk Madrid 4-0 di Semifinal! PSG Melangkah Gagah ke Final Piala Dunia Antarklub FIFA 2025 Hari Ini
Pesta Gol PSG Hari Ini: Hantam Real Madrid 4-0, Amankan Tiket Final Piala Dunia Antarklub 2025!
Real Madrid Hancur Lebur! PSG Bantai 4-0 di Semifinal Piala Dunia Antarklub FIFA 2025, Kejutan Hari Ini
Breaking News! PSG Bikin Sejarah, Singkirkan Real Madrid 4-0 di Semifinal Piala Dunia Antarklub Hari Ini
Tak Terbendung! PSG Libas Madrid 4-0, Lolos Semifinal Piala Dunia Antarklub FIFA 2025: Sorotan Hari Ini
Cek Status BSU Lalu Berpetualang! Kejar Scatter Emas Paling Langka di Mahjong Ways 2
BSU Cair, Rezeki Melejit! Bongkar Rahasia Scatter Emas di Dunia Mahjong Ways 2
Jutaan Rupiah dari BSU? Lanjut Panen Emas di Mahjong Ways 2: Kisah Sukses Penerima!
Setelah Cek BSU kemnaker.go.id, Pecahkan Teka-teki Scatter Emas Mahjong Ways 2: Auto Untung!
BSU Datang, Sensasi Scatter Emas Mahjong Ways 2 Menanti: Siap-siap Kebanjiran Keuntungan!
Beyond The Ride: Menguak Daya Pikat Scatter Emas di Mahjong Ways 2 Bagi Penggemar Gamer Moge!
Petualangan Epik Gamer Moge: Menguak Misteri Scatter Emas di Mahjong Ways 2!
Di Balik Stang Moge: Strategi Jitu Para Gamer Meraih Kilauan Scatter Emas di Mahjong Ways 2!
Dua Dunia, Satu Tujuan: Bagaimana Gamer Moge Menaklukkan Tantangan Scatter Emas di Mahjong Ways 2!
Sensasi Koleksi: Mengapa Scatter Emas di Mahjong Ways 2 Begitu Menarik bagi Gamer Moge?
Jutawan Dadakan? Cairkan BSU di Pospay, Lalu Gas Mahjong Ways Cari Scatter Emas!
BSU Cair di Pospay? Jangan Lupa Mampir ke Mahjong Ways, Siapa Tahu Ada Scatter Emas Berlimpah!
Rahasia Saldo Meledak: Klaim BSU di Pospay, Lalu Intip Pola Mahjong Ways Berburu Scatter Emas!
Anti Boncos! Cairkan BSU Lewat Pospay, Main Mahjong Ways Pakai Trik Scatter Emas Ini!
Peluang Emas di Depan Mata! Setelah BSU Cair di Pospay, Langsung Coba Keberuntungan di Mahjong Ways & Scatter Emas!
terungkap 9 fakta mengejutkan di balik kematian misterius
rahasia jago biliar dalam 30 hari tips fundamental
chelsea vs psg bersiap hadapi dunia antarklub 2025
bsu tetap cair meski rekening bermasalah solusi mudah
samsung galaxy flip dan fold sudah bisa preorder
daftar hp android ram 16gb termurah 2025
motor matic terkece 2025 aplikasi mahjong ways
sepeda roadbike murah harga 2jutaan terbaik untuk pemula
rekomendasi smartwatch murah terbaik 2025 mahjong
mahjong ways 2 aplikasi ajaib menghasilkan 1 juta
all new honda beat ns125 rx spesifikasi lengkap
turun harga iphone12 pro juni 2025 plus
daftar 7 ipad terbaik untuk desain grafis 2025
daftar sepatu running brand lokal terbaik indonesia
daftar usaha modal kecil yang bikin cuan mahjong
yamaha aerox 155 motor impian anak muda 2025
harga iphone 13 anjlok juli 2025 tips cerdas mengumpulkan
sepatu lari asics terbaik 2025 panduan lengkap
sepeda roadbike terbaik dibawah 8juta untuk
tablet android murah harga 2 jutaan terbaik untuk anak
harga honda pcx 160 vs yamaha nmax turbo juli 2025
tampilan mirip yamaha xmax motor matic 22jutaan
laptop terbaru 2025 dengan spek ngebut dan harga dibawah 10juta
rekomendasi sepatu lari wanita untuk flat foot
psg vs real madrid pertarungan demi tiket final
honor x70 hp 2 jutaan dengan baterai besar super awet
daftar 5 mobil bekas harga 100 jutaan dengan cruise control
7 hp murah layar amoled terbaik 2025 bonus cara mahjong
7 ide usaha modal 10 jutaan yang bisa dijalankan dirumah
daftar mobil baru termurah juli 2025 spesifikasi lengkap
bsu juli 2025 telah cair segera cek apakah kamu
insiden pemukulan mas pelayaran ke driver shopeefood hebohkan
link nonton live streaming piala presiden malam ini 8 juli
honda scoopy jadi favorit gen z di jakarta fair kemayoran 2025
hp 4 jutaan kamera terbaik 2025 yang wajib kamu punya
rekomendasi 5 motor matic terkece juli 2025
rekomendasi 7 laptop gaming rtx 50 series terbaik 2025
7 hp murah ram besar baterai awet 2025
ide usaha kecil di kampung dengan modal 2 juta
cara cek bsu 2025 di pospay lewwat hp dengan modal nik
simulasi kredit motor aerox pcx dan nmax juli 2025
rekomendasi aplikasi penghasil saldo dana yang bikin kantong tebal
pilihan 10 hp gaming terbaik juli 2025 untuk bermain
laptop gaming rtx 50 series terbaik 2025 solusi sempurna
daftar stik carbon biliar premium investasi cerdas dari
5 smartwatch terbaik penghitung kalori yang bikin diet
berburu mobil bekas berkualitas dibawah 150juta
harga emas hari ini kompak turun di pegadaian
yamaha aerox turbo 2025 resmi meluncur dengan teknologi
ingin menambah modal usaha begini simulasi pinjaman
honda xr150l 2025 akhirnyta motor trail impian resmi dijual
rahasia tki tokyo tips mahjong ways 2 yang bikin kantong
tukang ojek terminal bojong gede raih 79 juta
petani sragen raih scatter hitam 2x beruntun di sukses303
penjual martabak di medan raih 85 juta dalam semalam berkat
Bandung Bergema: Rahasia Tersembunyi di Balik Performa Sempurna Persib
Gorontalo Hoki: Rahasia Saldo Dana Gratis via Misteri Scatter Hitam
Livesscore Terkini: Rahasia Scatter di Balik Skor Sepak Bola Mataram
Warga Bima Heboh: Jadwal Piala Presiden 2025 dan Rahasia Main Mahjong Ways 2
Tom Lembong Kunyah Gula Rafinasi: Viral Seperti Scatter di Sugar Rush!
Gempa 50 Kali di Jepang: Apakah Ini Mengganggu Fokus Anda pada Spin Joker Jewels?
Fakta Menarik: Mengapa Slot Gate of Olympus Trending Setelah Comeback BTS? Temukan Rahasianya!
Heboh! Telkom Luncurkan Kamera AI, Warganet Bandingkan dengan Fitur Bonus Sweet Bonanza!
Jackpot John Hunter Tak Bisa Obati Duka: Diogo Jota Tewas, Komunitas Hiburan Berduka
Lamine Yamal Jadi Inspirasi Pemain Mahjong Ways 2 di Pontianak, Ini Strategi Dapat Scatter Hitamnya
Buktikan Sendiri, Mahjong Ways 2 di MONGGOJP Banjir Scatter Hitam JP Hingga Ratusan Juta
Penjaga Pantai Bali Ungkap Rahasia Scatter Hitam di Mahjong Ways 2 di MONGGOJP
Peternak Lebah di Surabaya Ungkap Rahasia Produktivitas Scatter Hitam Mahjong Ways 2 Usai JP Ratusa Juta
Cristiano Ronaldo Resmi Perpanjang Kontrak, Sementara di Bandung Komunitas Game Ramai Jackpot Scatter Hitam Mahjong Ways 2 MONGGOJP
Satpam Hotel di Bali Jackpot Rp132.000.000 Langsung Bengong Setelah 3 Scatter Hitam Turun di Mahjong Ways 2
MONGGOJP Hadirkan Inovasi Terbaru untuk JP Scatter Hitam Mahjong Ways 2
Penjual Bakso Kini Jadi Bos Besar Usai Raup Rp142.000.000 dari Scatter Hitam Mahjong Ways Monggojp
Rahasia Sukses Peternak Bebek Scatter Hitam Mahjong Ways 2 PG Soft Sumber Penghasilan Tambahan
Turnamen Squid Game Edition Kejar Scatter Hitam di Mahjong Ways PG Soft MONGGOJP
Peternak Lele Ini Sukses Ganda Berkat Scatter Hitam & Mahjong Ways 2 PG Soft
Tukang Bubur Raup Rp121.000.000 Berkat Scatter Hitam Mahjong Ways 2 di MONGGOJP
Wayan Pria Asal Bali Jackpot 3 Scatter Hitam Mahjong Ways 2 Raup Rp120.000.000 Tanpa Pola-Pola
Gara-gara Scatter Hitam Mahjong Ways 2 MONGGOJP, Tukang Parkir Kute Bali Borong Vila
Jackpot Scatter Hitam Mahjong Ways 2 Rp83.000.000 Pak Komang Asal Bali Main Dengan Pola Sendiri
Warga Desa Solo Ramai-Ramai Gabung di MonggoJP Usai Ada yang Raup Rp145.000.000 dari 3 Scatter Hitam Mahjong Ways 2
Main Mahjong Ways 2 Coba-Coba Endin Nya Malah Jackpot Scatter Hitam Ratusan Juta
PG Soft Berkahi Seniman Bali Scatter Hitam Mahjong Ways 2 Ubah Nasib dalam Semalam
Keajaiban Kebun Sawit: Kuli Bangunan Temukan Emas Setelah Berani dengan Modal Scatter Hitam PG Soft
Kisah Tak Terduga: Tukang Parkir Dapatkan Motor Bekas Impian Setelah Main Scatter Hitam Mahjong Ways 2
Malam Spesial Ojek Online: Sorak Sorai Piala Presiden Diiringi Sensasi Mahjong Ways 2 PGSoft
Jejak Emas di Kebun Sawit: Kuli Bangunan Ungkap Kekayaan Terpendam Berkat Modal Scatter Hitam PG Soft
Bukan Sulap Bukan Sihir! Tukang Parkir Beli Motor Murah Berkat Kejutan Scatter Hitam Mahjong Ways 2
Cerita Unik Ojek Online: Saat Gol Indah Piala Presiden Bertemu Kombo Mahjong Ways 2 PGSoft
Tak Disangka! Kuli Bangunan Kebun Sawit Mendadak Kaya Raya Berkat Emas Modal Scatter Hitam PG Soft
Lebih dari Sekadar Kos Murah: Mahasiswa Temukan Peluang di Balik Scatter Hitam Mahjong Ways 2 PG SOFT
Bikin Rekan Ojol Terpukau: Cara Dapatkan Motor Bekas Murah Plus Nikmati Gates of Olympus Pragmatic Play
Solusi Gaming Hemat: Dapatkan HP Gaming Impian dengan Bantuan Sweet Bonanza Pragmatic Play
Performa Maksimal, Harga Minimal: Taklukkan Wild Bandito PGSOFT dengan Laptop Gaming Terjangkau!
Rezeki BSU BPJS Ketenagakerjaan Cair? Langsung Nobar Piala Dunia Antarklub bareng Kawan!
Mahasiswa Hemat Cuan: Rahasia Kos Terjangkau dan Sensasi Scatter Hitam Mahjong Ways 2 PG SOFT
Kunci Sukses Ojek Online: Dari Motor Bekas Ramah Kantong Hingga Kisah Gates of Olympus Pragmatic Play
Rahasia Gamer Cerdas: Beli HP Gaming Murah Berkat Sensasi Sweet Bonanza Pragmatic Play
Upgrade Pengalamanmu: Jelajahi Dunia Wild Bandito PGSOFT dan Game AAA dengan Laptop Gaming Murah
Kabar Gembira BSU BPJS Ketenagakerjaan & Keseruan Piala Dunia Antarklub: Temukan Tempat Nobar Terbaikmu!
Strategi Cerdas Mahasiswa: Kos Murah dan Keberuntungan Scatter Hitam Mahjong Ways 2 PG SOFT
Ojek Online Hemat Modal: Rahasia Beli Motor Bekas dan Sensasi Gates Olympus Pragmatic Play
Modal Minim, HP Gaming Mantap: Bagaimana Sweet Bonanza Pragmatic Play Bisa Wujudkan Itu?
Main Game AAA dan Wild Bandito PGSOFT Tanpa Kantong Bolong? Ini Dia Laptop Gaming Pilihan Terbaikmu!
Jangan Lewatkan! Info BSU BPJS Ketenagakerjaan Terbaru Sambil Rencanakan Nobar Piala Dunia Antarklub
slot gacor
slot gacor
slot gacor
slot gacor
slot gacor
slot gacor
slot gacor
slot gacor
slot gacor
slot gacor
slot gacor
slot gacor
slot gacor
slot gacor
Bukan Cuma Antar Penumpang Driver Ini Panen Maxwin Berkat Mahjong Ways 2 PG SOFT
Juragan Muda Makin Tajir Rahasia di Balik Scatter Hitam yang Bikin Usaha Melejit
Juragan Emas Dadakan Untung Wild Bandito PGSOFT dan Langsung Borong Emas Antam
Dari Cuan Gates of Olympus Pragmatic Play Lahir Rumah Makan Viral Omzet Jutaan
Modal Kecil Ojol Untung Mahjong Ways 2 PG SOFT Strategi Cerdas Driver Ini Raih Jutaan Rupiah
Dari Aspal Ojol ke Jackpot Mahjong Ways 2 PG SOFT Kisah Sukses Driver Ini Bikin Melongo
Dari Gamer Jadi Pebisnis Sukses Begini Cara Pengusaha Muda Manfaatkan Scatter Hitam
Anti Boncos Beli Emas ANTAM Cara Penggemar Wild Bandito PGSOFT Wujudkan Koleksi Emas
Zeus Resto Kisah Pengusaha Muda Buka Rumah Makan Viral Berkat Gates of Olympus Pragmatic Play
Modal Main Game Balik Modal Ratusan Juta Kisah Pengusaha Muda Berkat Scatter Hitam
Destinasi Bali Murah Jelajahi Surga Tersembunyi dengan Strategi Mahjong Ways 2 PGSOFT
Dari Antam Hingga Wild Bandito PG SOFT Kisah Pencarian Keberuntungan dalam Ekspedisi Harta Karun
Resep Sukses Warung Makan Racik Profit Sehebat Kombinasi Game Penghasil Uang Scatter Hitam
Jejak Petualang Hemat di Bali Temukan Keberuntungan di Setiap Sudut Terinspirasi Mahjong Ways 2 PGSOFT
Tambang Emas Antam Membongkar Potensi Kekayaan Mirip Kombinasi Unggulan Wild Bandito PG SOFT
Modal Kecil Cuan Maksimal Bangun Warung Makan ala Game Penghasil Uang Scatter Hitam
Panduan Wisata Bali Irit Dapatkan Pengalaman Terbaik Bak Bonus Mahjong Ways 2 PGSOFT
Dari Dapur Warung ke Saldo Rekening Kiat Jitu Mirip Game Penghasil Uang Scatter Hitam
Kisah Budi Tukang Parkir Handal Bagaimana Permainan Mahjong Ways 2 PG SOFT Menemani Rehat Sorenya
Kisah Anya Staf Shopee Produktivitas Kantor dan Rahasia Kemenangan di Permainan Wild Bandito PG SOFT
Pengalaman Bima Dari Mengantar Paket Hingga Kemenangan Sensasional di Mahjong Ways 2 PGSOFT
Rezeki Tak Terduga Pak Sugi Nasi Kuningnya Laris Manis Berkat Rahasia Scatter Hitam PGSOFT
Sukses Usaha Viral Rudi Bermula dari Hobi Game Penghasil Uang Scatter Hitam
Strategi Cerdas Rina Investasi Emas ANTAM Dimulai dari Kemenangan Gates of Olympus Pragmatic Play
Kisah Bu Ani Rezeki BSU BPJS Ketenagakerjaan Datang Disambut Petir Permainan Gates of Olympus
Kisah Sukses Pak Tino Sarang Walet Melesat Berkat Modal dari Sweet Bonanza Pragmatic Play
Rahasianya Makmur Punya Kebun Sawit Luas Berkat Game Penghasil Uang Sweet Bonanza
kujangbet 168
pacutoto 99 pacutoto 99 login pacutoto99 link alternatif pacutoto99 login sabung ayam pacutoto99 pacutoto99 slot pacutoto99 gacor pacutoto99 togel pacutoto99 slot anchorfly sportsepreneur visitomahafamilydental daladestroirecords africarenewableenergyawards sandsandpalms computerplanets njmetalroofing shanailmonick jun-deegan-mold-remediation superiorwastedisposal egyptotravel egyptotravel uthara serdiconi cliniquealbassar alfouzantransport kabatravel catoleemfoco uticafoods srisharadavedalayam sparelaxia feja feja shaheedeazamnews raus-global localenergyaudits unitedinstituteofbusiness maalichfarm keyviewadv sterlingfinancepartners raethgroup glhuntfoundationrepairofhondo dedicatedstaffingservices dedicatedstaffingservices skedaddlewildlife maeeempreendedora tamingautism esfamunifoundation risingabovethestorms dikomba rauthla denherdergroup abhilegal advankitsahu advocatepraveenmishradivorcelawyer akcentassociates radiantreve crazykidstudio psycora media-sellers sumanrai0 diftexcoco yovizag asiadigitallift cairodaytrip hawqaf nfcvault clubdecampobellavista coveprojects berlindomitrautama kopko lpm-support attorneysyonkers attorneysyonkers bemhospedado isabelacolucci shoisrestaurant maush alus milogloballogistics eticaretia
agidenim boitronthucpham keodannhanh mobochiunhiet raulanton mondebiscuit deafdw aaii adisankarafoundation adoremission airwingacademy amardeepeyecare amigotech aruvippurammadom asikerala bharatbhavankerala bluechipwll boffincontrol brookeportglobal carelinks chembaitrust divinesupermarket dmintllc dranupama drharishchandran drsunilmenon drvineethvascularsurgery flourishinternational genetika getsetgolearning gforgenius globalsofttvm hometech iase imapeps indianthozhilali intuckerala jabreen jandjassociate jointsolution kariyamkulathamma karunyaguidance kksudhakaran learningmask malankaraboyshome casaruralcazorla jaenrural agidenim diskubota <
praiseads olgaarce dynamicvishva compuretail maitreshygiene rumahspabali faevyt sada styledebates media polinizadores <
uve transcampos stefanruiz fortheloveofchickens dolawofattraction thecomfysofastudio relax n travel aismarine indonesia update amitabhshah papyrus travel caiotirapaniadvogados cartonwega cave chafarizdasquatroestacoes cirurgiadojoelhojuizdefora clidef clinicaramosjf confiancadedetizadora copfisioterapia pururucadetiradentes residencialvistaalegre rodrigueseseixas sagrescriativa suzanaazevedo tidimarhospitalar titaniumgoiabeiras trackaligner yuks gcdharamshala dimi group faro digital inspiro isos media group monggojp
sukses303 monggojp amarta99 sukses303 monggojp monggojp monggojp


Leave a Reply