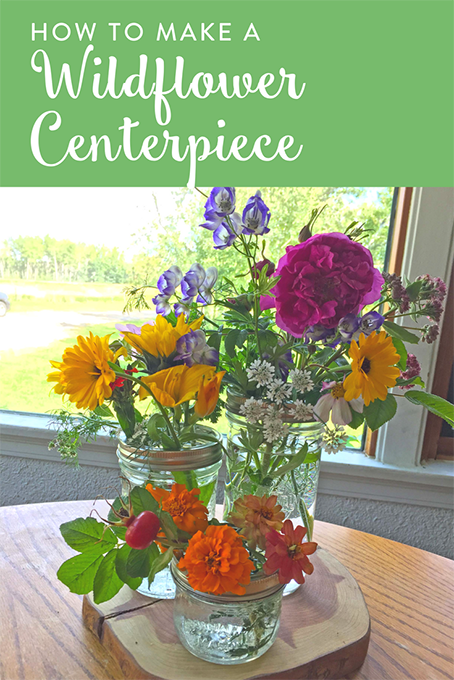
How to Make a Wildflower Centerpiece
It’s that time of year where our property just blooms in wildflowers. Both flowers we’ve planted as well as plants the birds have brought for our enjoyment. Although I typically enjoy all of these outside, I also like to bring a little bit of pretty indoors to enjoy too. Unlike my sister, who is THE flower arranger (indeed, she even owns her own flower shop), I need a little remedial help.
I’m also sort of anti-vase. Vases need a lot of flowers to make them look truly stunning, and in my garden, I may only have a few stems of this and that. I needed a smaller solution. Although I had been using mason jars, they didn’t really stand up the stems in a way that looked great.
Fast forward, I attended a blog conference where Bernardin gave me a Frog Lid. This has rocked my world – these lids fit on wide mouth jars, and help you easily arrange flowers. Since I may be obsessed with canning (understatement), there are a few different kinds of jars hanging out around my house. You can put them together to create a 3 level arrangement. Or if you only have 1 or 2, put together what you have.
This couldn’t be easier. Here’s how you do it:
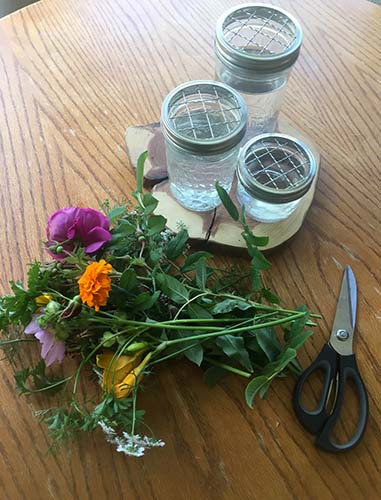
- Pick some stems from your garden or wild field that draw your attention.
- Grab Bernardin mason jars. I used one that’s 750ml, 500ml and 250ml with wide mouths.
- Pick up a package of Frog Lids.
- Insert the Frog Lids in the rings of the jars.
- Fill with water.
- Trim your stems to your jar’s height.
That’s it! It’s super easy to let kids help with too – my 4 year old designed this whole arrangement.
Looking for more uses for your Bernardin Mason Jars? We’ve got you covered.
]]>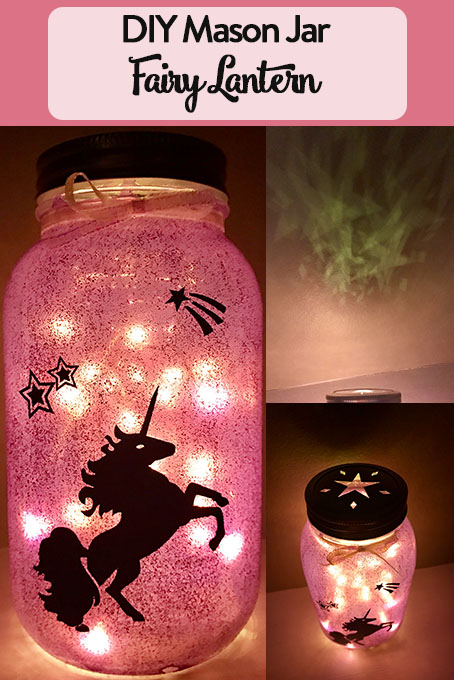
Mason Jar Fairy Lantern
Bring a little bit of magic and whimsy into your home with a beautiful lantern. My daughter is definitely a girly girl. She loves unicorns and rainbows and glitter and the colour pink. Fairy jars are typically just that: a jar featuring a fairy. For my five year old daughter, I decided to alter it exactly to her liking. So technically, this is a unicorn lantern but I think it still contains the same magic as a mason jar fairy lantern.
What You’ll Need
- Bernardin 1L Mason Jar
- Transform Mason™ Metal Star Lid
- White glue
- Extra fine glitter (either silver or a matching colour)
- Food colouring
- Foam paintbrush
- Permanent adhesive vinyl in black (aka Oracal 651 or similar)
- Transfer tape
- Cricut or similar device
- If you do not have a Cricut, arm yourself with a template, small scissors and some patience!
- Twine or ribbon
- Battery-powered light strand
Invite Magic In
This isn’t a project you can complete in one sitting as it requires several layers of “paint” in the form of white glue. Get a small bowl and pour in some glue. Add a few drops of food colouring (I used about 6 drops of the purple colour from the neon pack). Blend it all together and paint a thin layer onto your jar with the foam brush. Allow it to dry at least 1 hour. Apply a second coat and allow to dry. For the third coat, stir in a healthy dose of your glitter and add another layer to the jar. After letting dry once again, apply your fourth coat of the glue, colouring and glitter mixture. Let dry overnight.
Customization

While you’re waiting for those many layers of glue to dry, start preparing your design. I simply used files available to me in the Cricut Access software: the unicorn and a variety of stars. This is where you can have some fun. You may want a fairy and some flower shapes. Maybe your little one prefers rainbows. Let your imagination run wild. Your focal point (in my case, the unicorn) is about half the height of the jar. I used black permanent adhesive vinyl (aka Oracal 651). The designs were cut and weeded, ready to be applied to the outside of the mason jar once dried.
Be sure to press your decals down very well. I used my scraper to burnish them on. Once I removed the transfer tape, I used my thumb to really press the vinyl onto the surface. Due to the glitter, you will have many lumps & bumps but these will not be seen once the jar is light.
Starlight, Star Bright
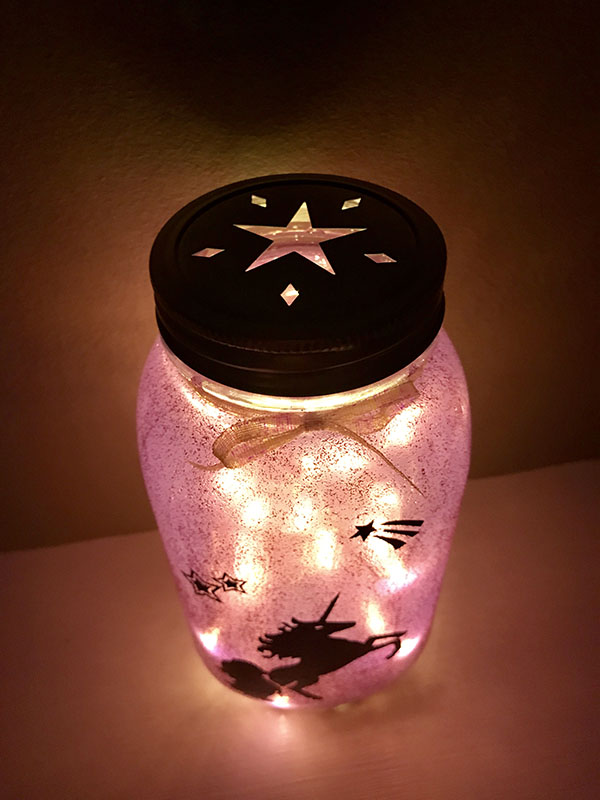
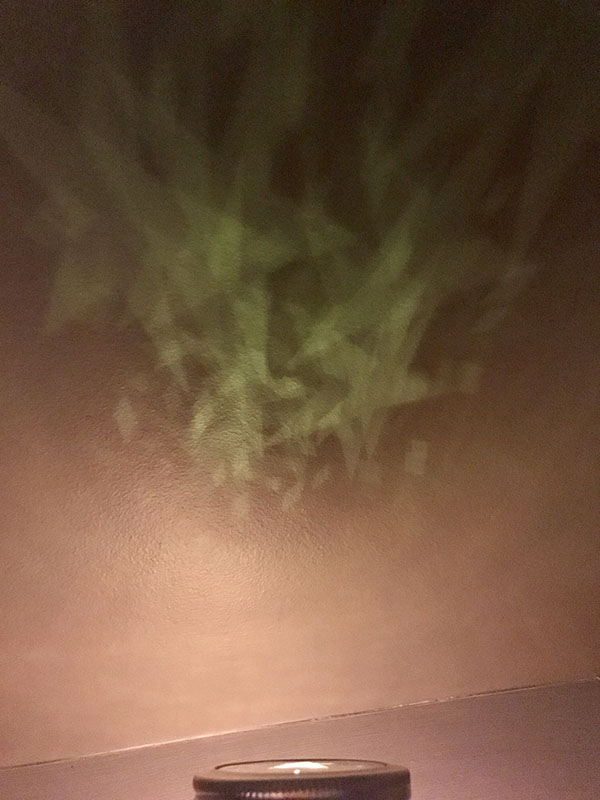
Remove the lid of the jar, discard the snap lid and place your metal star lid inside the ring. Drop your battery-powered light strand into the jar and place the lid on. Tie some pretty ribbon or twine around the next of the jar. Another nice touch would be to add a Metal Wire Handle to hang it. The star lid will shine a smattering of stars all along the ceiling which your little one is sure to love.
Check out more of our DIY Crafts for Kids.
Looking for more Bernardin Mason Jar crafts? We’ve got you covered.
]]>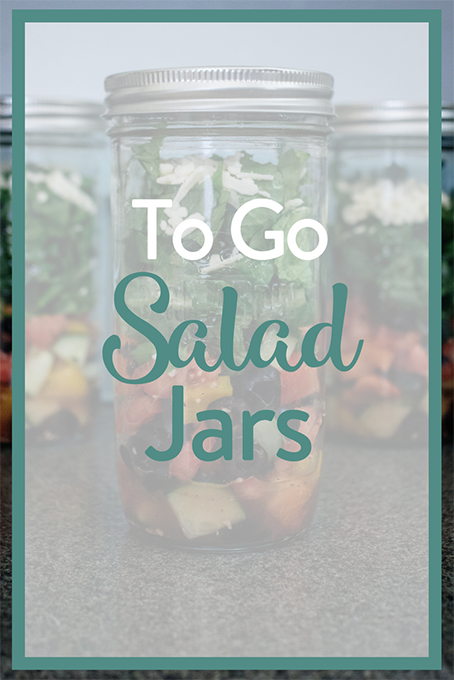
To Go Salad Jars
Summer is a busy time for everyone. Meal times tend to sneak up out of nowhere. I find myself looking at the clock wondering where the last few hours just went. And then wondering what in the world we are going to eat. By this point the kids are hungry (read: whiny) and I quickly scan the fridge looking for the answer.
Since our house does not have A/C, when it is hot, we try to avoid turning on the oven and stove. We BBQ a lot since it’s quick and easy. Plus the kids can play outside while we cook – win win! Hot dogs, hamburgers, and sausages are our go-to foods on the grill, and then we need a side to go with them. The answer: salad jars!
Making salad jars is so simple, and it’s the perfect way to portion out a salad. Perfect for dishing up with dinner, packing in your lunch for work, or as a healthy late night snack. Using glass jars is not only environmentally friendly, it is a little more “grown up” than plastic containers. Being able to grab a jar of salad and head out the door to work, baseball practice, or to watch your kid’s soccer game is great.
We like to use the Bernardin 750 mL Wide Mouth jars – it’s the right size for us. You may prefer to use smaller or larger jars depending on your family and/or how much salad you want to eat at a given time. The two recipes below make a enough salad for 4 of the 750 mL jars. You can easily adapt these recipes to make more or less depending on your needs.
Greek Salad
Ingredients
Dressing
- 1/4 cup olive oil
- 1/4 cup red wine vinegar
- 1 tbsp lemon juice
- 2 cloves garlic minced
- 1/2 tbsp dried oregano leaves
- 1/2 tsp salt
- 1/4 tsp black pepper
Salad
- 2 tomatoes chopped
- 1/2 english cucumber chopped
- 1 bell pepper chopped
- 1/2 cup feta cheese crumbled
- 3/4 cup black olives
- romaine lettuce
Instructions
- Make the dressing. Let stand for a half hour.
- Chop up tomatoes, cucumber, peppers in large pieces
- Pour dressing over chopped vegetables & olives, mix together.
- Divide mixture evenly between 4 750mL wide mouth mason jars
- Fill remainder of jar with chopped romaine lettuce, and sprinkle feta cheese on top
- When ready to eat, simple shake up jar to mix, then enjoy!

Cobb Salad with Bacon Ranch Dressing
Ingredients
Bacon Ranch Dressing
- 1/2 cup sour cream
- 3 tbsp buttermilk
- 2 tbsp lemon juice
- 2 tbsp dijon mustard
- 1/2 tsp onion powder
- 1/4 tsp black pepper
- 1/4 tsp garlic powder
- 1/2 tsp chilli powder
- 1-2 green onions finely chopped
- 1 tbsp parsley finely chopped
- 3 slices bacon cooked & finely chopped
Salad
- 4 slices bacon cooked & chopped
- 1/2 cup cheese crumbled or cubed
- 1/2 cucumber diced
- 1 avocado diced
- 1/2 tomato diced
- romaine lettuce chopped
- 2 hard boiled eggs diced
- 1-2 chicken breast cooked & diced
Instructions
- Divide dressing evenly between 4 750mL mason jars
- Divide bacon, cucumber, cheese into the jars
- Add eggs and avocado, followed by chicken and tomatoes
- Fill remainder of jar with romaine lettuce
- When ready to eat, simple shake up jar to mix, then enjoy!
I think the classic Bernardin 500mL jars would work great for setting out already portioned salads on a buffet table. Just place a pile of forks next so them and everyone can enjoy right from the jars!
We absolutely love simple meal ideas here, so check out more of our great recipes.
Do you love Bernardin mason jars as much as we do? Be sure to have a look at more of our mason jar crafts & recipes.
]]>
How To Organize Craft Supplies
In our house, my almost-4-year-old Allie has a wildly creative imagination. It leads to all sorts of wonderful crafts, games, songs, and more. I love that I never know what to expect from her, or what turns she will take us on as we head through an activity. I find the best way to let her express her creativity is to let her see what’s available to her. That is why I just reworked how to store all our craft supplies.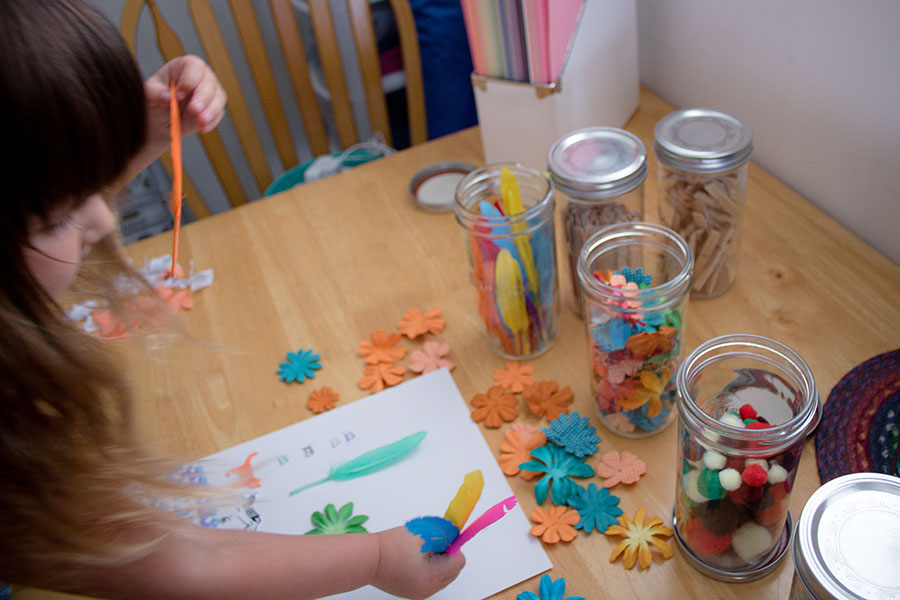
Make It Visible
Our craft supplies were stored in all sorts of bins, bags, and boxes. There was no rhyme or reason to where they were kept. This is so not like me at all. I knew I wanted to organize it better so I gave it a fair bit of thought before tackling the project. Allie is the type of child who needs to see her options. Whether she is deciding on what to eat, what colour cup to have, or what movie to watch – Allie needs to see the choices in front of her. This is why I chose to put the majority of our craft supplies into Bernardin Mason Jars. The clear glass jars allow Allie (and me) to see what is inside easily. We can open the jars she wants to use, and leave the others aside or up on the shelf. I love these wide mouth jars since Allie can reach right in and grab what she’s got her eye on. The 750mL size is tall enough for pipe-cleaners (cut or bent in half) as well as pencil crayons once they have been sharpened a couple times. 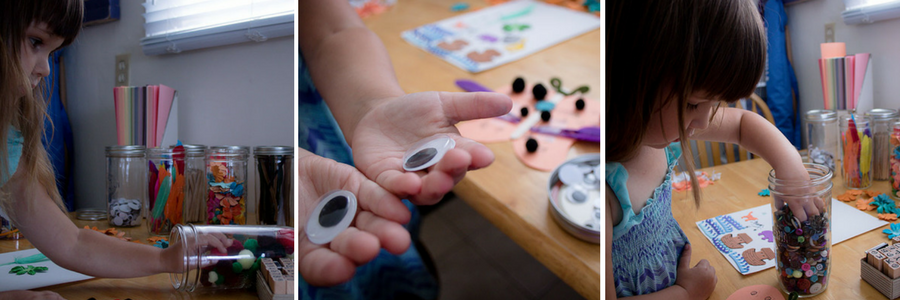 Having everything in the jars has made things much better. We can easily see the supplies, and Allie is always dreaming up the next craft we will make. I can also see when things are getting low, and take note so I can restock.
Keep It Together
We do still use some plastic containers for things that don’t easily fit into glass jars, or that the kids can use without me around. For us this includes crayons & markers, scissors & stamps. For construction paper, colouring books, and sticker sheets, I love using magazine holders. They keep everything upright and together in one place. It easy to find what you are looking for, and for a cleaner look you can turn them around so the exposed side faces into the shelf or against the wall. I try to keep all our craft supplies in one spot. This is easier said than done of course. My own personal craft supplies are all in the basement. While the kids stuff is upstairs on the shelf between the kitchen & living room. Typically the kids do crafts at the kitchen table. So my goal is gradually move any of my supplies that they may use upstairs with theirs. (Just add that to the never ending to do list, right?)
Be Ready To Change It Up
One thing that having kids has taught me, is that any form of organization works until it doesn’t. As my kids grow & learn & develop & change, so must the way I organize. As the kids are able, I want to include them in the organization maybe this will work process. To let them help decide how things will be done, so that it makes sense for them & to them. That will be a fun challenge for me, since I always like to have the final say when it comes to organization in our house. Take a moment to check out more of our Organization ideas. Do you love Bernardin mason jars as much as we do? Be sure to have a look at more of our mason jar crafts & recipes.
]]>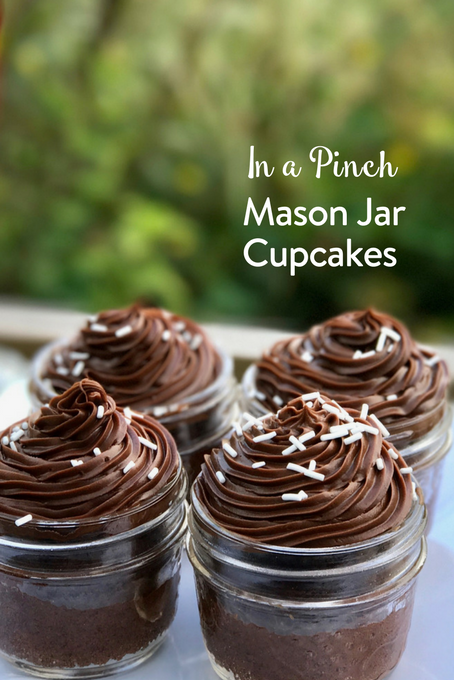
It’s been busy, busy around here. Between health stuff, kids stuff, work stuff and volunteer stuff, my husband’s birthday party planning kind of took a back seat. I needed to make some kind of cake, it needed to be chocolate. The kids wanted cupcakes and I wanted fancy and easy. Those two things are hard to achieve at the same time. Then it hit me. Mason Jar Cupcakes. Cake mix upgrade is my go-to in a pinch. And this was definitely pinch time.
I love baking with Bernardin mason jars. Everything just looks extra fancy (and extra homemade) in mason jars – even if you had a little help.
These mason jar cupcakes were very easy. Like super cheater easy. As someone who used to make multi-tier wedding cakes, it actually pains me to say this. These are Devil’s Food Cake boxed cake mix cupcakes, with store-bought whipped chocolate icing.
There are three things that make them look fancy. The adorable jars. The piped frosting. And sprinkles.
Baking Mason Jar Cupcakes
Step 1. Prepare your favourite cupcake recipe. Preheat the oven to the desired temperature. Mine cooked at 350 degrees.
In this case, I used Dunkin Hines Devils Food Cake Mix. It’s dairy-free, very moist and it tastes rich in your mouth.
When you can, use fresh eggs. They make a better cake.
I tend to mix it a little longer than than the instructions say.
Step 2:
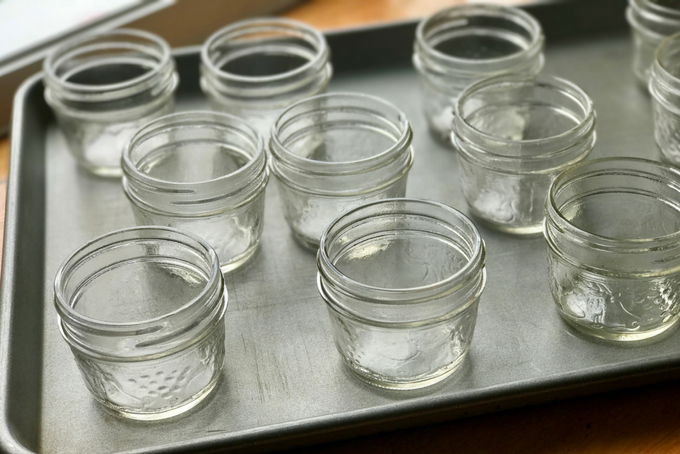
Prepare the jars.
Make sure they are clean and dry.
Spray them lightly with PAM or grease them with oil so the tasty cakes will pop out.
Add cake batter to each one until they’re 2/3 full. Don’t overfill and wipe away any drips or spills.
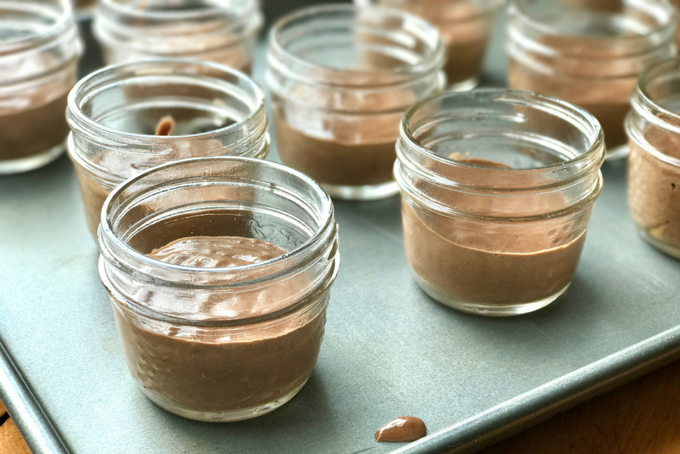
Place them into the oven on a baking sheet. Be sure they don’t touch.
Bake as directed until an inserted toothpick comes out clean.
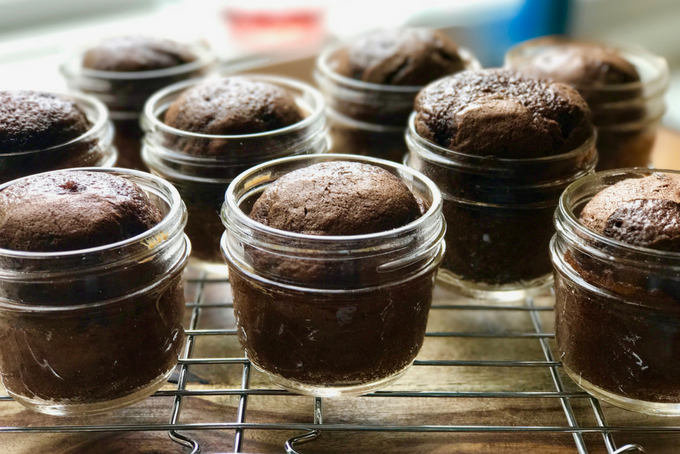
Step 3:
Frost and add sprinkles.
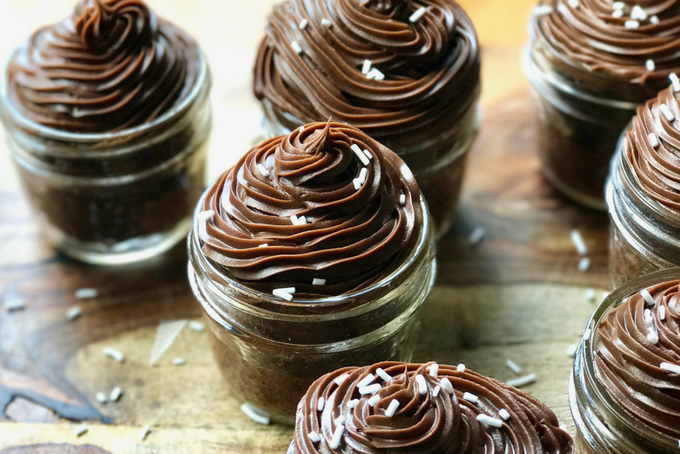
As I said in my confession earlier, I used store-bought frosting. If you decide to go that route, try choosing a whipped variety. In my experience, they just seem to pipe more easily.
You can achieve this look with a star tip and a piping bag. Or you can choose to use a flat knife or palate knife to create a flat or swirled top.
Lastly, add sprinkles. If the icing looks perfect, use a few. If it doesn’t quite turn our the way you planned? Add a lot of sprinkles. Everything looks fancy with sprinkles.

We love quick & simple desserts around here so be sure to check out a few more.
Do you love Bernardin mason jars as much as we do? Be sure to have a look at more of our mason jar crafts & recipes.
]]>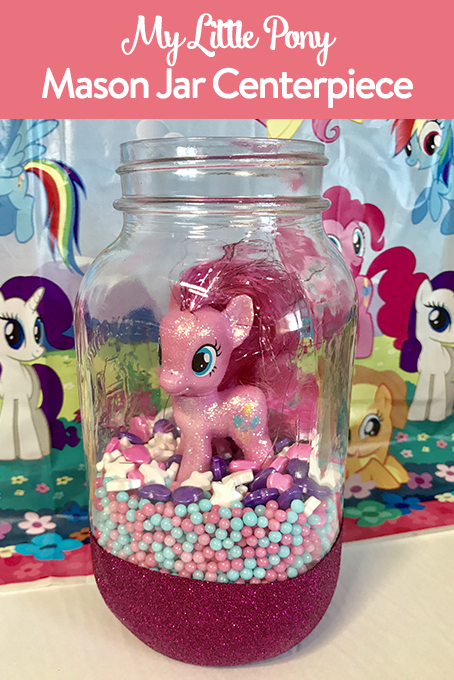
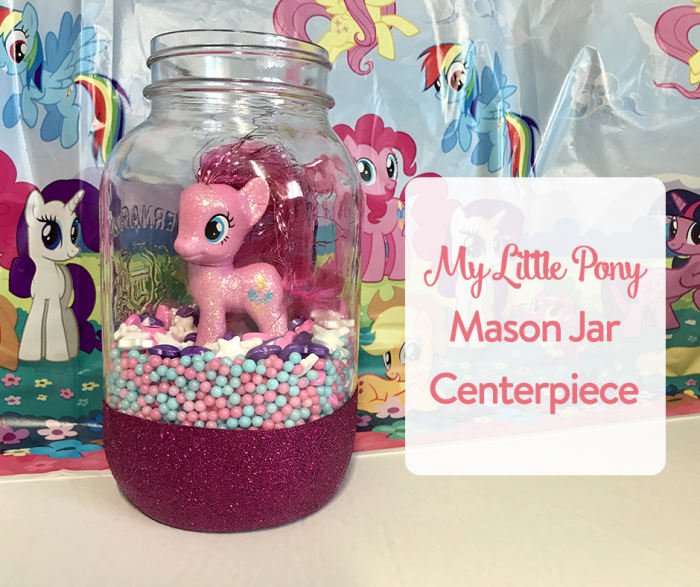
My Little Pony Birthday Party
If you are a regular visitor here at The Inspired Home then it doesn’t come as a surprise to you that I love to throw fun, themed birthday parties for my kids. Miss O has had a pink party, a Princess Peach party and a Hello Kitty party over the years. This year’s theme of choice was My Little Pony. I decided to whip up a simple mason jar centerpiece to adorn the food table. I pulled out one of my favourite Bernardin mason jars and went to work!
What You’ll Need
- 1L Mason Jar
- Lots of sprinkles!
- Pony figure
- Mod Podge (optional)
- Extra fine glitter (optional)
- Painter’s tape
- Foam brush
Note: You can get away with 500mL mason jars if that’s all you have on hand, you’ll just need to use a smaller pony.
Get Crafty
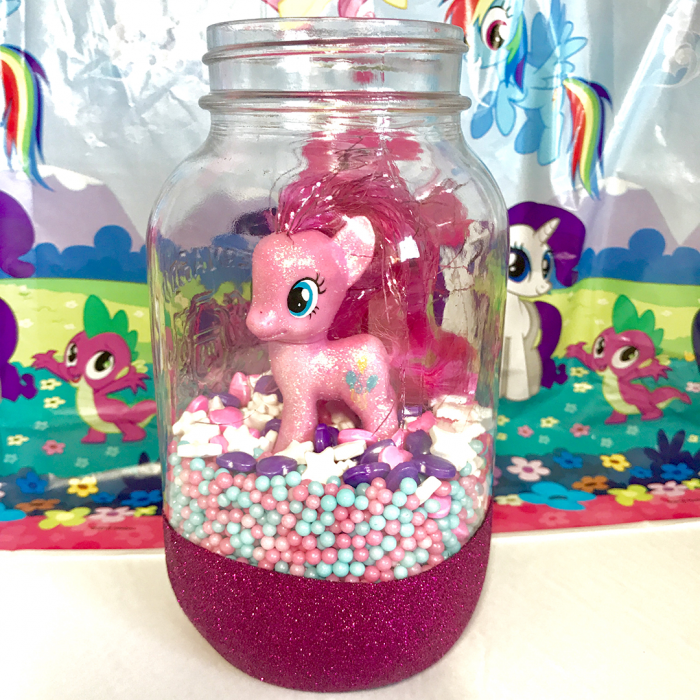
If you want to add a little sparkle to your mason jar centrepiece then you’ll need to pull out some Mod Podge (matte, glossy, glitter, it’s all up to you!) and some extra fine glitter in a colour to accent your pony. Lay out some paper on your work surface. First, you’ll need to put a line of painter’s tape around the jar to mark off a nice straight edge. I suggest stopping the glitter just under the logo of the mason jar.
Using your foam brush, paint a coat of Mod Podge from the bottom edge of the jar right up to the edge of the tape. Once you’ve done that, it’s time to pour on the glitter! It’s helpful to do this over a container that will make it easier to pour the excess glitter back into its container. Use a heavy hand with the glitter to cover it fully.
Allow the jar to dry for at least 30 minutes but one hour is best. Once that is done, paint on another coat of Mod Podge and dump even more glitter all around. Let dry once again. Now it’s time for one final coat of Mod Podge to seal the glitter. Once you have finished with that layer, peel off the painter’s tape while the glue is still wet – this will ensure a nice, crisp line around the jar. Let dry overnight.
Now comes the easy part (especially if you decided to skip the glitter!): pour in the sprinkles, pop in your pony and you have assembled a beautiful mason jar centrepiece that any My Little Pony lover is sure to adore.
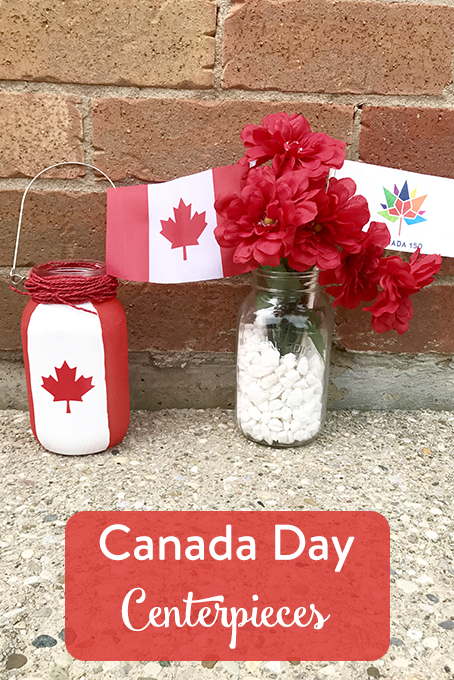
Happy Canada Day!
It’s time to celebrate Canada’s 150th Birthday and I thought I’d spruce up our tables with two different styles of a Canada Day centerpiece. Both of these were fun and simple to make using some Bernardin mason jars and a variety of dollar store items on all payday loans direct lenders.
What You’ll Need
- Bernardin 1L mason jars (1 for every centerpiece)
- Transform Mason Metal Wire Handle
- Acrylic paint in red & white
- Sponge brushes
- Red twine
- Maple leaf stickers (or cut out two from vinyl with your Cricut)
- LED tea lights
- White rocks
- Red fake flowers
- Mini Canada flag
Canada Day Lantern
![]()
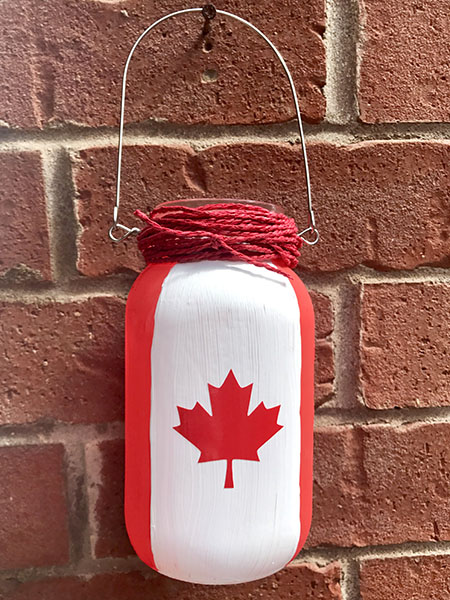 The most time-consuming part of these Canada Day lanterns is waiting for the paint to dry. Aside from that, they’re quick and simple to complete. I suggest putting your wire handle onto the jar before painting. I didn’t and it scratched up my paint. Since you will be covering the wire with twine or ribbon, it won’t matter if you get paint on it! Using a Bernardin 1L mason jar, I took my sponge brush and painted red down two of the sides. If your jar only has one decorative side as these do, make sure you paint the sides with the decoration in red. I didn’t use any tape to ensure straight edges as I have a pretty stead hand. Once your red paint dries, do a second coat. It will take a little while for it to dry – I left mine for about an hour. Once your second coat of red paint has dried, use your white paint to cover the other two sides, leaving time in between coats. Once the paint is dry, add your maple leaf stickers or vinyl decals to the middle of the white sides. Wrap the top of the jar with red twine. Drop an LED tea light or two inside and you have a lovely festive lantern.
Canada Day Centerpiece
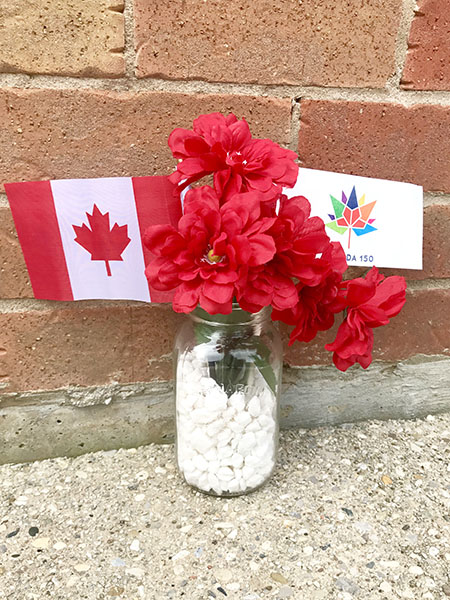 This centrepiece couldn’t have been any easier to make. Grab your 1L mason jar and dump in some decorative white rocks. Next, insert your red flowers and your Canada Flags. Voila! A gorgeous centerpiece that took mere minutes to assemble. Everything in this jar is from the dollar store. The mason jar itself is courtesy of Bernardin. You could also add some decorative ribbon around the neck of the jar for even more punch.
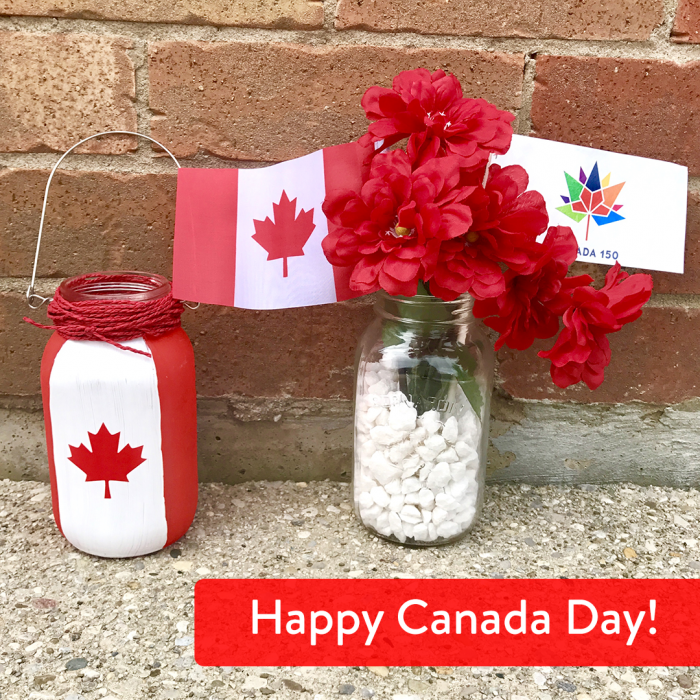
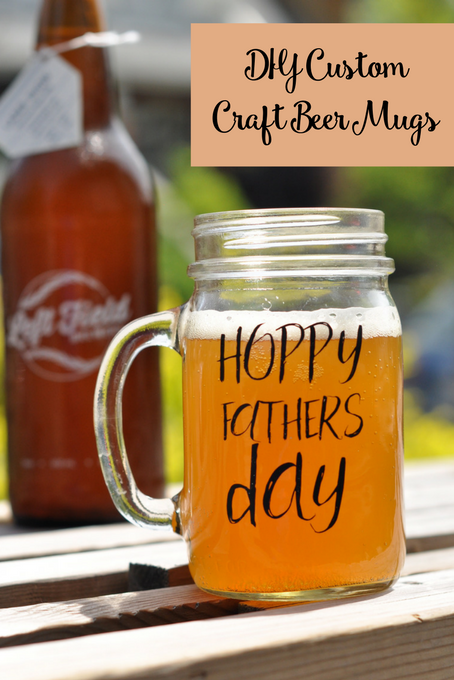
DIY Custom Craft Beer Mugs
I created these DIY custom craft beer mugs for Father’s Day for my craft beer loving husband.
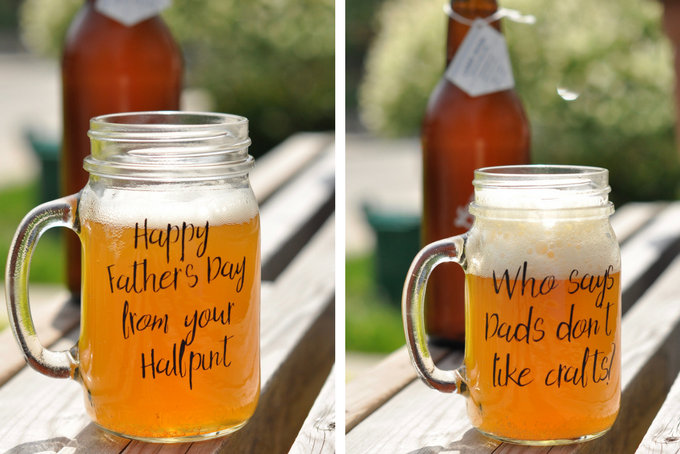
With the weather getting nicer, it’s almost time to sit out on our back deck. We have a host of family friendly breweries popping up in our neighbourhood so there is always something new to taste.
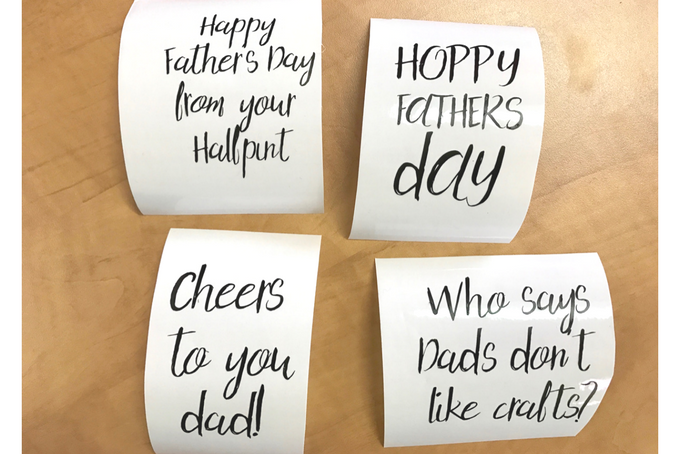
I wanted to make some mugs that would give him a giggle and make the kids feel like they were from all of us. Bernardin Beer Mugs come in a 4 pack, and I love the idea of each one saying something different. My Cricut Explore Air made it easy to design them using a font I had on my computer, then save the type as an image, and import into Cricut Design Space.
What you’ll need:
- Cricut Explore Air™ machine
- Black Vinyl
- Standard-Grip Cutting Mat
- Transfer Tape
- Cricut® Tools Basic Set
- Bernardin Mason Jar Mugs/ handle
I used a font called Holy Mountain Style. I love how they turned out, but I would probably choose a font with more substantial letters next time. The type was a bit finicky for a beginner like me.
To create the art, I used Adobe Illustrator. I’m trying to learn the software and thought I’d give it a try. I was able to turn the type into an image and save it as an .SVG. You could easily create these in Cricut Design Space as well.
Once your .svg is in Cricut Design Space (or you’ve finished setting your type there), adjust the text to the right size for your mug.
Once you are content with your design, set the Cricut to the vinyl setting, place your sheet of black vinyl onto the mat and start cutting. After it’s cut, trim the vinyl around your art and save the rest for another day. Then, weed the vinyl. During this process, you remove all the little bits of vinyl that aren’t part of your art – like the little circles inside the letters.
At this point, I suggest you wipe down the part of the mug you’re going to use with alcohol or sanitizer for a better stick.
Now gently press your transfer paper over your art. Using your scraper tool, rub your transfer paper onto your vinyl.
Next, peel up your transfer paper at a 45 degree angle. The vinyl should now be on the transfer paper.
You might want to cut your design so you can apply the words line by line, but I really wanted to maintain the spacing that I set and, let’s face it, I’m terrible at eyeballing.
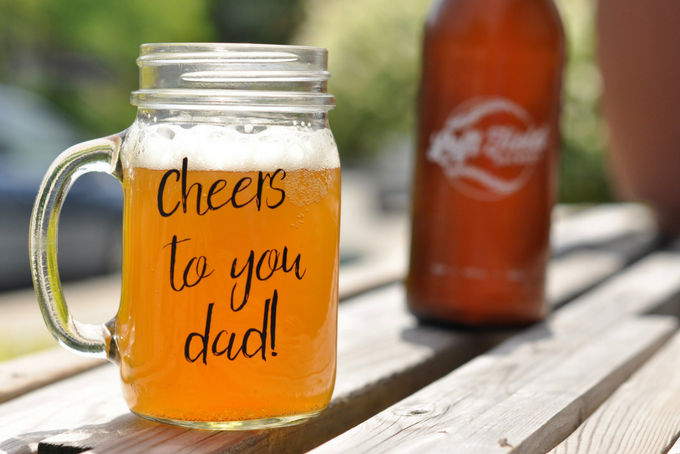
Ok, final step. Place your design on the right spot on your mug. Then use the scraper tool to rub over the transfer paper and adhere the vinyl to the mug. Go over every aspect of the design very carefully. Once the vinyl is attached, slowly remove the transfer paper at a 45 degree angle.
One last tip: theseDIY custom craft beer mugs will be hand wash only – and let them sit for 48 hours before you get them wet the first time.
That’s it! Cheers to Father’s Day everyone.
]]>
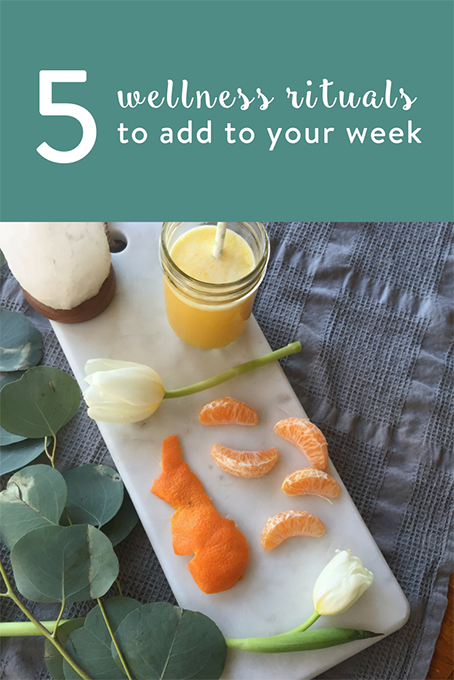

5 Wellness Rituals to Add to Your Week

I’m always on the lookout for simple wellness rituals that I can pop into my week. With so many obligations on the go, I need rituals that will fit into a few moments, or when I need to take an hour or two to myself. These are the ones I keep coming back to time and time again for a little Mom Time. Most of these wellness rituals are ones that are low-cost and are easy to sneak in, once the kids have gone to bed.
I double dog dare you to fit one of these into your week and try it out. I’d love to hear more of what rituals you use too in the comments below. I’m always open to trying a few more!
A Little Cheer for the Counter
Every other month or so, I will bring some flowers to my kitchen table. Sometimes that means cutting them from my garden outside, other times, I visit my local florist to grab a few stems. This little pop of colour on my table makes me smile. I use a 1L canning jar with a Wide Mouth Frog Lid that makes arranging them a snap. If you’re not creatively blessed, ask your local florist to match up a few stems in a bouquet for you.
Hydrate or Juice It Up
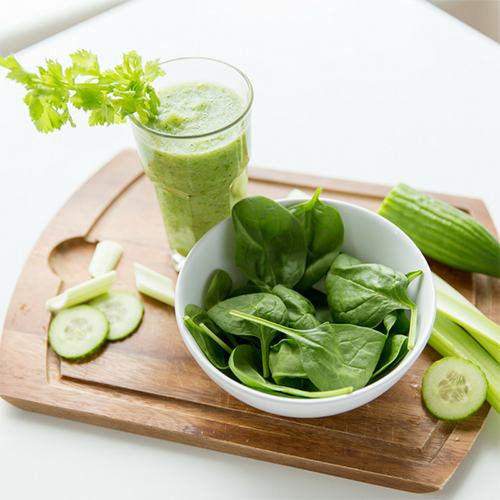
Even slight dehydration can affect your brain function, mood and energy. Although sometimes it doesn’t feel like drinking water is sexy, treat yourself to an extra cucumber and a few mint leaves, lemons and limes, or a pomegranate on your next grocery shop. Adding these to your water can get that brain function under control and make a difference in your week. Mix up a pitcher in your favourite glass pitcher or store in a mason jar for use throughout the week. You don’t even have to share.
Juicing is a delicious and easy way to get your veggies in. Your body will thank you for dropping into your local juice bar. Enjoy a tech-free time out for 30 minutes while you enjoy your juice. (Bonus points if you pick anything with green veggies or wheatgrass in it).

Go for a Massage
My husband and I frequently book a one-hour massage for a time out. This one usually ends up being a cost effective option as our extended health plan covers it. Massage can help you relax, but it also has proven to counteract all the sitting we do, soothes anxiety and depression, improves sleep and boosts immunity.
You don’t need health benefits to enjoy it either, you and your partner can practice on each other. Besides feeling great on sore muscles, massaging each other can promote trust and build intimacy.
Clear Your Mind
I struggle with clearing my mind! There is always something going on there, from my next article to planning dinner. In order to relax though, and be able to sleep, that grey matter needs an OFF switch. Ways that I’ve been able to clear it:
- Meditation: Headspace for me has been a game changer. This meditation app can be added to your device to listen to on the go.
- Savasana: After-yoga ritual of lying still after your practice is a great mind clearer. Just set your intention and lie still. It’s harder than you think!
- Get Outside: Go to your happy place. To me it means hitting a trail with trees, but wherever in nature you find your calm will work.
Skin & Hair Rituals
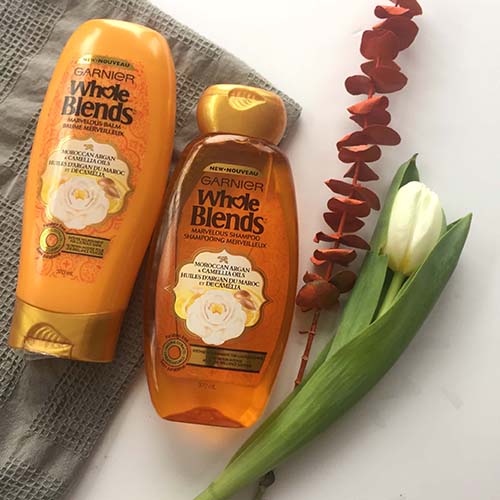
With the harsh Alberta winter, taking care of my skin & hair is a must. Skin care is fairly simple, just involving some mud masks and additional moisturizer. Hair care has been a little more challenging. Recently, I tried the new Whole Blends Moroccan Argan & Camellia Oil shampoo, conditioner and Marvelous Oil. Before using, my hair was dry and flat. After a little me time in the shower basking in the sweet notes of camellia, my hair was shining and ready to take on winter again. Try my shower routine by:
- Apply Mud Mask: Add mud mask of your choice then turn on the shower water to warm up.
- Use Marvelous Oil: Add oil before you shampoo your hair to help nourish it after the harsh winter winds.
- Wash Away Your Worries: Add your perfect Whole Blends shampoo and work into the hair.
- Exfoliate: Gently rinse off mud mask & use your favourite body moisturizer.
- Smooth Your Hair: Add your favourite Whole Blends conditioner to reveal your shining locks.
Get a coupon for Whole Blends which are paraben free and contain natural extracts. There’s also a new Legendary Olive blend that you’ll want to check out in stores soon.
Join the #NewWholeBlends Twitter Party!
Join us on Twitter to talk about your own beauty & wellness rituals on February 16, 2017 at 7 PM EST.
]]>
Colourful Playdough Recipe
Recently, the kids were invited to a friend’s birthday party. I struggled with what to give as a present.
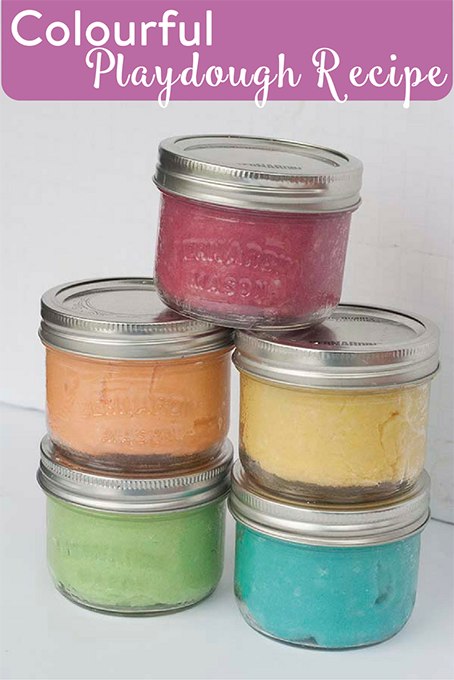
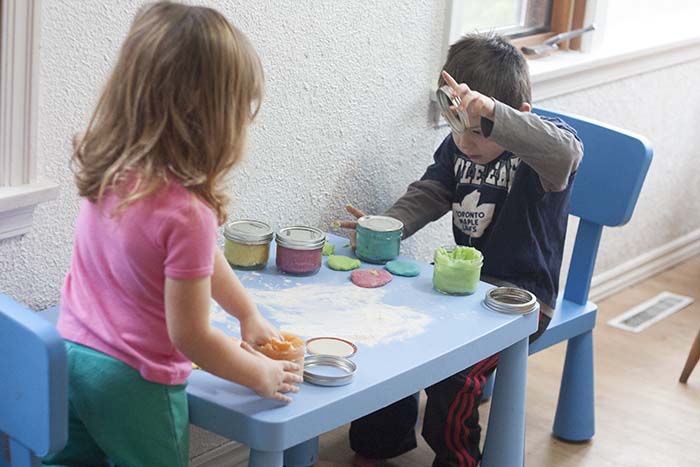
Instead of rushing out to the mall, we decided to make her some homemade playdough in the birthday girl’s favourite colours. Mr J, Ms P and I whipped up a batch of no-cook playdough in our kitchen. The kids were pleased with their colours & creations. We piled them into a jars and wrapped them up in a homemade painting for wrapping.
Of course, we had to make a second batch the next day for my kids to play with too! This recipe makes it a breeze to whip up no-cook playdough in just a few minutes. As a mom, I love it because it only uses one bowl and I don’t have to cook it either. Most of the ingredients are ones that we typically have in our house, so no need to run out and buy anything. No pesky cream of tartar like some recipes either.

No Cook Playdough Recipe
-1 cup flour
-1/2 cup salt
-1/2 cup water
-1 tbsp vegetable oil
Yields about 3 cups of playdough.
How To Colour Playdough
There are many different ways to do this: food colouring, gel food colouring or even powered gelatin mix.
In my kitchen, it comes down to what’s in the cupboard.
If you want a vivid, rich colour – gel food colouring is the way to go.
If you like a scent along with your playdough, powered gelatin mix in all the different flavours will work.
For a pastel coloured playdough, 5-8 drops of food colouring will work.
Packaging for a Gift or for Much Use
To package, use 250ml Wide Mouth Canning Jars. We love these containers because they hold 1 cup of playdough which is usually more than enough and the lids can be popped on and off for playtime.
Enjoy your new dough!
]]>