
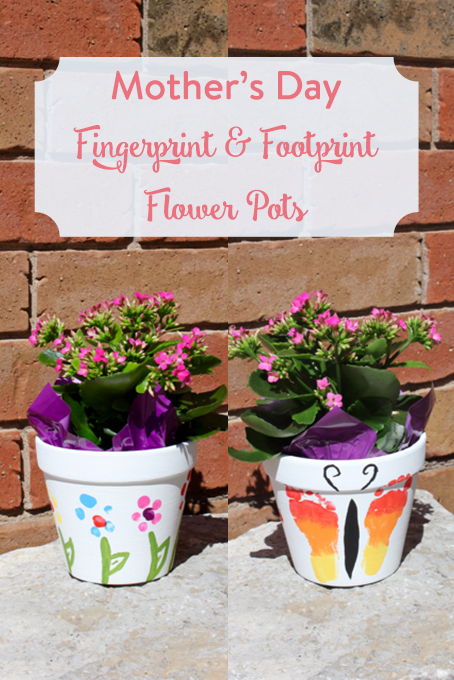
Mother’s Day Flower Pot
I decided to make a Mother’s Day flower pot – one from each child to give to grandma. All of my supplies came from the dollar store. These mother’s day flower pots have a great personal touch with fingerprints, footprints and toe prints. And they look simply adorable with a nice spring bloom in there like a hyacinth, daffodil, or any spring flower you can find from your local garden store.
What You’ll Need
- Clay flower pot – make sure it’s big enough to fit a baby-sized footprint
- A rainbow of acrylic paint colours – make sure you have green & white & black
- Paintbrushes – fine ones are best for this project along with sponge or larger brushes for baby’s feet
- Some sort of pallet for the paint – we used an ice cube tray!
- Thin black permanent marker
How To Make Mother’s Day Flower Pots
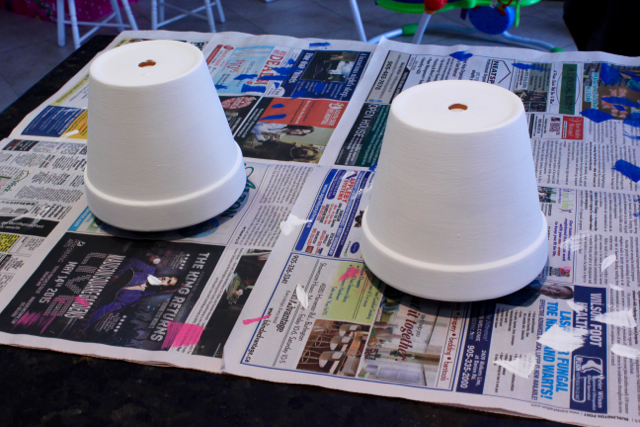
Prep the night before you want to make it with the kids. Lay down some newspaper. Paint the rim of the pot with white paint – I prefer to use a sponge brush for large surfaces. Once that is complete, turn the pot over and balance it on a bottle of the paint or something similar – just high enough that the freshly painted rim doesn’t touch the newspaper. Paint the entire pot with two coats of white paint. Let dry overnight.
Fingerprint Flowers
To do the fingerprint flowers, I put Miss O in her high chair with an ice cube tray filled with all the colours. I let her choose a colour for the petals and a colour for the centre of the flower. Holding the pot in one hand, I guided her hand with my other hand to do 5 petals for each flower. A quick clean with a baby wipe and she would do a different colour for the centre. In total I think it took about 10-15 minutes to do flowers all the way around the pot. It went quickly because she was being very, very cooperative. Once that was done, I sent her on her way. Using your green paint, add some stems and leaves to your flowers.

Footprint Butterfly
For the baby’s flower pot I opted for a butterfly and some caterpillars. You will need to paint both feet (one at a time) with three colours. You’ll have to be quick about it so the paint doesn’t dry and your active baby doesn’t start freaking out! Little J is very ticklish. Make sure you have everything prepared before you start! Babies lack patience, especially 8 month old little boys.
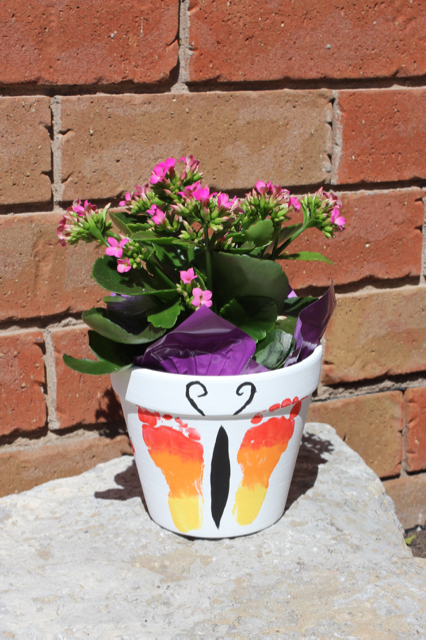
I found it helpful to start painting the bottom of the foot first as you can steady the ankle but you can’t steady the toes! Painting them last just seemed to make it simpler. When placing the feet on the flower pot, remember that the left foot is the right wing and the right foot is the left wing. Figure out the logistics of how you will be holding the pot before you start so you know which foot to begin with. I started with his right foot. Make sure to press down the whole foot and the toes – it’s much easier if you have someone helping you.
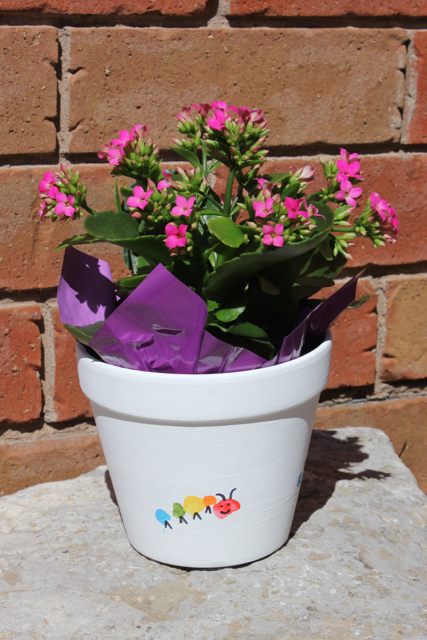
Fingerprint Caterpillar
Once your wings are done, it’s time to move onto the caterpillar. You simply paint their toes! I went with a rainbow but you can also just stick with one colour or one colour for the body and one colour for the head. If you go with a rainbow of colours like I did, you have to be quick so that the paint doesn’t dry. Once they’re painted, press the toes onto the pot. Again, it’s very helpful to have assistance. I opted to do two caterpillars so I did not have to repaint the toes in between, I just moved quickly. One toe on the second caterpillar needed a touch-up as there wasn’t quite enough paint.
When the butterfly & caterpillar are dry, paint a black body & antennae between the foot prints. Using a thin black permanent marker, give the caterpillars some legs, antennae and a little smiley face!
Extra Details
If you’re feeling inspired, you can write Happy Mother’s Day or some other note around the rim of the clay pot. I used the permanent marker to write their names and the date on the bottom of the pot.
If the pots will be used indoors only, you do not have to seal them but I still recommend it for protection. For outdoor use, you can purchase a sealant from your local craft store. When sealing, ensure that you cover the entire thing – inside, outside and the little hole in the bottom. Follow the specific instructions on the product and make sure to do it in a very well-ventilated area.

Be sure to check out some of our other Mother’s Day gift, crafts and celebration ideas!
Andrea can always be found with a new craft in front of her, a form of technology on her right and a coffee on her left. This is how she survives suburbia with her two crazy toddlers in tow.
Leave a Reply