
DIY Light Tent
Last winter, I really struggled with taking photographs for items I was featuring on the blog. Mainly, I wanted to get a few of our favourite recipes to be accepted by Food Gawker. If you’ve ever tried this, you know that the light has to be just right for acceptance. Add in the fact in the winter it’s dark. The only good time to take photos would then be the weekend. Trying to cram yet one more task in my weekend simply wasn’t working out. Even in the best lighting situation I could come up with, the light was still too weak.
I scoured the Internet to figure out how to make my own little light tent. I had a few provisos – it had to be small and compact, easily stored. I later found out, I also needed to be able to take overhead photos if needed.
Items Needed:
- Two automotive clip-on lights (got mine from Amazon)
- Two daylight bulbs (GE 26W, 6500K)
- 4 – 1/2″ PVC elbows
- 4 – 1/2″ PVC T connectors
- 4 – 15″ pieces of PVC pipe
- 4 – 12″ pieces of PVC pipe
- 4 – 1″-2| pieces of PVC pipe (2 – 2″ for front, 2 – 1″ for the back)
- 1 shower curtain
- 4-6 large binder clips
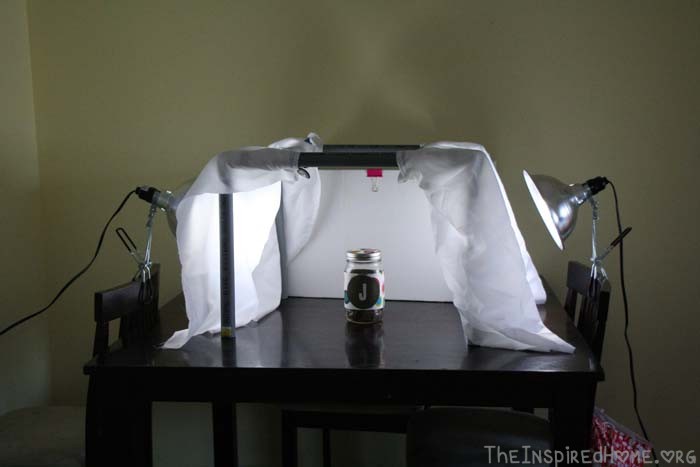
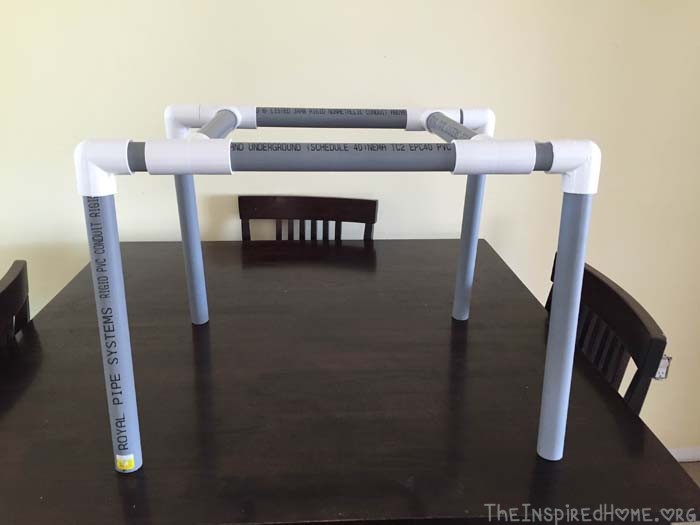
The main piece of the DIY Light Tent is the Frame. You can get the hardware store to cut the PVC for you on the spot, saving you from cleaning up little pieces of plastic from everywhere. PVC pieces just pop together with no glue needed, just a little muscle.
 |
|
I cut a piece of shower curtain to fit into the sides of frame. I wrapped it around the legs and secured with binder clips. The shower curtain helps diffuse the light and make it less harsh on what you’re taking a photo of. Be cautious not to put the lights too close to the shower curtain as they get hot quickly.

For the back drop, I use a white box that I got out of the recycling pile. I have also used white easel paper from Ikea, scrapbooking paper, or just the neutral wall colour we have in several rooms of our house.
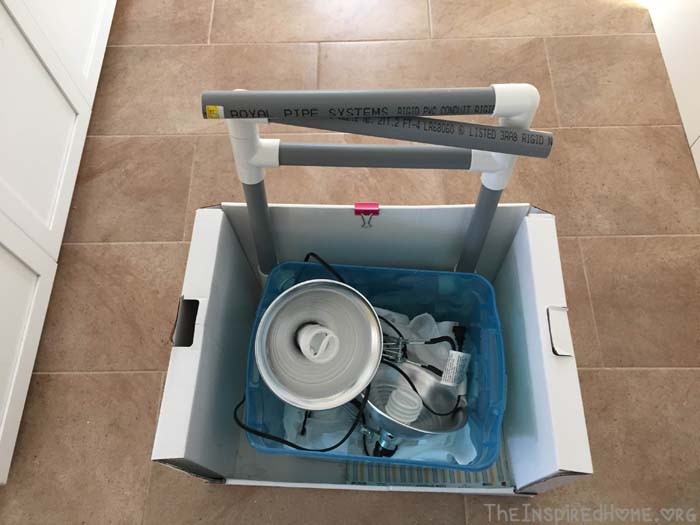
Best of all, it folds up for easy storage and fits right in a closet.
Have you ever used a light tent?
a passionate recreation coordinator by day, crazy farm mama of two by night. i live outdoors: growing my own food, camping and hiking with my border collie with two active kids in tow. when I’m not writing, I’m experimenting with recipes, and crafts – or anything else that might keep the monkeys entertained.
Leave a Reply