
DIY Disney Autograph Books
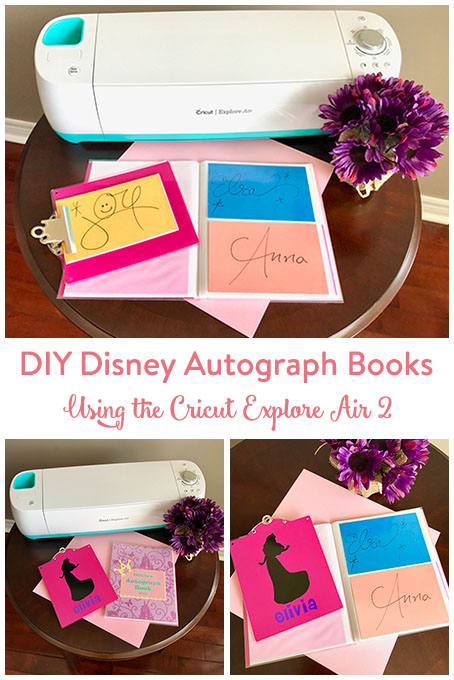
Recently, we embarked on a trip to Disney World in Florida. The kids are only 2.5 & 4.5 but I couldn’t let them miss out on an opportunity to get autographs of all their favourite characters. Being the crafty mom that I am, I just couldn’t bear to hand them one of those Disney autograph books to have signed. Knowing that they won’t necessarily remember the trip being so young, I wanted something fun, personalized and with an area for photos.
Enter the Cricut Explore Air™ 2 machine.
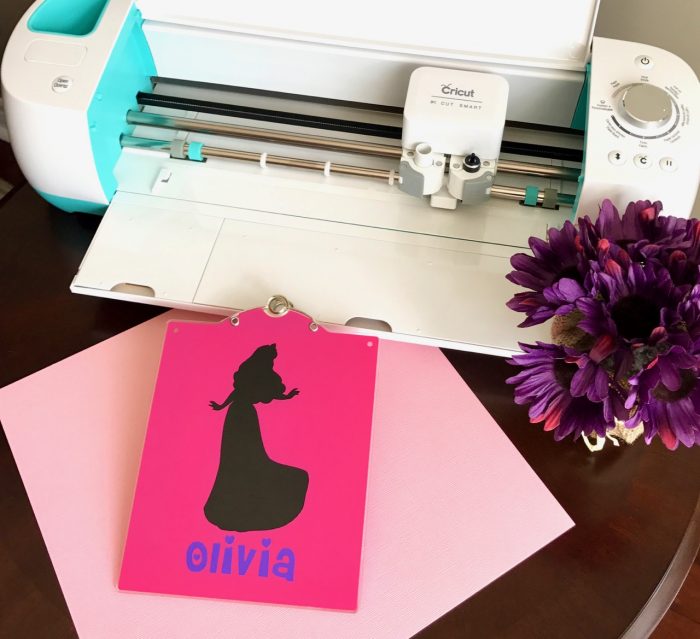
I wanted a simple way for them to carry the paper to have signed and a cute place to store the signatures and photos. As I have recently delved into the world of Cricut Vinyl, I knew this would be my chosen medium so I used it to decorate some cute little clipboards I picked up at Michaels.
Disney Autograph Clipboards
-
- Small clipboard that will hold paper cut to 4×6″
-
- One piece of Vinyl in Midnight
-
- Some Vinyl in Grape
-
- A pack of 12″ x 12″ Cardstock, Wildflowers
For the clipboards, you will need to open up Cricut Design Space™ and insert a silhouette of Aurora (aka Sleeping Beauty) or any other favourite Disney character. There are many Disney® Cartridges available in Design Space and you’re sure to find the perfect character. In order to only cut the silhouette, you will need to hide all the other layers as you can see in the image below.
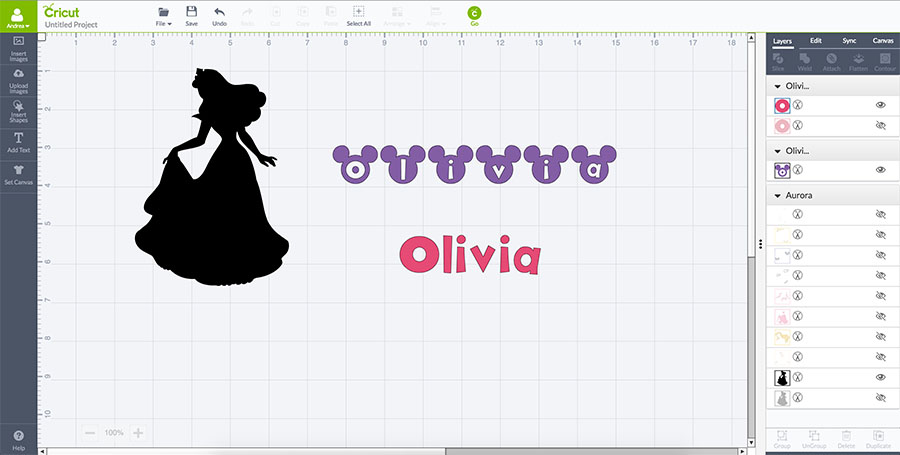
You will also need a Disney-themed font such as Disney Mickey – Mickey Tag (pictured above/top) or Disney Mickey (pictured above/bottom) available in the Disney® Mickey Font Digital Set or your favourite font. Edit your character & letters accordingly to fit nicely on the back of your clipboard. Once you’re happy with the design, it’s time to cut! Set the machine to vinyl, lay the first sheet onto the mat and cut away.
Assembling the Disney Autograph Books
Once the design is cut, you will need to weed. In order to save the excess vinyl, remove the entire sheet from the mat and just cut around your character shape and your name. Stick those two things back to your mat to make it easier to weed (remove excess vinyl). Once you have weeded all the little pieces you don’t need, it’s time to transfer. Cut a piece of Transfer Tape about the same size as your design. Peel off the backing and lay it over the design. Use the scraper to adhere the vinyl to the tape and lift slowly, ensuring you pick up all the letters. Decide on your placement on the clipboard and press it down. Use the scraper again to adhere the vinyl to the clipboard. Slowly peel away the transfer tape, ensuring you leave all the vinyl behind on the board.
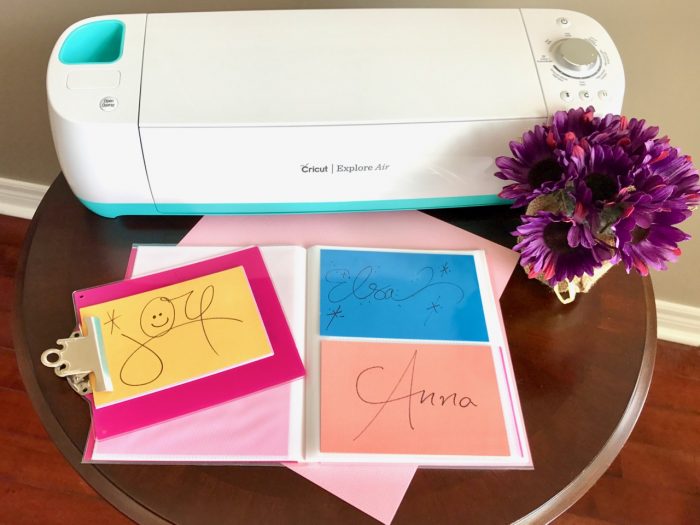
Once you have finished the clipboard, you will need to cut some paper. 12×12″ paper will give you exactly 6 cards when cut on a paper cutter. I had high hopes of using the Cricut to do this but there is a margin of error on the machine and it will not allow you to cut all the way to the edges. It was very quick and easy to just use the Cricut® 12″ Portable Trimmer to do this. I ended up cutting 6 different colours of cardstock for a total of 36 sheets. My books only hold 24 autographs but I wanted extras just in case.
Disney Autograph Books
For the photo books, check out your local dollar store. I found a book that holds two 4×6 photos horizontally on each page which is perfect for displaying a photo of my daughter getting the autograph as well as the autograph itself. The book had a random picture inside the front cover which I removed to create my own.

I picked up a pack of Disney Princess themed paper from Michaels for the background and cut it to fit inside the cover of the book. Choosing coordinating cardstock in yellow & pink, I cut out the Princess Party – NameTag image. Using Cricut® Vinyl in Caribbean (one of Miss O’s favourite colours), I personalized it with her name and the year. A really nice font in Cricut Design Space for a Disney Princess theme is Nursery Rhymes.
Cut everything using a Cricut® 12″ x 12″ LightGrip Adhesive Cutting Mat for the cardstock and a Standard Grip Mat for the vinyl and the correct settings for each on your machine. I like to use the transfer tape to apply the vinyl to the cardstock before attaching all the layers together in case I make a mistake. Once the vinyl is centred on the top layer of cardstock, affix all your layers using your chosen adhesive. Once assembled, tuck it into the front cover of your photo book.
Bring along a large, black permanent marker for all the characters to sign the cards!

Be sure to check out our collection of awesome homemade gift ideas.
If you need some ideas for costumes for your upcoming trip to Disney, check out our DIY Disney Costumes for Kids.
This is a sponsored conversation written by me on behalf of Cricut. The opinions and text are all mine.
Andrea can always be found with a new craft in front of her, a form of technology on her right and a coffee on her left. This is how she survives suburbia with her two crazy toddlers in tow.